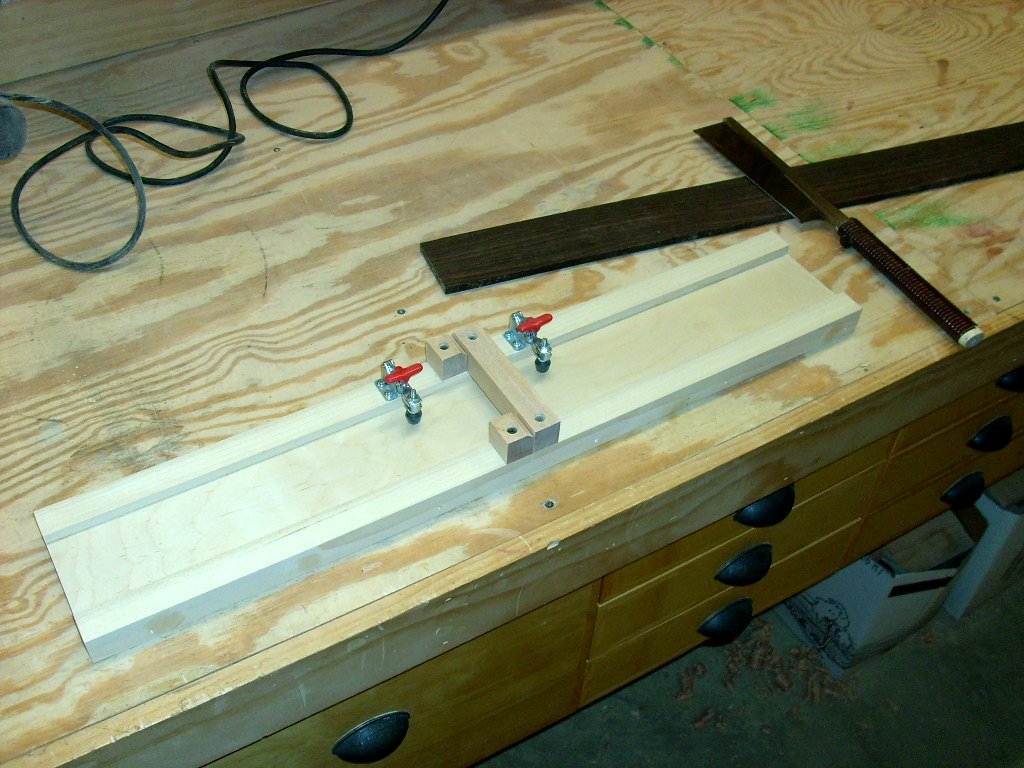
Before you start sawing away on the fret slots, you want to be damn
sure the saw is going to stay perfectly straight and perpendicular
to the fretboard and that it won’t wander and cut where you don’t
want it to cut. You’re going to be cutting many fret slots and you
don’t want to get halfway through and screw one up. I built a jig to
hold the fretboard solid and to enable me to saw perpendicularly
without the saw wandering off. Now lay out your fret positions. You
can easily find a fret distance chart on the internet for your
chosen scale length. All of the charts will give you the location of
each fret from the nut (not the distance between the frets). This is
so that you don’t compound an error all the way down the fretboard.
It also allows you to clamp a ruler next to your fretboard without
having to move it. Now you just need to make some marks using a
combination square and a knife which will give you a very thin,
crisp, and precise line. Fill in the lines with chalk so you can see
them better.
  Once
all the frets are marked, don’t just start hacking away until you’ve
run a few trial cuts. If you haven’t done this before, you’ll want
to get a feel for the technique before you start messing up the real
thing. I also made an ingenious template to gauge the depth of my
cuts: a piece of cardstock with a line drawn on it (wow, high
tech!). You can also simply draw the line on the side of your saw. I
used my Japanese pull-saw which has the appropriate kerf width for
the frets I’ll be using. Make a cut, check the depth, and tweak the
cut until it’s the right depth. Once
all the frets are marked, don’t just start hacking away until you’ve
run a few trial cuts. If you haven’t done this before, you’ll want
to get a feel for the technique before you start messing up the real
thing. I also made an ingenious template to gauge the depth of my
cuts: a piece of cardstock with a line drawn on it (wow, high
tech!). You can also simply draw the line on the side of your saw. I
used my Japanese pull-saw which has the appropriate kerf width for
the frets I’ll be using. Make a cut, check the depth, and tweak the
cut until it’s the right depth.
|


 Once
all the frets are marked, don’t just start hacking away until you’ve
run a few trial cuts. If you haven’t done this before, you’ll want
to get a feel for the technique before you start messing up the real
thing. I also made an ingenious template to gauge the depth of my
cuts: a piece of cardstock with a line drawn on it (wow, high
tech!). You can also simply draw the line on the side of your saw. I
used my Japanese pull-saw which has the appropriate kerf width for
the frets I’ll be using. Make a cut, check the depth, and tweak the
cut until it’s the right depth.
Once
all the frets are marked, don’t just start hacking away until you’ve
run a few trial cuts. If you haven’t done this before, you’ll want
to get a feel for the technique before you start messing up the real
thing. I also made an ingenious template to gauge the depth of my
cuts: a piece of cardstock with a line drawn on it (wow, high
tech!). You can also simply draw the line on the side of your saw. I
used my Japanese pull-saw which has the appropriate kerf width for
the frets I’ll be using. Make a cut, check the depth, and tweak the
cut until it’s the right depth.


