| Brian's Guitar from Conception to Birth or How to Build a Guitar in 62 Easy Steps! | ||
| 57 Solder Away | ||
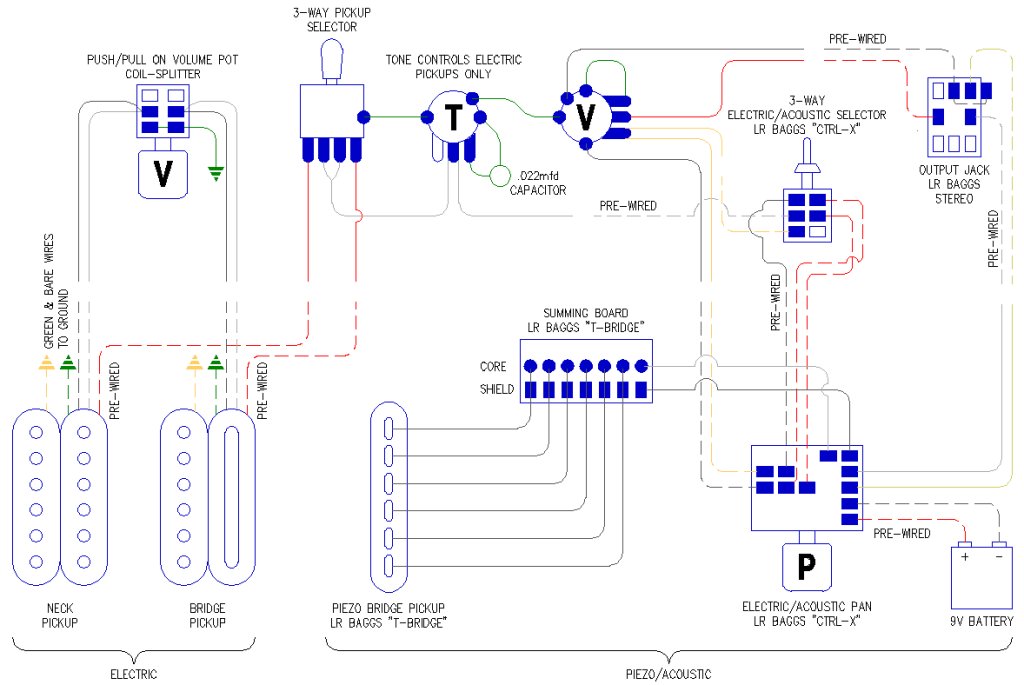 I’m not going to try to explain all of the basics of guitar
electronics here. If you’ve never wired up a guitar before, read up
on it first. There are plenty of resources on the web that will get
you going. You’ll also want to draw up your schematics first so that
you know what gets soldered where. The schematic does not show the
exact layout of all the knobs and switches; it more shows the flow
of sound in the order the signal travels. There will be many wires
crammed into the small cavity, and correcting a mistake might mean
unsoldering several other connections to get to the problem spot.
You’ll definitely want to try to get it right the first time. I’m not going to try to explain all of the basics of guitar
electronics here. If you’ve never wired up a guitar before, read up
on it first. There are plenty of resources on the web that will get
you going. You’ll also want to draw up your schematics first so that
you know what gets soldered where. The schematic does not show the
exact layout of all the knobs and switches; it more shows the flow
of sound in the order the signal travels. There will be many wires
crammed into the small cavity, and correcting a mistake might mean
unsoldering several other connections to get to the problem spot.
You’ll definitely want to try to get it right the first time.As you can see, our piezo acoustic bridge added a lot of extra wires, a couple of circuit boards, an extra switch, a 9 volt battery, and a proprietary output jack. However, a lot of the components came pre-wired which made it a little easier, and the additional tone options were worth the extra effort. |
||
 |
 |
 |
|
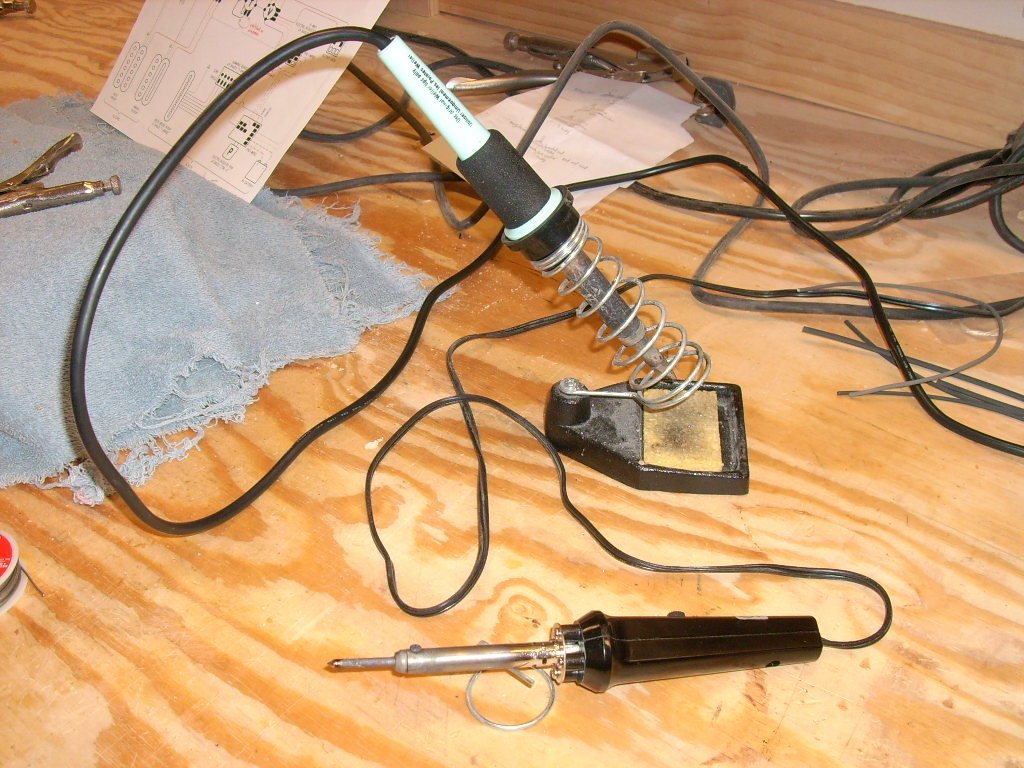
Plug in your soldering irons. I used a 30 watt unit for most of the
work, but the 100 watt “flame thrower” came in handy when grounding
to the backs of the potentiometers (pots) which require more heat.
Install as many pots and switches as you can, and do not overtighten
any screws or nuts. Keeping in mind that you will need to get a hot
soldering iron to the connection points, orient the pots so that the
connection points face a convenient direction. We were able to
install everything except the volume pot since ours had a
double-pole, double-throw (DPDT), push-pull switch on it with many
wires to attach to it. It will be easier to solder the wires to that
one before it is installed. If you have a battery associated with
your scheme, install the housing and route the wires for that now. |
||
 |
 |
 |
|
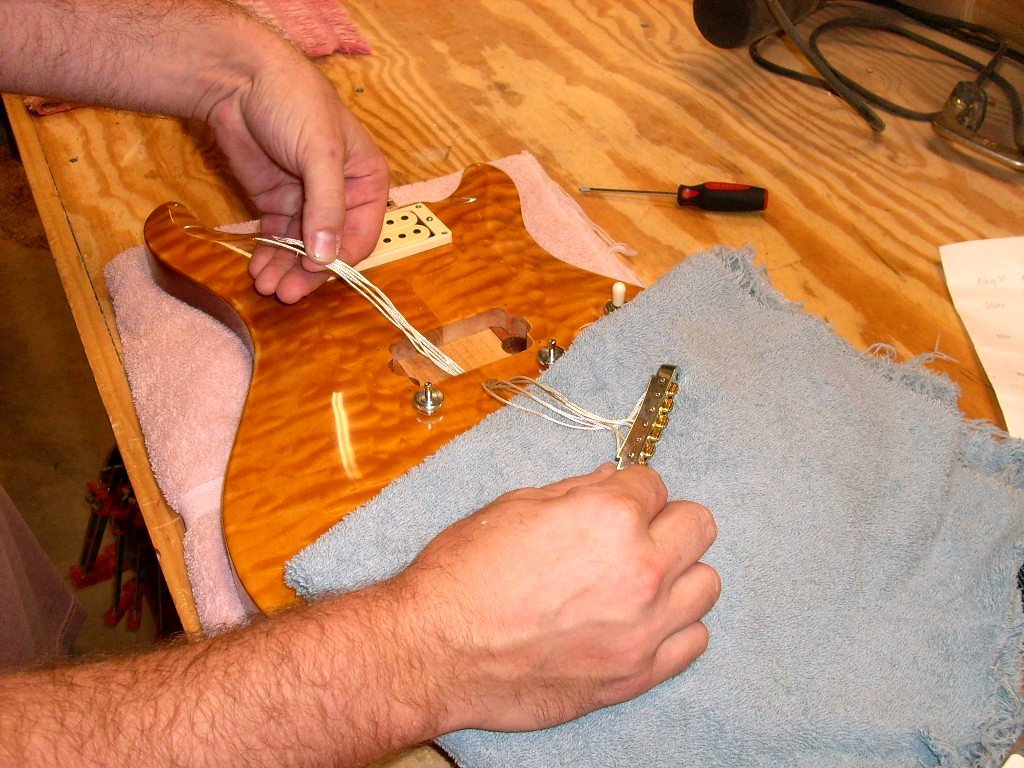
Flip the guitar over and install your pickups. Our guitar had a
piezo pickup in the bridge whose wiring had to be routed through the
bridge pickup cavity, so it had to go in first. When installing your
pickups, loop the wire around in the bottom of the cavity before
setting the pickup (as in the center photo above). This will leave
you a little safety slack if you cut too much off the other end.
Screw down the bezels without over tightening. |
||
 |
 |
 |
|
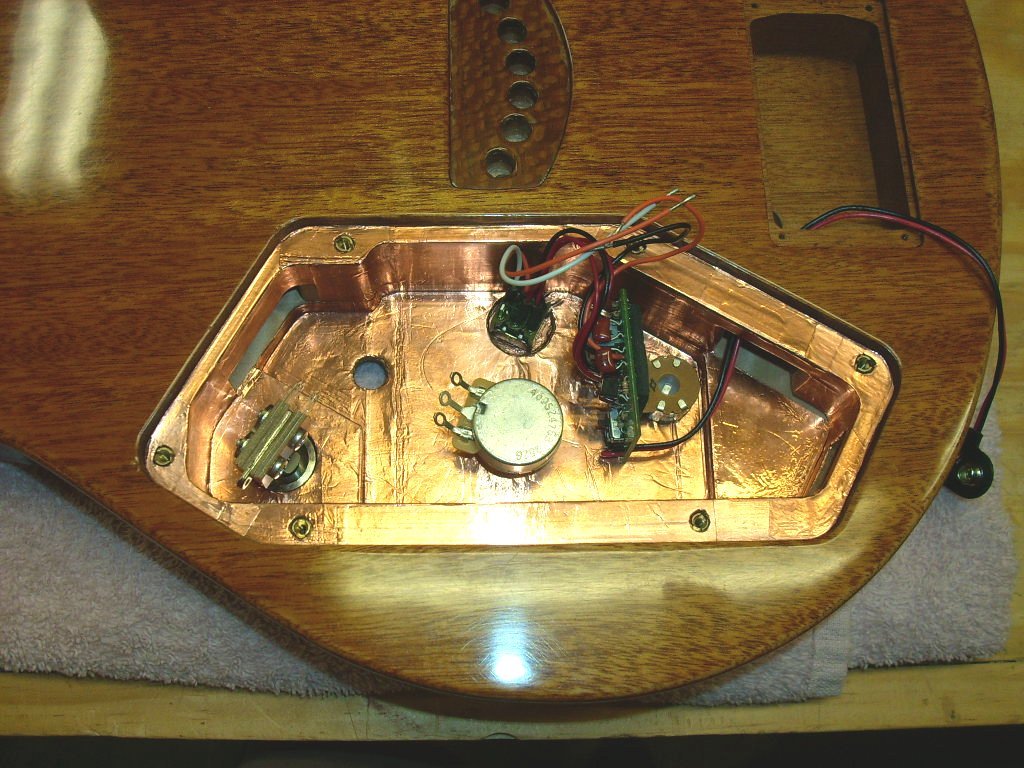
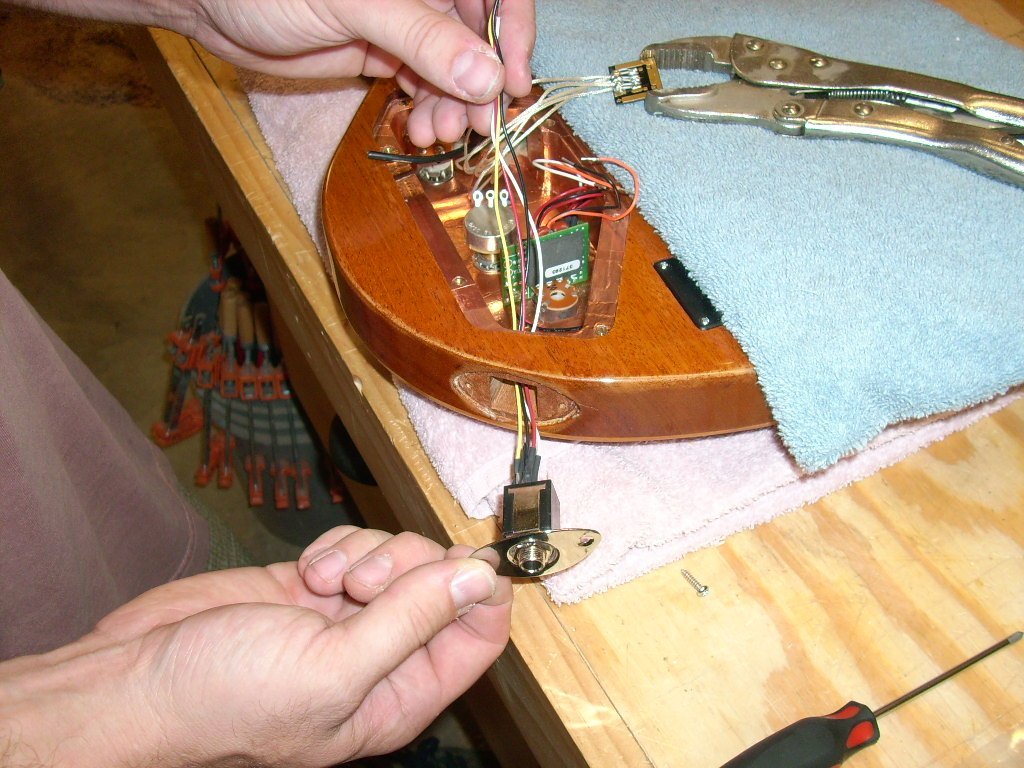
Notice the soft towels above and below our work area. Don’t risk a
scratch at this point. Our output jack already had wire leaders
soldered to it. If yours does not, solder some on now since it will
not be easy getting to those points once it is installed. Mount the
jack to the cover plate and screw it in. Again, do not overtighten
anything; snug is enough; strip it out and your screwed. The middle
photo above shows our piezo circuit board wired up which will be
installed with double-stick tape to the sidewall of the cavity. It
also shows me tinning the wires before they are soldered to the pots
and switches. Twist your wires together first, then apply a small
amount of solder to “glue” the wires together (this is called
“tinning”). Insert the wire into the tab’s hole, apply your heat,
and it will pull some of that solder onto the tab and make a good
connection. Test all of your connections by giving them a light tug.
Our volume/push-pull switch can be seen in the right photo above. A
vise-grip helps hold it in place; these things do get hot. We made
all the connections first, then installed the switch. |
||
  Now
that you’ve got all of your hot wires soldered up, it’s time to make
sure everything is grounded properly. The three-way pickup selector
switch will have a grounding lug on it; connect it to the back of
one of the pots. Your pickups will have one or two ground wires
which should be twisted together and soldered to the back of a pot.
Be very careful as to how you route your wires. If a bare ground
touches a hot wire, your signal will take the path of least
resistance and go to ground. That will result in a weak sound or no
sound at all. The center photo above shows our neat and organized
wiring job. Our piezo pickup added some components and complexity to
the schematic, but their literature was easy to follow and we were
able to integrate it into our system successfully. We can’t do too
much troubleshooting now without strings, but you can plug in the
guitar and tap on the pickups with a screwdriver. You can check for
a signal, test your pickup selector switch, and test your
coil-splitter switch if you have one. You’ll give your electronics a
full test drive later. Now
that you’ve got all of your hot wires soldered up, it’s time to make
sure everything is grounded properly. The three-way pickup selector
switch will have a grounding lug on it; connect it to the back of
one of the pots. Your pickups will have one or two ground wires
which should be twisted together and soldered to the back of a pot.
Be very careful as to how you route your wires. If a bare ground
touches a hot wire, your signal will take the path of least
resistance and go to ground. That will result in a weak sound or no
sound at all. The center photo above shows our neat and organized
wiring job. Our piezo pickup added some components and complexity to
the schematic, but their literature was easy to follow and we were
able to integrate it into our system successfully. We can’t do too
much troubleshooting now without strings, but you can plug in the
guitar and tap on the pickups with a screwdriver. You can check for
a signal, test your pickup selector switch, and test your
coil-splitter switch if you have one. You’ll give your electronics a
full test drive later. |
||


