 |
||
| Beauty is in the details. Click on the photos to see them in a larger size. Use your browser's "Back" button to return. | ||
| December 11, 2008 | ||
|
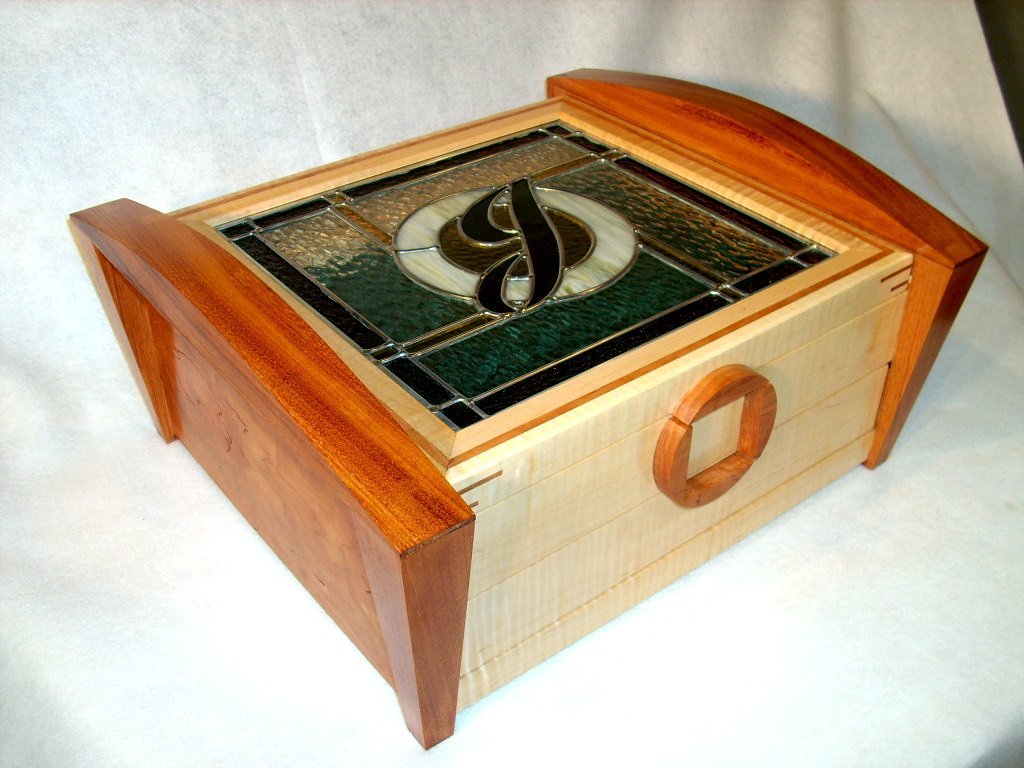
Welcome, Jeff! I purchased the first few pieces of wood for your jewelry box today. I know we didn't talk much about the design details and cost and such, but even if you decide (for whatever reason) that the piece isn't right for you, it is absolutely no problem whatsoever. I will be building a total of five jewelry boxes at the same time so I'll have something to sell on the web site. I have one box spoken for already, but you will have your choice from the remaining four. 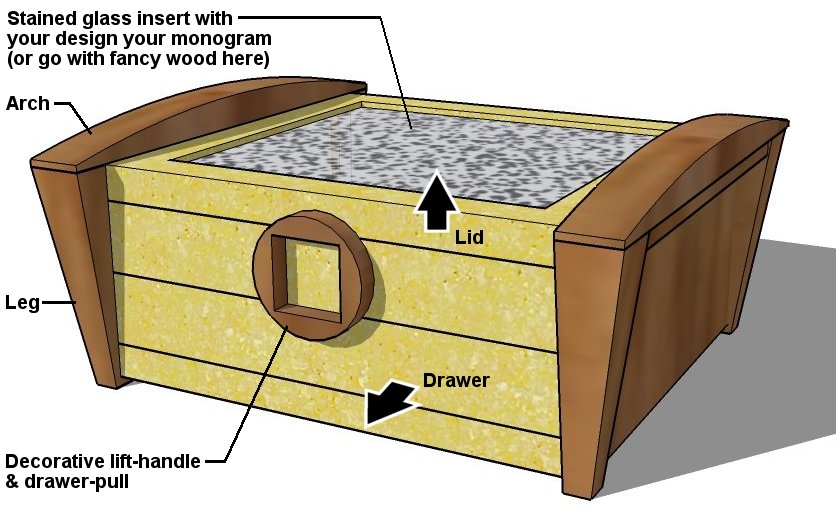 The
basic design is shown in the image to the right (you can always
click on these pictures to see a larger image). It is art deco
styling made from contrasting woods. There's tiger maple for
the front/top/back and a darker wood for the sides/legs/arches
(either mahogany, cherry, or walnut). The top can be done in a
stained glass design or monogram. You could simply choose some
fancy wood for the top, but the interior of the box will be lit with
small LED lights! When turned on, it will cast a beautiful
glow through the glass. The decorative element on the front
will serve as a lift-handle and a drawer pull. The overall
size is generous at about 21"w x 18"d x 9"h. It will hold two
of the 12"x15" jewelry trays shown below. Your wife may have
more jewelry than that, but we can probably agree that I could never
make a box large enough to house her entire collection. This
will certainly serve as a focal point in the room. The
basic design is shown in the image to the right (you can always
click on these pictures to see a larger image). It is art deco
styling made from contrasting woods. There's tiger maple for
the front/top/back and a darker wood for the sides/legs/arches
(either mahogany, cherry, or walnut). The top can be done in a
stained glass design or monogram. You could simply choose some
fancy wood for the top, but the interior of the box will be lit with
small LED lights! When turned on, it will cast a beautiful
glow through the glass. The decorative element on the front
will serve as a lift-handle and a drawer pull. The overall
size is generous at about 21"w x 18"d x 9"h. It will hold two
of the 12"x15" jewelry trays shown below. Your wife may have
more jewelry than that, but we can probably agree that I could never
make a box large enough to house her entire collection. This
will certainly serve as a focal point in the room.I will try to post some updates here about once a week. I still have a day job plus I'm making five of these boxes at a time, so progress will be at a slow but steady pace. I'm projecting completion near the end of March. Feel free to stop by any time to look at the progress in person and see which box you might be interested in. If anyone else you know might be interested in some custom woodwork, I'd appreciate a referral. Thanks. |
||
| December 27, 2008 | ||
 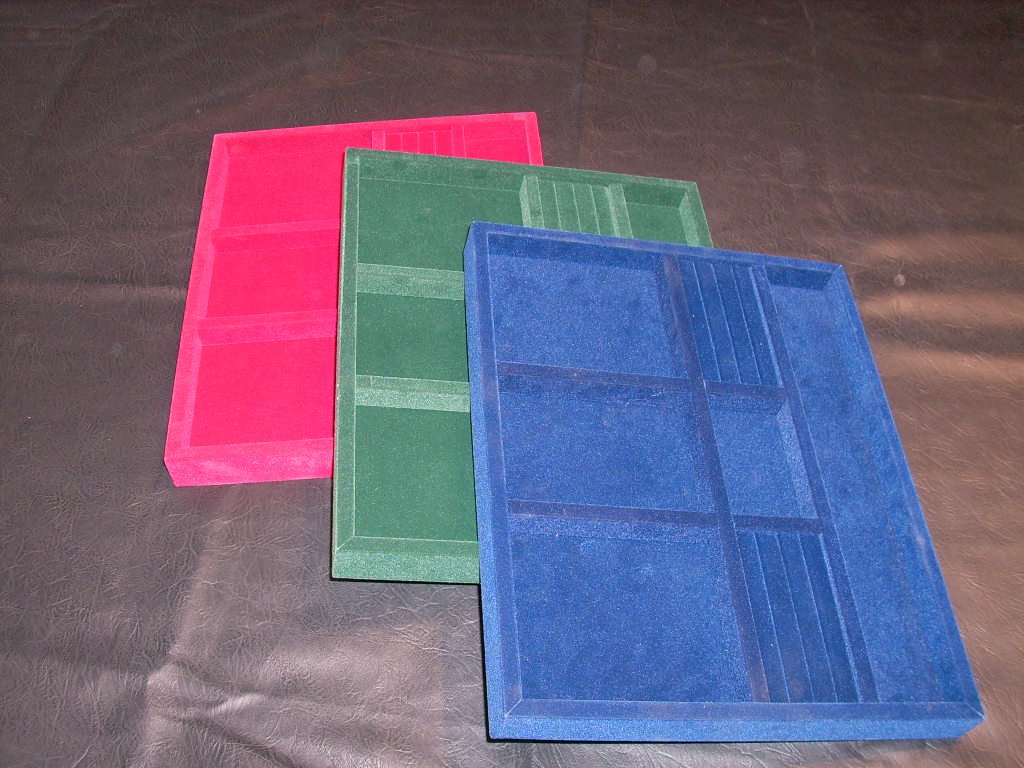 I ordered the jewelry trays today. I didn't know what color
you would want so I just bought some in each color they had.
What I don't use in your box will go in one of the other boxes I'm
making. I usually don't like buying pre-manufactured items
like this, but these are very high quality and I'm not sure I could
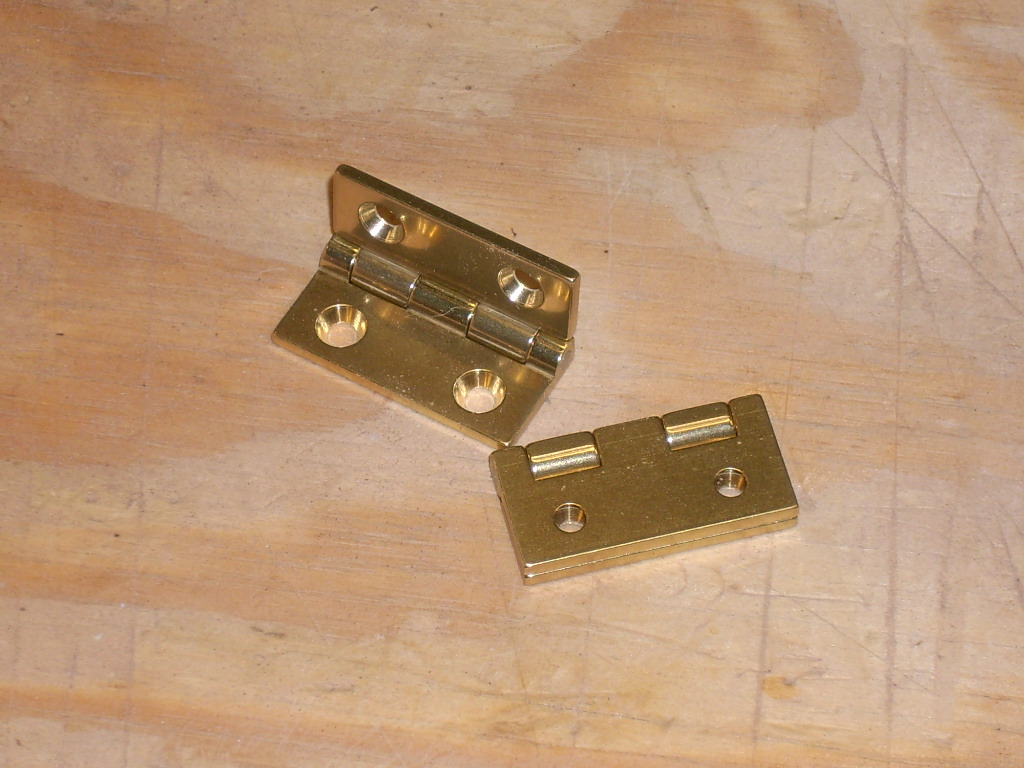
make them for the same cost. I also picked up the hinges. They're solid
brass, of course, with a stop which will hold the lid open at 95
degrees. I ordered the jewelry trays today. I didn't know what color
you would want so I just bought some in each color they had.
What I don't use in your box will go in one of the other boxes I'm
making. I usually don't like buying pre-manufactured items
like this, but these are very high quality and I'm not sure I could
make them for the same cost. I also picked up the hinges. They're solid
brass, of course, with a stop which will hold the lid open at 95
degrees. |
||
| January 4, 2009 | ||
| Last week, I dimensioned the lumber for the legs and sides. It looks like I'm going to be a little short on wood, so I'll have to get more to finish all the boxes I'm making in this series. | ||
| January 11, 2009 | ||
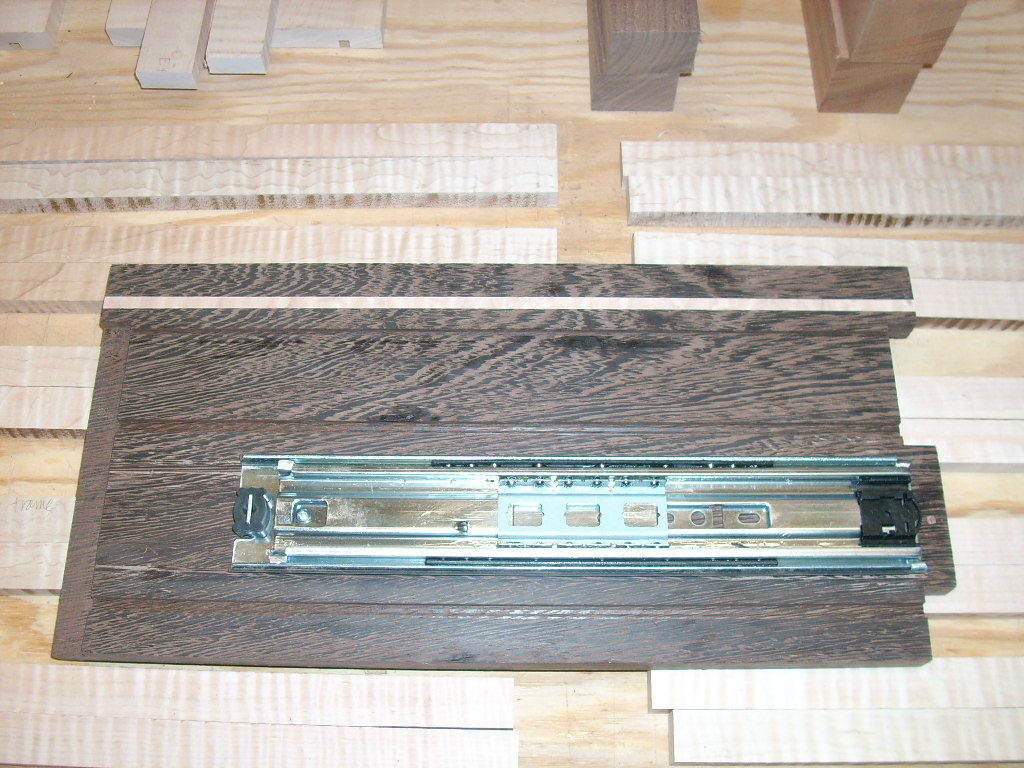
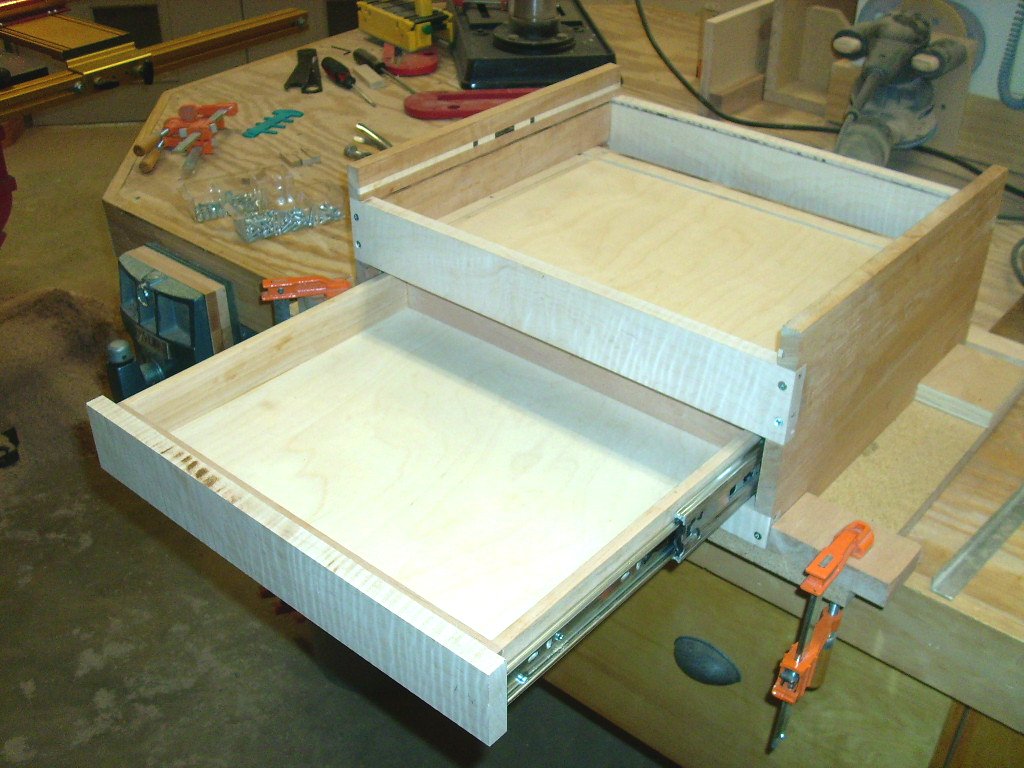
 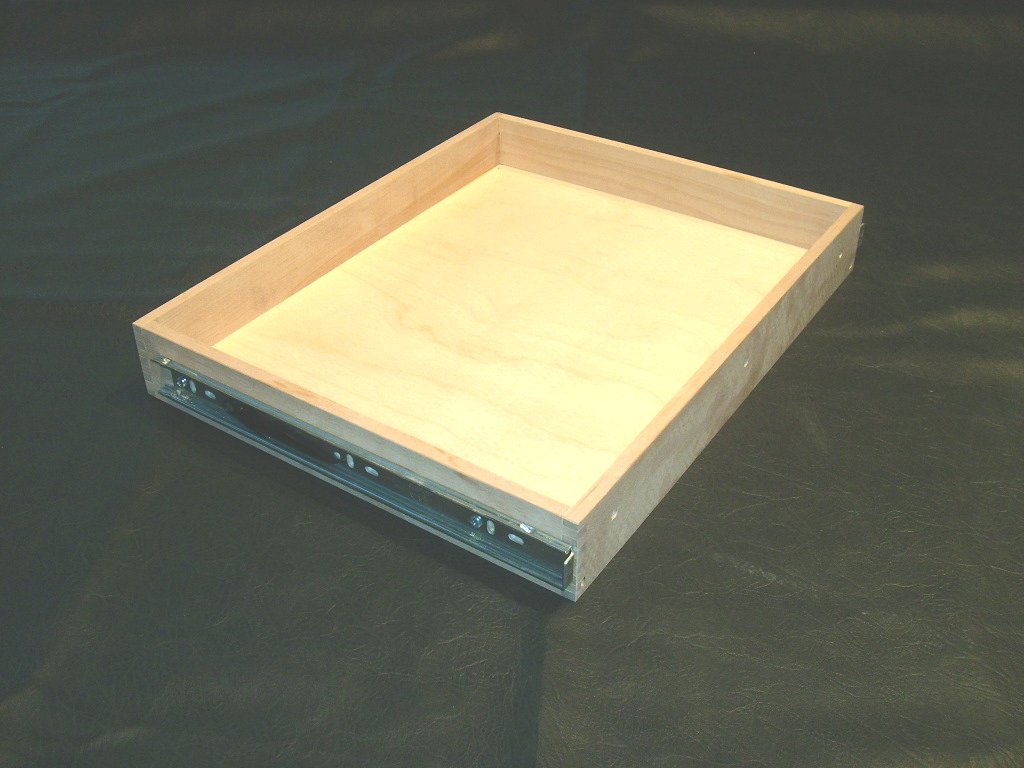 I dimensioned and cut all the drawer parts, the sides and bottoms.
I cut all the joinery on the drawer corners. The first photo
shows an assembled drawer with the drawer slide attached. I
like to use high quality, ball bearing slides. They add a
little cost, but the drawers will work super-smooth. I'm using
"over-extension" slides which allow the drawer to be pulled out all
the way giving easy access to the back of the drawer. I also
used the box-jointed corners which are incredibly strong. I dimensioned and cut all the drawer parts, the sides and bottoms.
I cut all the joinery on the drawer corners. The first photo
shows an assembled drawer with the drawer slide attached. I
like to use high quality, ball bearing slides. They add a
little cost, but the drawers will work super-smooth. I'm using
"over-extension" slides which allow the drawer to be pulled out all
the way giving easy access to the back of the drawer. I also
used the box-jointed corners which are incredibly strong. |
||
| January 18, 2009 | ||
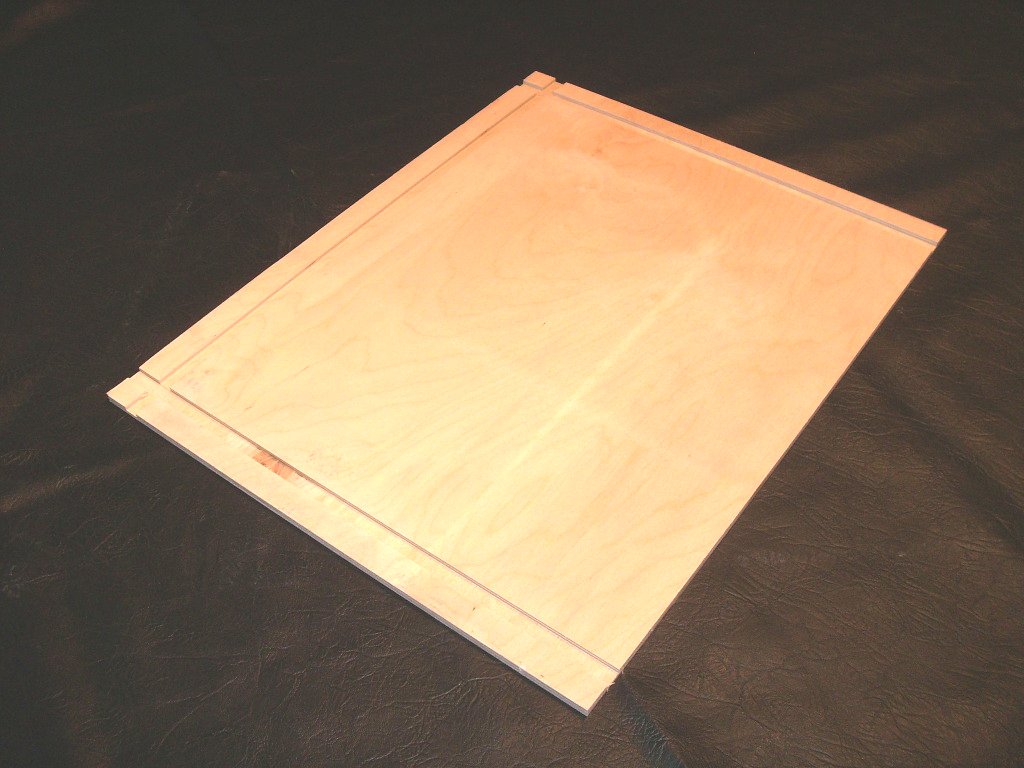
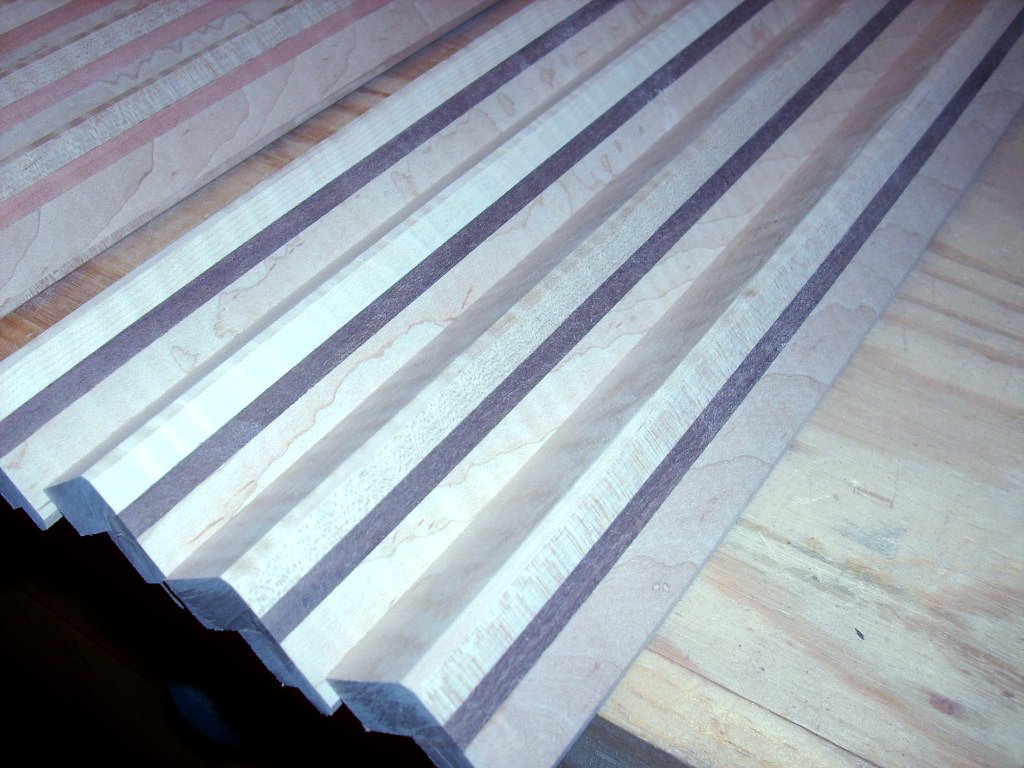
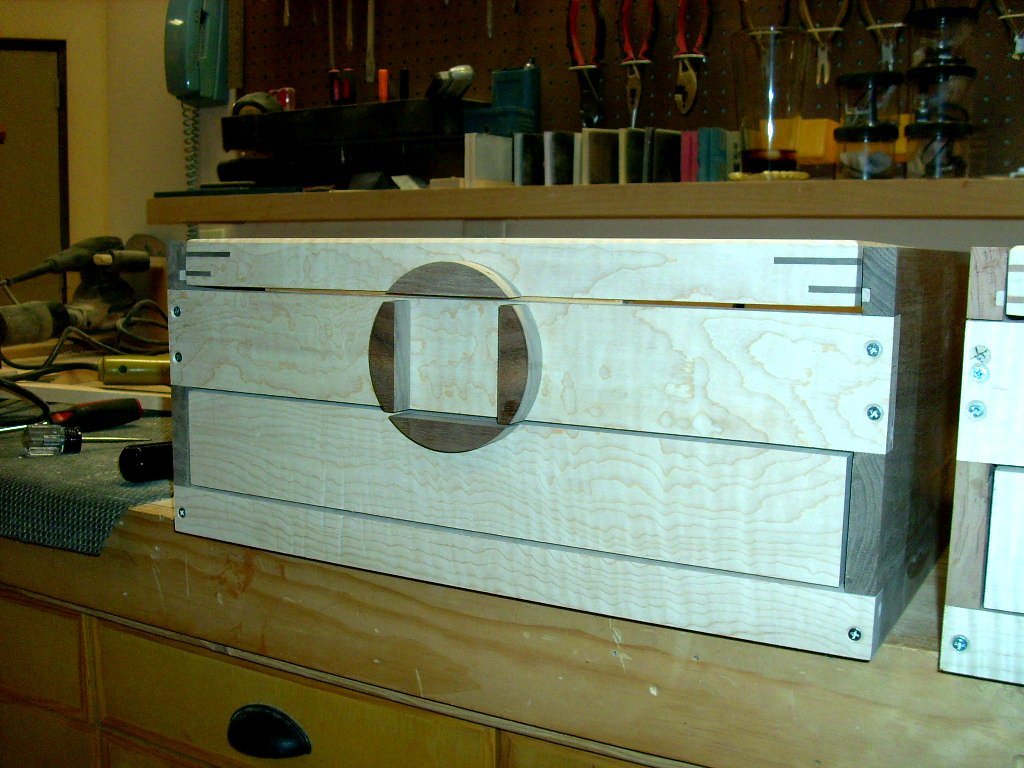
| I glued up the drawers and sanded them smooth. The sides, legs, and arches were rough-cut. I also dadoed the side panels to accept the case fronts and backs. You might have to click on the photo (below) to catch some of the details, but there are shallow grooves (dados) running horizontally which will house the case/compartment bottoms. There's a vertical groove to the left which will nest the back panel of the box. The right side has notches cut out to receive the case front pieces. This interlocking joinery takes time, but will provide a much more solid assembly. I inlayed a thin strip of complimentary wood across the top which will provide a little visual interest when you open the box. It is easiest to install the drawer slides before assembly since it would be difficult to get a screw gun inside the box after it's put together. | ||
| January 25, 2009 | ||
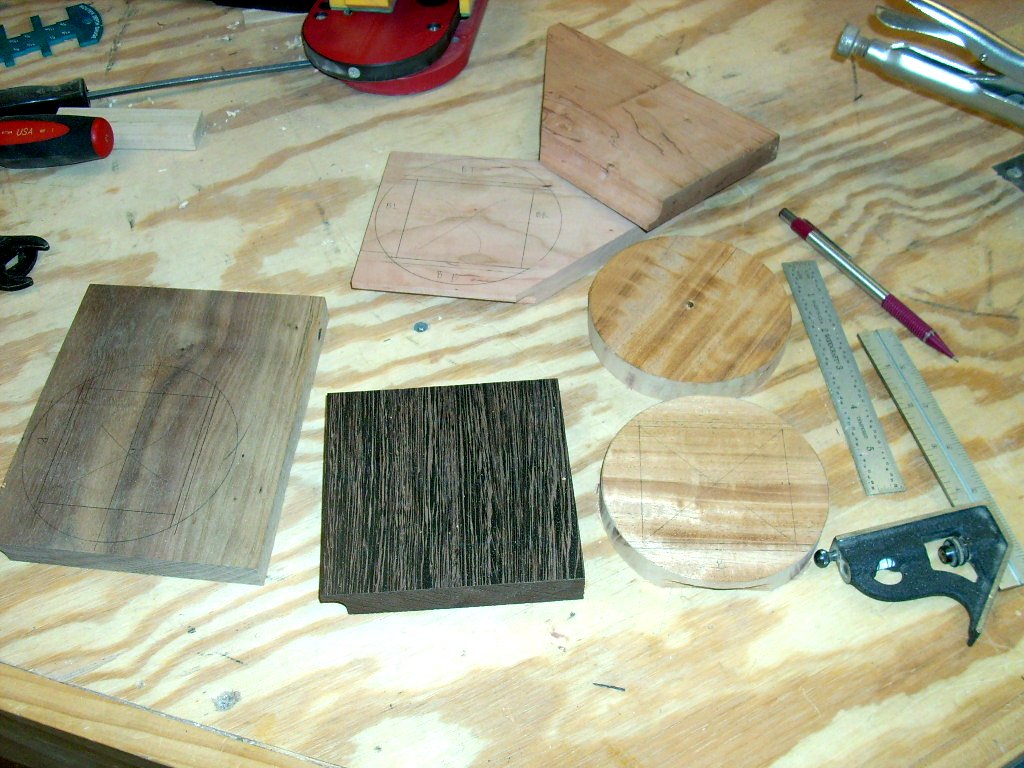
 I cut all the pieces for the front and back panels, drawer fronts,
and lids to size. I added the inlay decoration on the side
panels. These inlays have different woods and patterns for
each box in this series. This photo shows a quilted maple
inlay in a wenge wood side panel. I enjoy these spontaneous
embellishment. I had a little fancy wood leftover and this
seemed like a good place to put it. This wenge wood/ tiger
maple box is the one which is already spoken for. All the
boxes will have tiger maple fronts, but there will also be mahogany,
cherry, and walnut side panels from which to choose. I cut all the pieces for the front and back panels, drawer fronts,
and lids to size. I added the inlay decoration on the side
panels. These inlays have different woods and patterns for
each box in this series. This photo shows a quilted maple
inlay in a wenge wood side panel. I enjoy these spontaneous
embellishment. I had a little fancy wood leftover and this
seemed like a good place to put it. This wenge wood/ tiger
maple box is the one which is already spoken for. All the
boxes will have tiger maple fronts, but there will also be mahogany,
cherry, and walnut side panels from which to choose. |
||
| February 1, 2009 | ||
  I cut in all the dadoes
in the side panels to nest the front and back panels. All
of the drawer hardware was pre-installed (see photo in previous
entry). The bottom panels
were dadoed to receive the back panels. Again, with many parts
interlocking, the box will be very strong. The legs were cut to
size and then shaped. The far right photo shows the wenge wood
sides with a couple of legs to the left. You can also see the
bevy of other case parts in the background. Sometimes it can
be a little difficult to keep all these pieces in order. I cut in all the dadoes
in the side panels to nest the front and back panels. All
of the drawer hardware was pre-installed (see photo in previous
entry). The bottom panels
were dadoed to receive the back panels. Again, with many parts
interlocking, the box will be very strong. The legs were cut to
size and then shaped. The far right photo shows the wenge wood
sides with a couple of legs to the left. You can also see the
bevy of other case parts in the background. Sometimes it can
be a little difficult to keep all these pieces in order. |
||
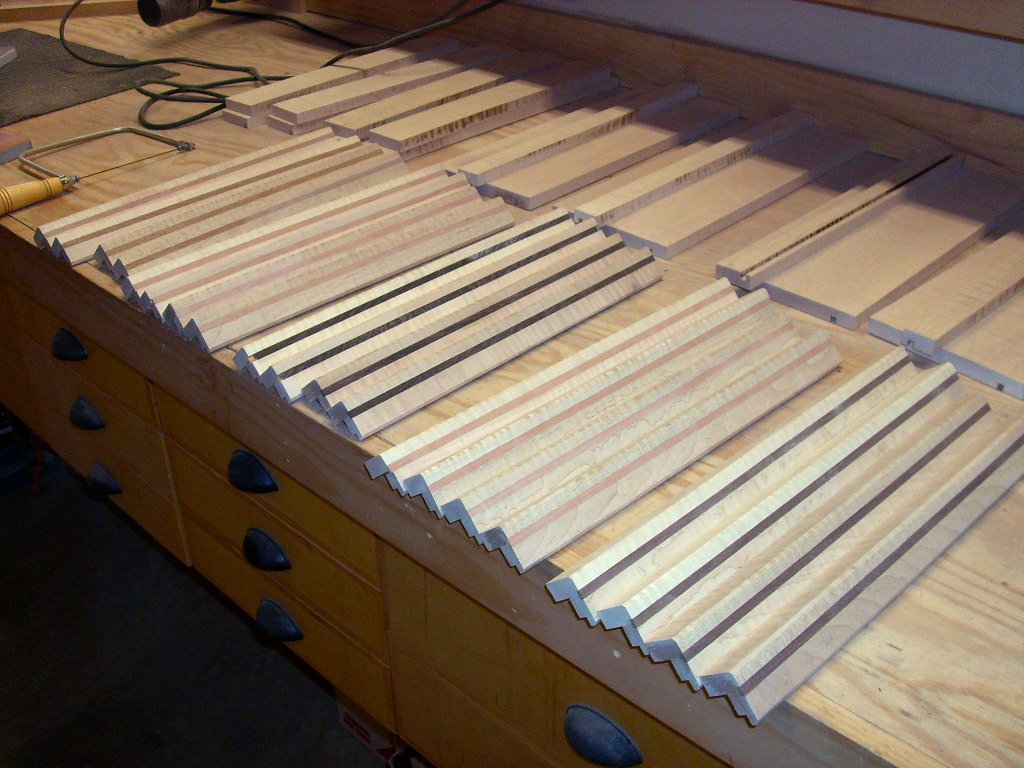
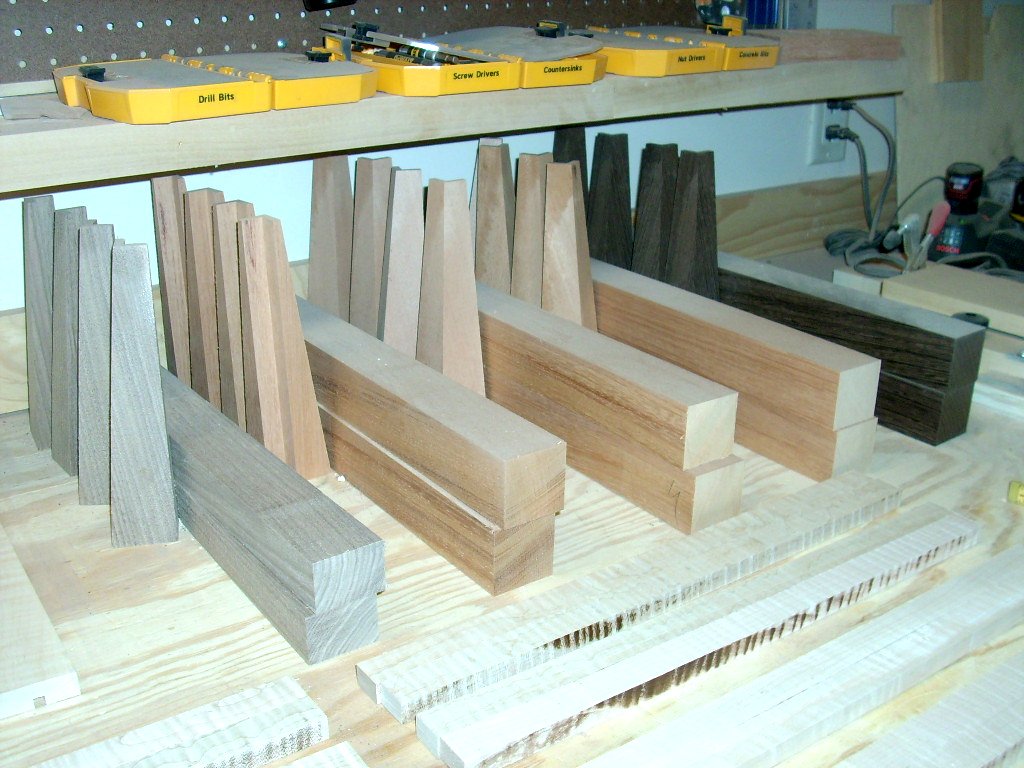  I
rough-cut all of the interior partitions and dividers which will
serve as the small wiring raceways for the LED lights. These
are all the stacks of wood for each box. The right photo is a
shot of all the leg and arch pieces ready for final shaping and
installation. I
rough-cut all of the interior partitions and dividers which will
serve as the small wiring raceways for the LED lights. These
are all the stacks of wood for each box. The right photo is a
shot of all the leg and arch pieces ready for final shaping and
installation. |
||
| February 8, 2009 | ||
 |
 |
 |
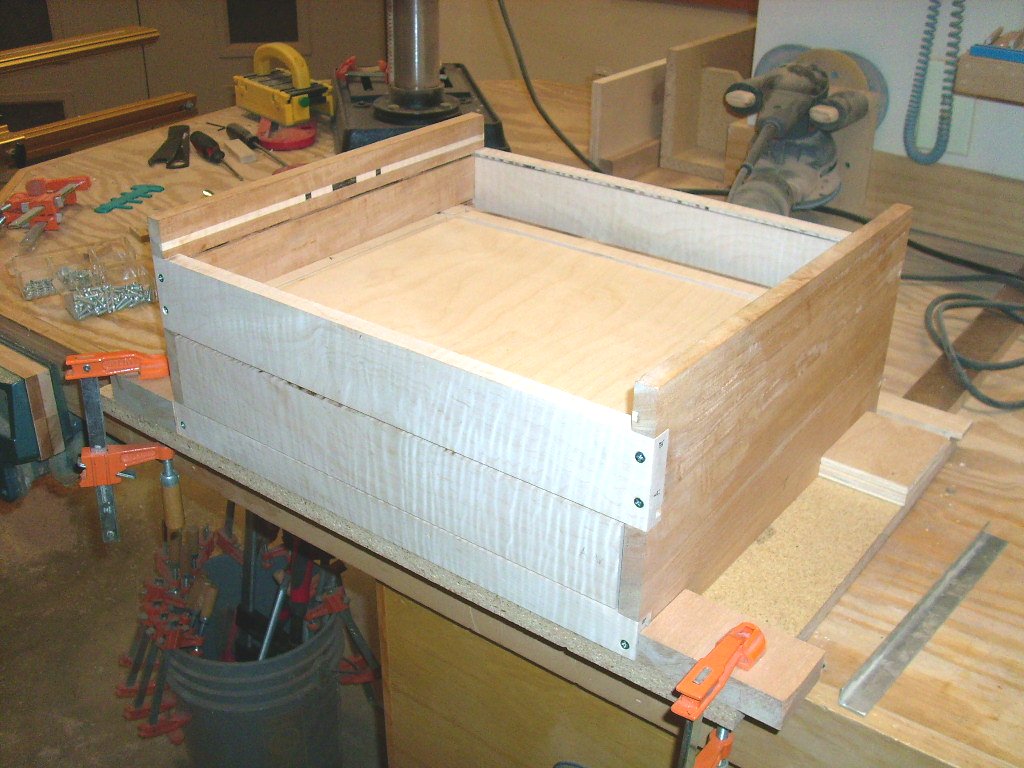
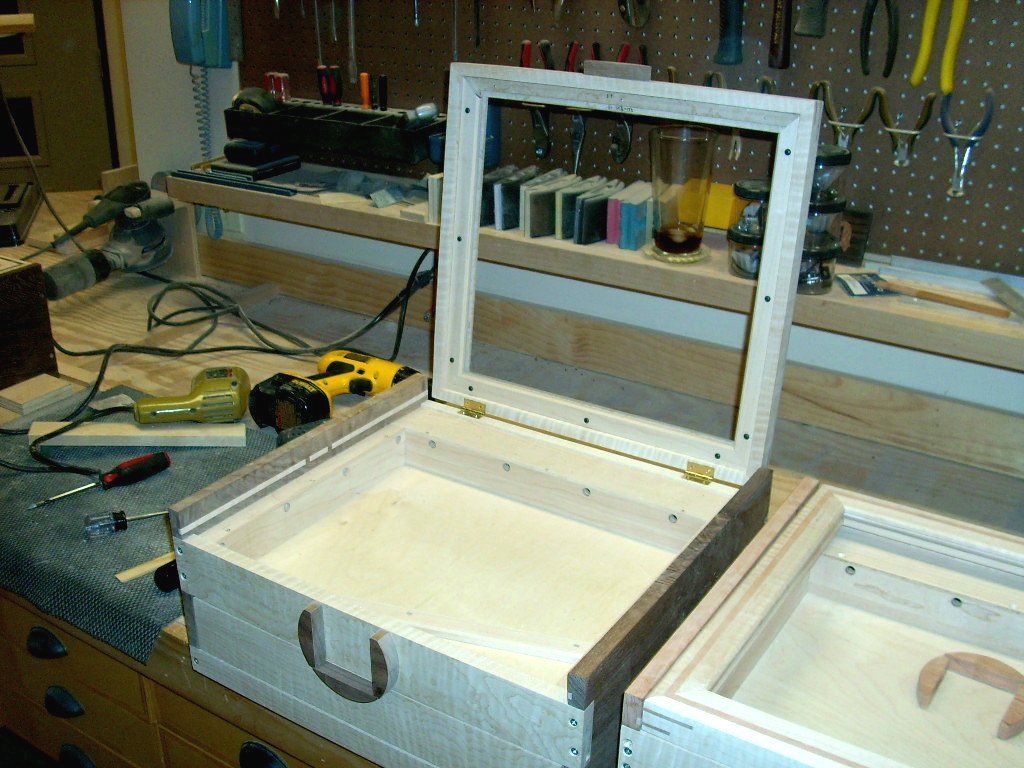
| I began assembly on the first box in this series. All of the pieces are fine-tuned for a perfect, tight fit. I installed the drawer fronts. Notice how the ball bearing slides allow the drawer to extend all the way out allowing complete access. I also rough-cut the lift handle and drawer pull assemblies. This will create a functional and aesthetic embellishment for the front of the box. Once again, I'm guilty of creating a bunch of small pieces which I'll need to label and track. | ||
| February 15, 2009 | ||
 |
 |
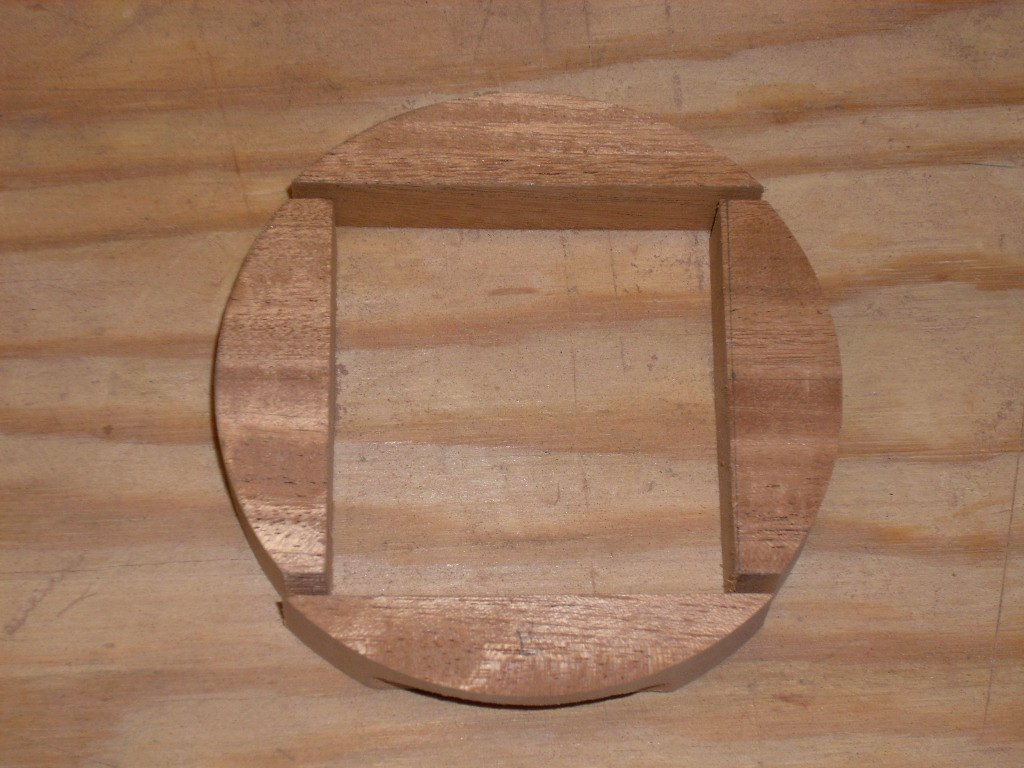 |
| I glued up the lid segments, basically the front face of the lid to the top frame of the lid. The leftmost photo shows the twenty segments for all five boxes in this series; your box will only use four of these segments. I also added a wood inlay at the abutment of those two pieces. This provides additional strength to the joint and it looks cool. I cut out the drawer pull and lift handle pieces. The lower portion of the circle design will be mounted to the drawer and has a finger-pull routed into the bottom of it (you can just see it in the photo). The top portion will be mounted to the lid so you grab it to lift it. The two side pieces are decorative and will complete the circular design. | ||
| February 22, 2009 | ||
 |
 |
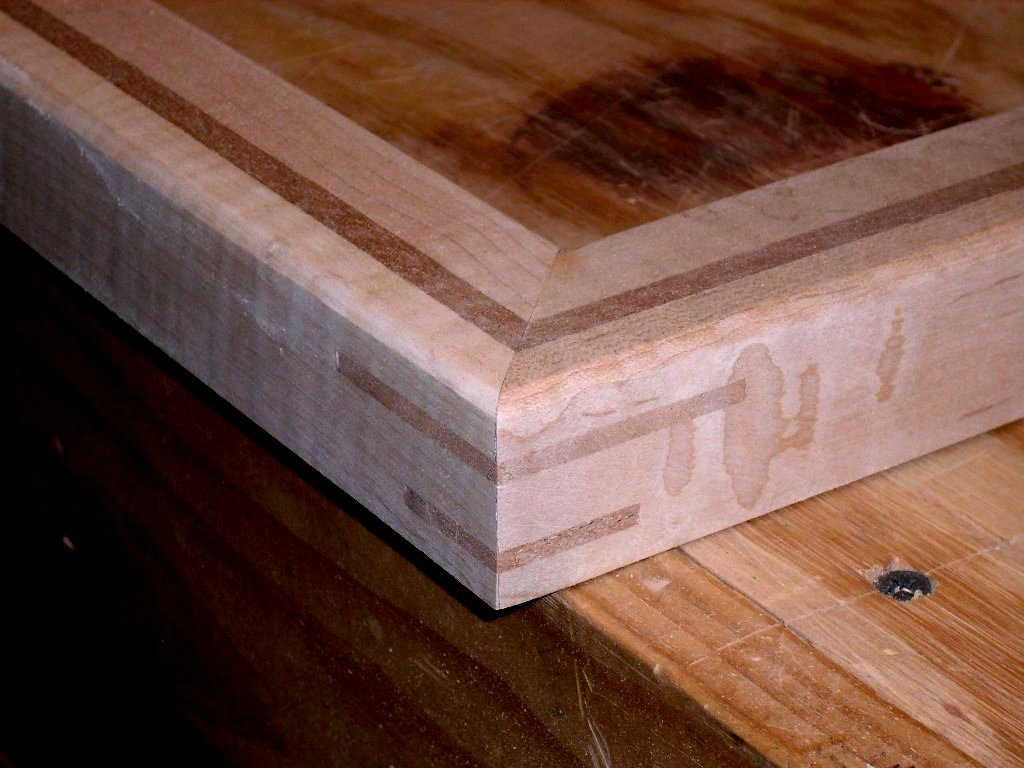 |
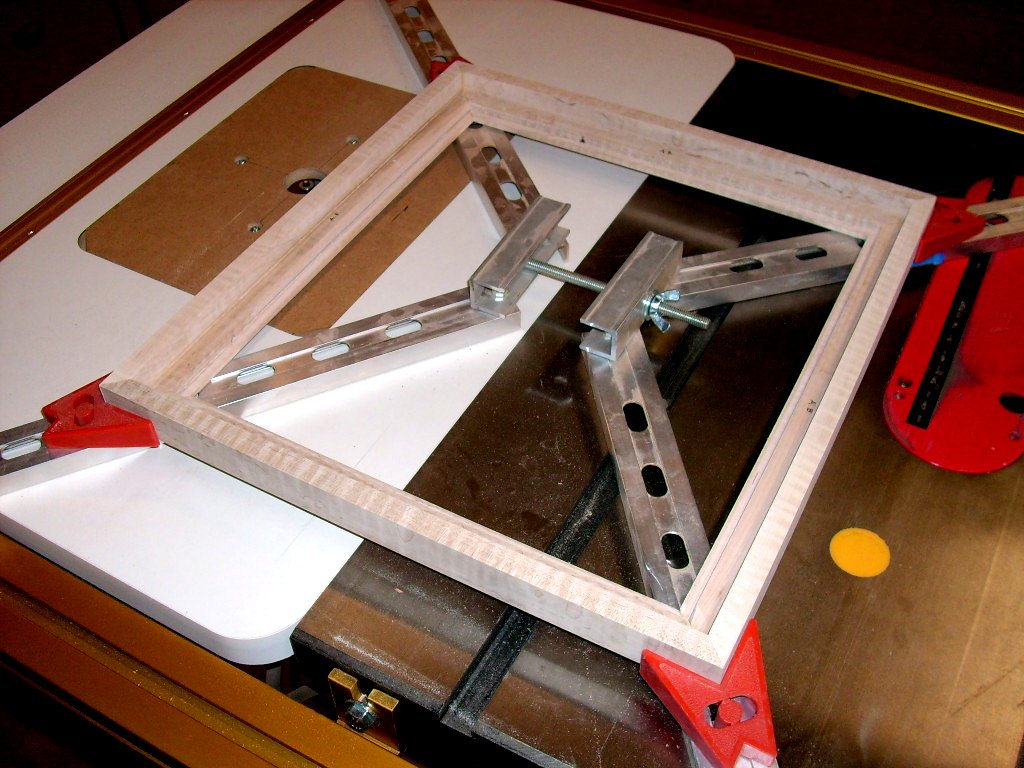
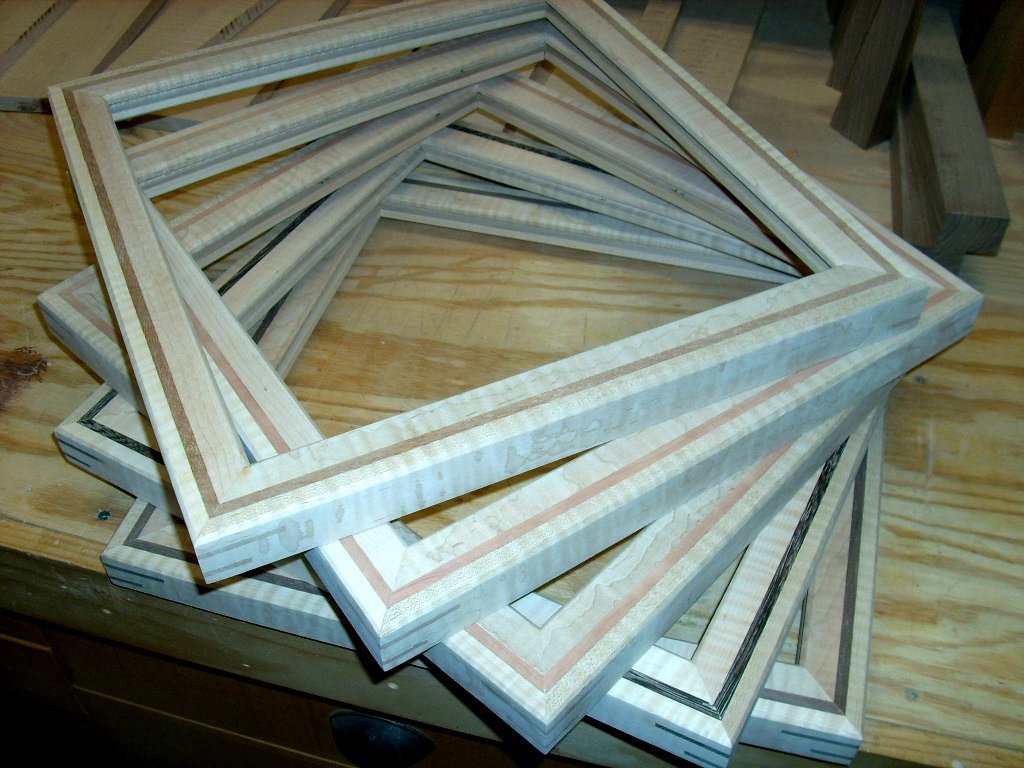
| All of the lid segments which were produced last week had their corners mitered and their assemblies glued up. Now that all of the lids are together, it's possible to take the precise measurements needed for the stained glass inserts which will eventually call those lids home. So very soon you will need to make your final decision on the glass design and color scheme. We'll need to get together so you can see some glass samples or I can shop with you for glass and make recommendations if you'd like. The rightmost photo above shows a detail of a lid's corner. There's a wood band inlayed on top which will frame the stained glass and two corner "keys" on the side which are decorative and add strength to the corner joint. These are in the same wood of which the box sides are made to tie the design and color scheme together. | ||
| March 2, 2009 | ||
  All
of the boxes were assembled. The hinges were mortised
(recessed) and the lids were installed and tuned for smooth
operation. I began installing the front lift handle and drawer
pull assemblies. Things are really beginning to take shape
now. All
of the boxes were assembled. The hinges were mortised
(recessed) and the lids were installed and tuned for smooth
operation. I began installing the front lift handle and drawer
pull assemblies. Things are really beginning to take shape
now. |
||
| March 8, 2009 | ||
  I
had to completely assemble the jewelry boxes so that everything
could be cut to exact size and all the hardware could be installed.
However, there is no way I could apply finish to the interior
portions of the box while it's assembled; I can't even fit my hand
into the drawer cavity. So your box was completely
disassembled (into about 30 pieces) and everything was sanded
smooth. I could then apply the oil and spray on the lacquer
much more easily. Your stained glass panel was also completed;
it looks fantastic! Stop by and check it out if your get a
minute. I
had to completely assemble the jewelry boxes so that everything
could be cut to exact size and all the hardware could be installed.
However, there is no way I could apply finish to the interior
portions of the box while it's assembled; I can't even fit my hand
into the drawer cavity. So your box was completely
disassembled (into about 30 pieces) and everything was sanded
smooth. I could then apply the oil and spray on the lacquer
much more easily. Your stained glass panel was also completed;
it looks fantastic! Stop by and check it out if your get a
minute. |
||
| March 16, 2009 | ||
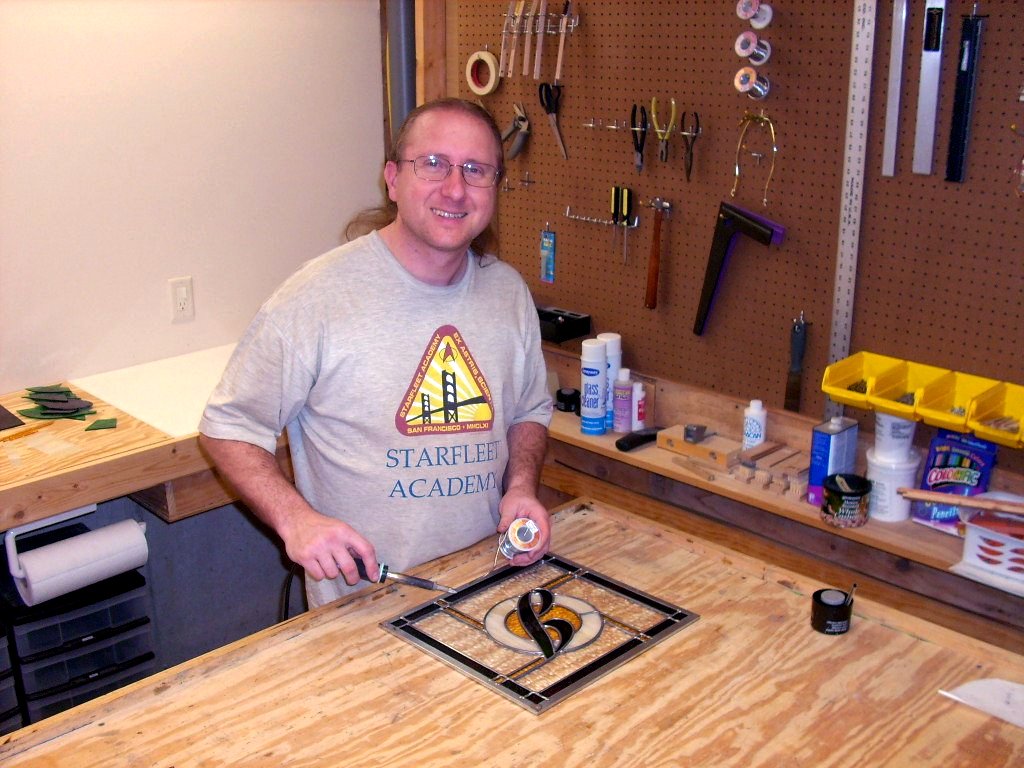
  After
the glass pieces are assembled and all the joints are soldered, a
special cement is forced under the lead to hold the glass secure.
The white powder you see helps the cement cure. This method of
concealment in the photo also helps build your anticipation.
Yours is the right panel (upside down); the other panel is for
another client. After
the glass pieces are assembled and all the joints are soldered, a
special cement is forced under the lead to hold the glass secure.
The white powder you see helps the cement cure. This method of
concealment in the photo also helps build your anticipation.
Yours is the right panel (upside down); the other panel is for
another client.I also assembled all the pieces which were sprayed with lacquer last week. The legs and top arches were added, the outside completely sanded, and a coat of linseed oil was applied to bring out the color and grain. This will ultimately be a three-toned piece. The tiger maple front will remain light, the mahogany legs and top arches will stay a medium tone, and the cherry side panels will darken a bit more over time. It will be spectacular! We're in the home stretch now. |
||
| March 23, 2009 | ||
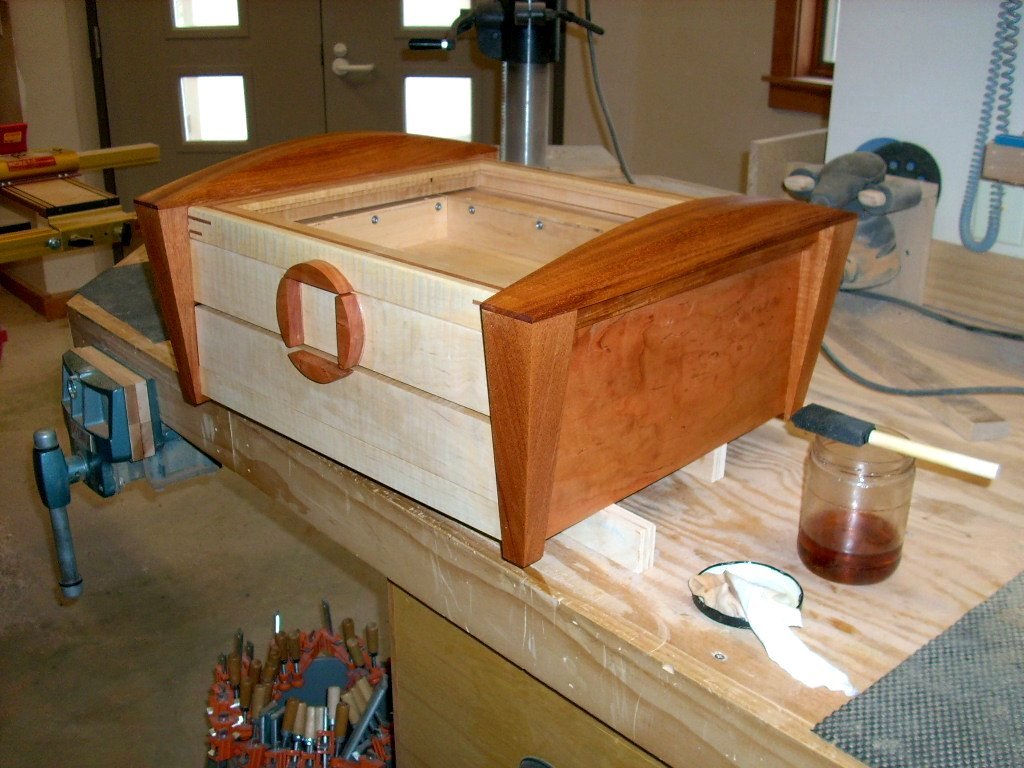
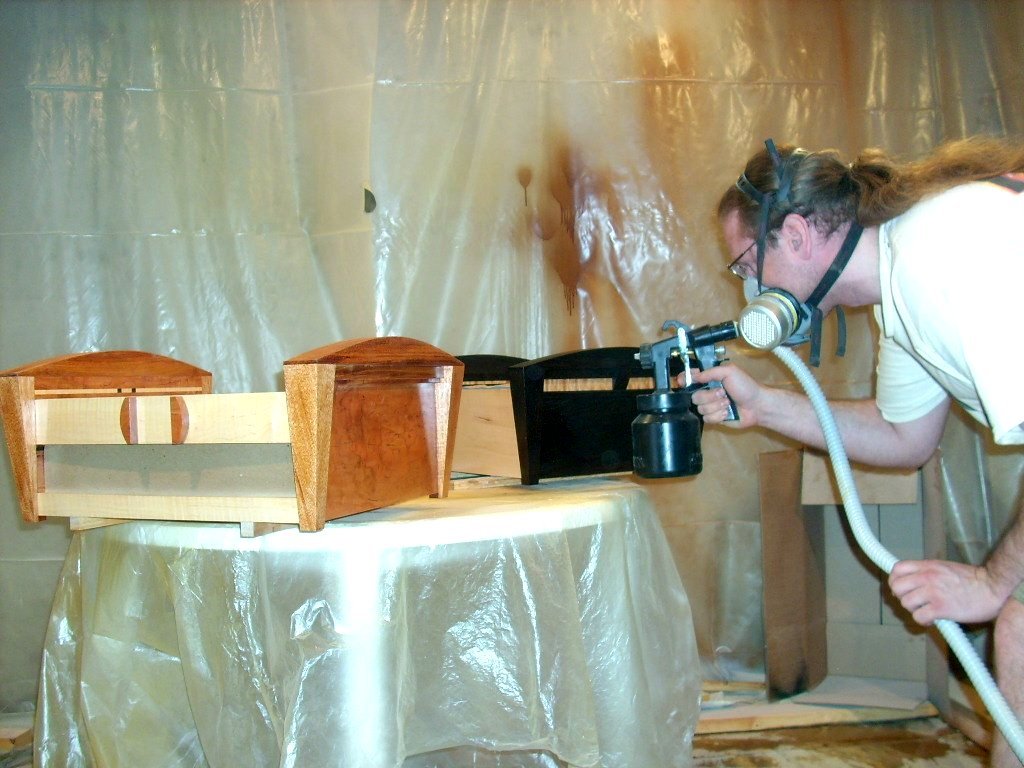 I
sprayed the final coats of lacquer on your jewelry box (yours is the
brownish-colored one in front). There's a total of 6 coats of
lacquer on there which will give it a very nice, glossy sheen.
The last time you saw the boxes they were without any finish.
I think you'll be pleasantly surprised when you see how much the
wood grain and color comes out when you oil and lacquer it.
The tiger maple on the front of your box is absolutely striking. I
sprayed the final coats of lacquer on your jewelry box (yours is the
brownish-colored one in front). There's a total of 6 coats of
lacquer on there which will give it a very nice, glossy sheen.
The last time you saw the boxes they were without any finish.
I think you'll be pleasantly surprised when you see how much the
wood grain and color comes out when you oil and lacquer it.
The tiger maple on the front of your box is absolutely striking. |
||
| March 30, 2009 | ||
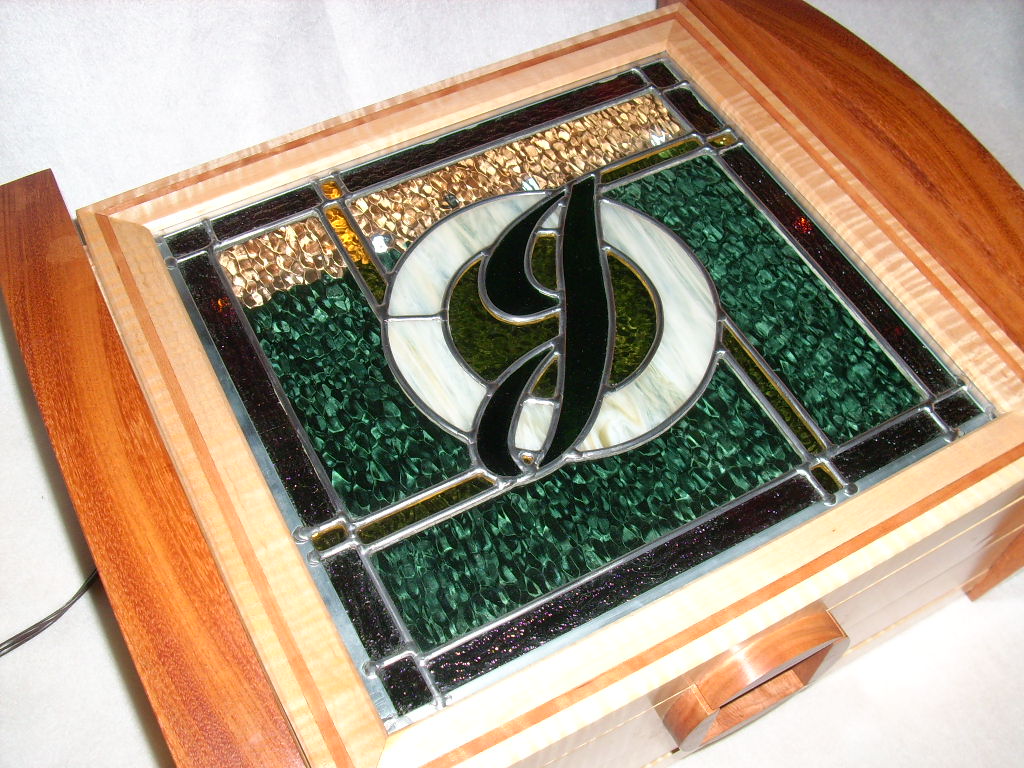  Finished
and ready for delivery! I think you'll find the results
spectacular. The combination of different woods creates a
wonderful contrast. The texture of the tiger maple is three
dimensional, almost holographic. The stained glass monogram is
backlit and casts a subtle glow. It adds that "little
something extra" to put the composition over the top. You are
sure to score some points on your anniversary with this personal and
unique gift. Finished
and ready for delivery! I think you'll find the results
spectacular. The combination of different woods creates a
wonderful contrast. The texture of the tiger maple is three
dimensional, almost holographic. The stained glass monogram is
backlit and casts a subtle glow. It adds that "little
something extra" to put the composition over the top. You are
sure to score some points on your anniversary with this personal and
unique gift.Let me know when you want to stop by and pick it up, or you can keep it hidden at our house if you don't want to risk the wife finding it before she's supposed to. |
||


