 |
|
| Beauty is in the details. Click on the photos to see them in a larger size. Use your browser's "Back" button to return. | |
| November 21, 2009 | |
|
Welcome, Mark! I hope you had fun personally picking out the wood for your new cabinet. Since we've got many of the details already worked out, I should be able to get rolling on it right away. I'll keep you posted on the progress here with photos once or twice a week. Feel free to share this link with any of your friends or family who might be interested. |
|
| November 21, 2009 | |
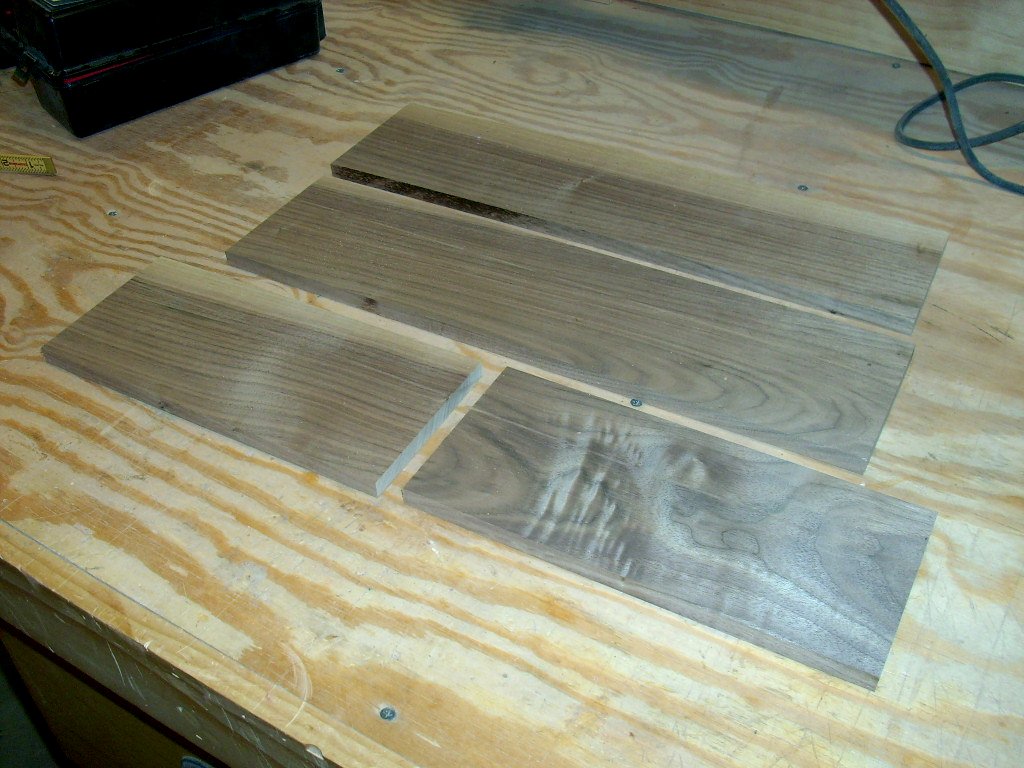
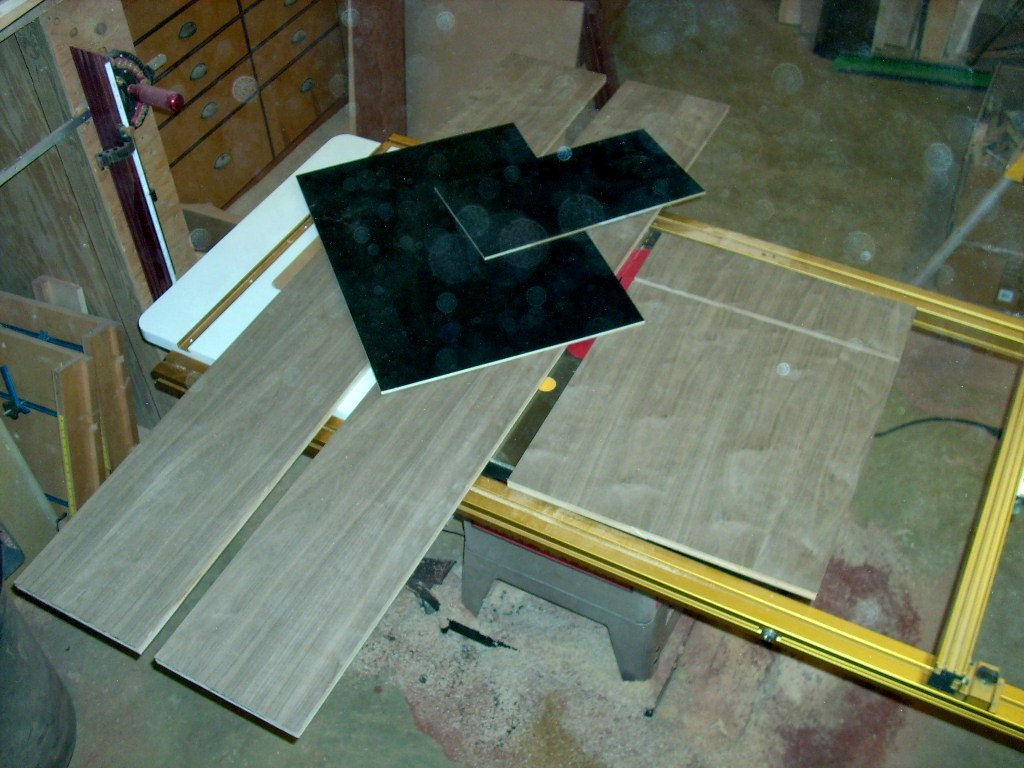  Well,
I got a quicker start than I thought I would. Since the lumber
yard couldn't rip the plywood down for us while we were there, I had
to take advantage of my outfeed table (my wife) while she was home.
Cindy would be running errands all day Sunday, so I had to make use
of her while she was there. Well,
I got a quicker start than I thought I would. Since the lumber
yard couldn't rip the plywood down for us while we were there, I had
to take advantage of my outfeed table (my wife) while she was home.
Cindy would be running errands all day Sunday, so I had to make use
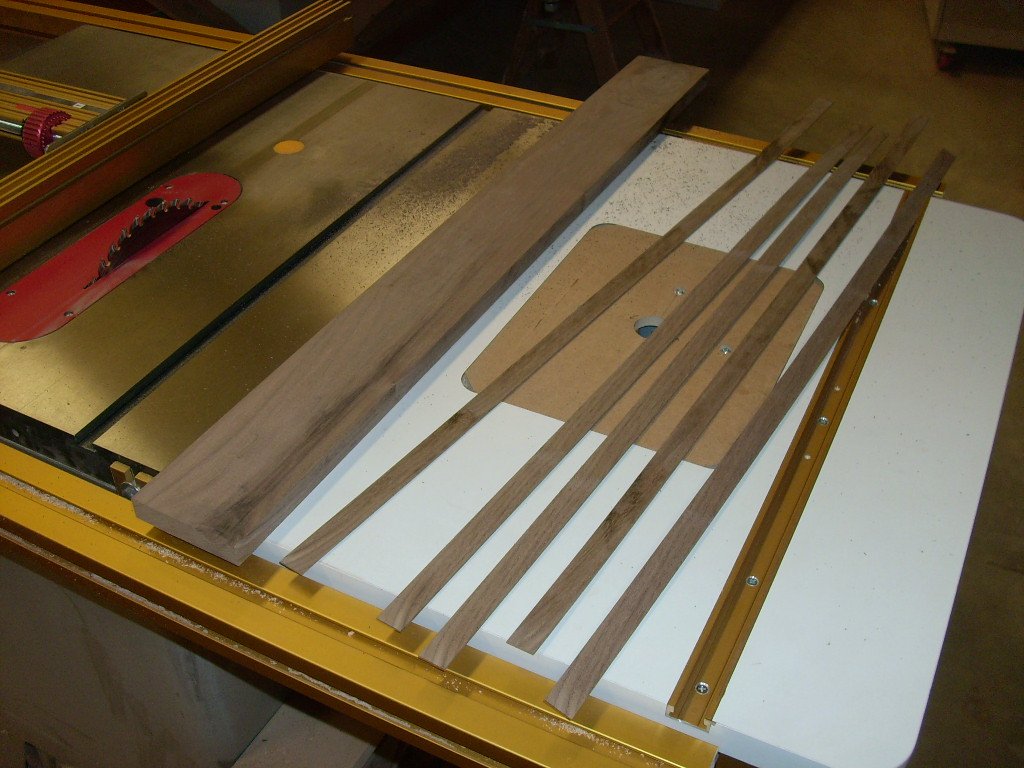
of her while she was there.In the far right photo, you can see the two long strips which will be your cabinet's case, the two black melamine pieces which will be the back and the drawer bottom, and the drawer/door fronts on the right arranged for a continuous grain pattern. |
|
| November 22, 2009 | |
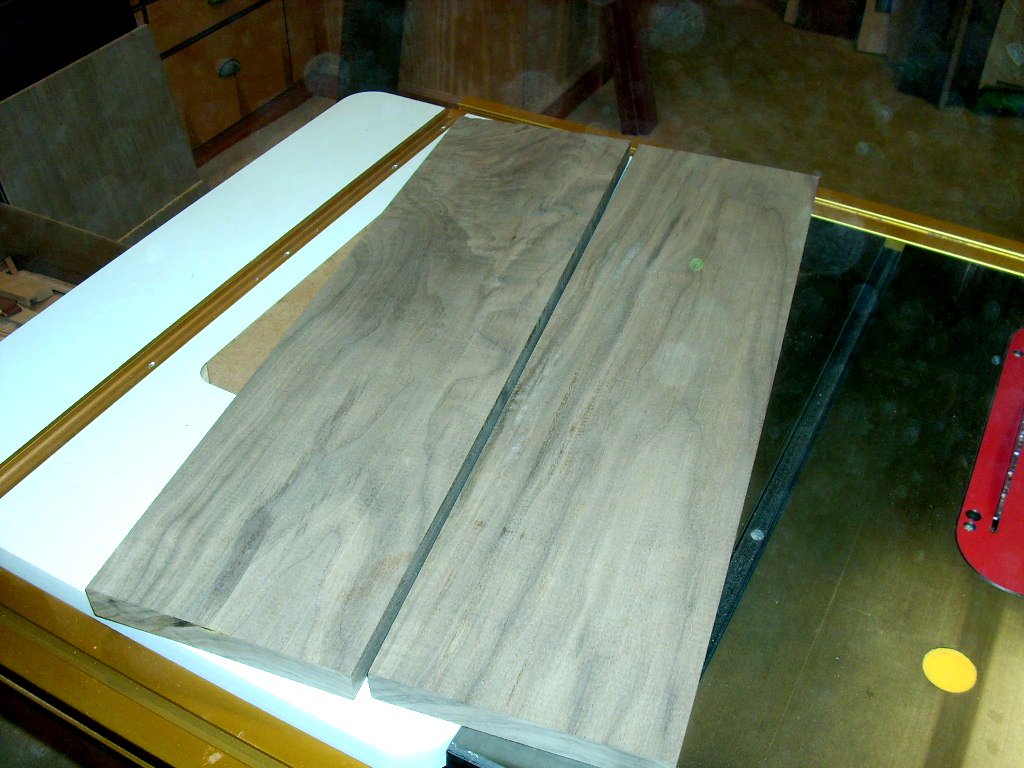  Busy
day on Sunday. I rough cut the side panels, then sized and
glued on the front and back edge banding. I'll keep them
clamped up overnight. Busy
day on Sunday. I rough cut the side panels, then sized and
glued on the front and back edge banding. I'll keep them
clamped up overnight.For the table top, I wanted to get the best grain on top, so I rough cut out the portions of the plank of wood which would do it and I aligned them in the most favorable configuration. |
|
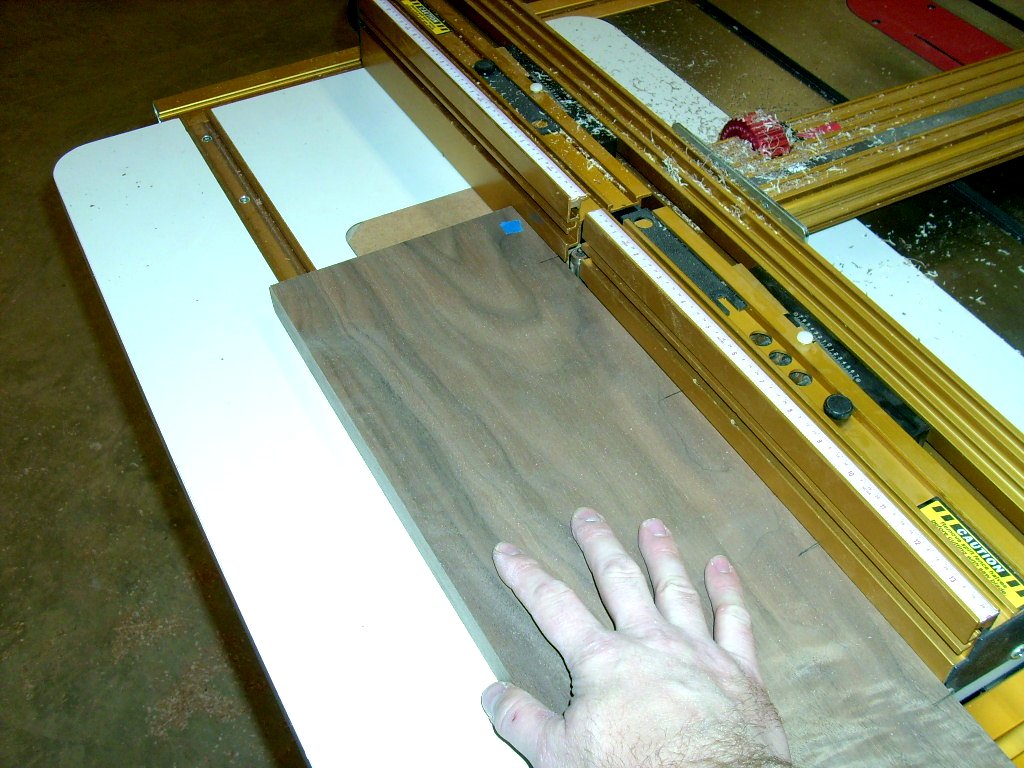 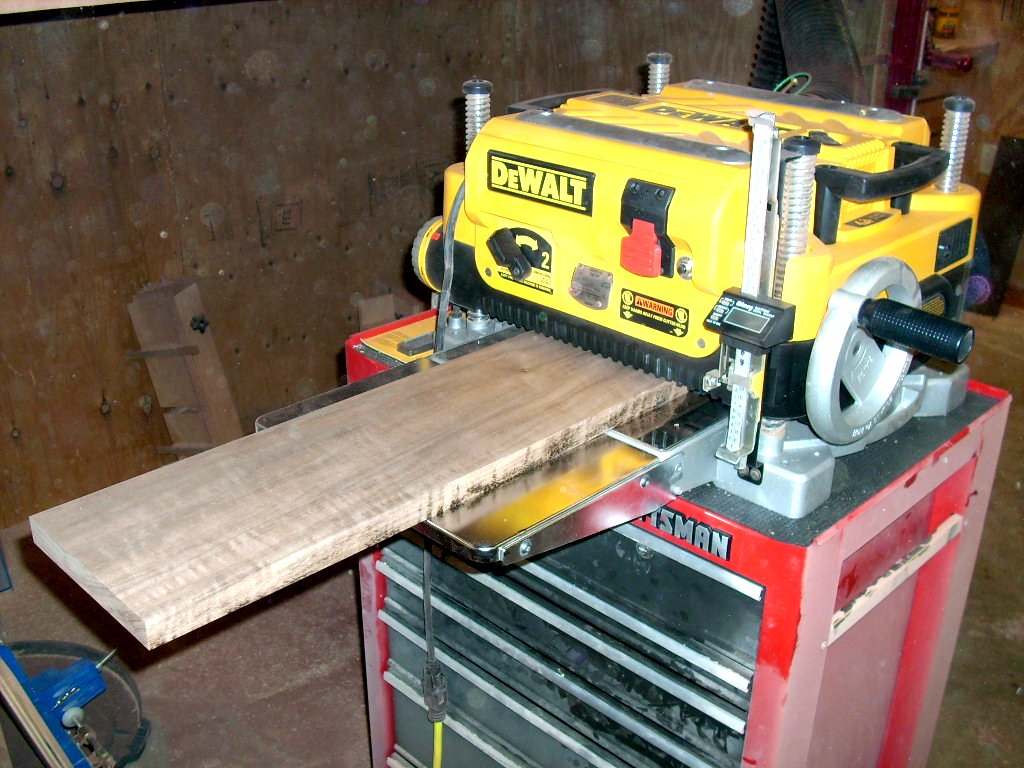 Next
the boards took a quick trip through the planer to make sure they're
exactly the same thickness. Then I cleaned up the adjoining
edges on the router table to make them dead flat and perfectly at 90
degrees. Next
the boards took a quick trip through the planer to make sure they're
exactly the same thickness. Then I cleaned up the adjoining
edges on the router table to make them dead flat and perfectly at 90
degrees. |
|
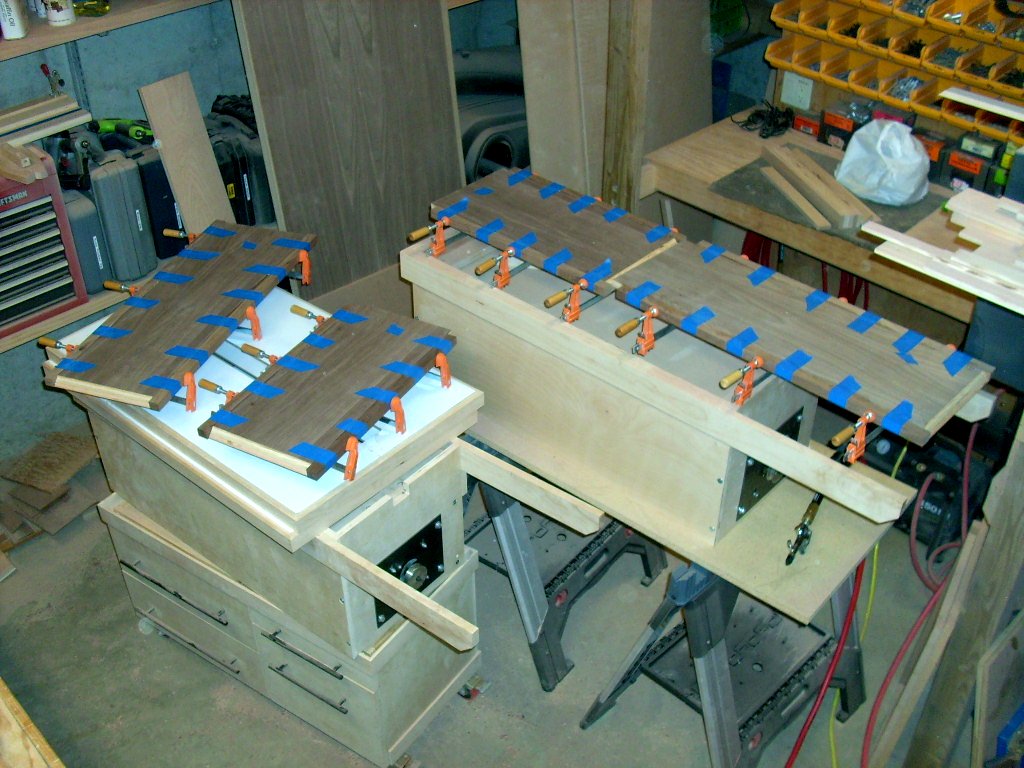
 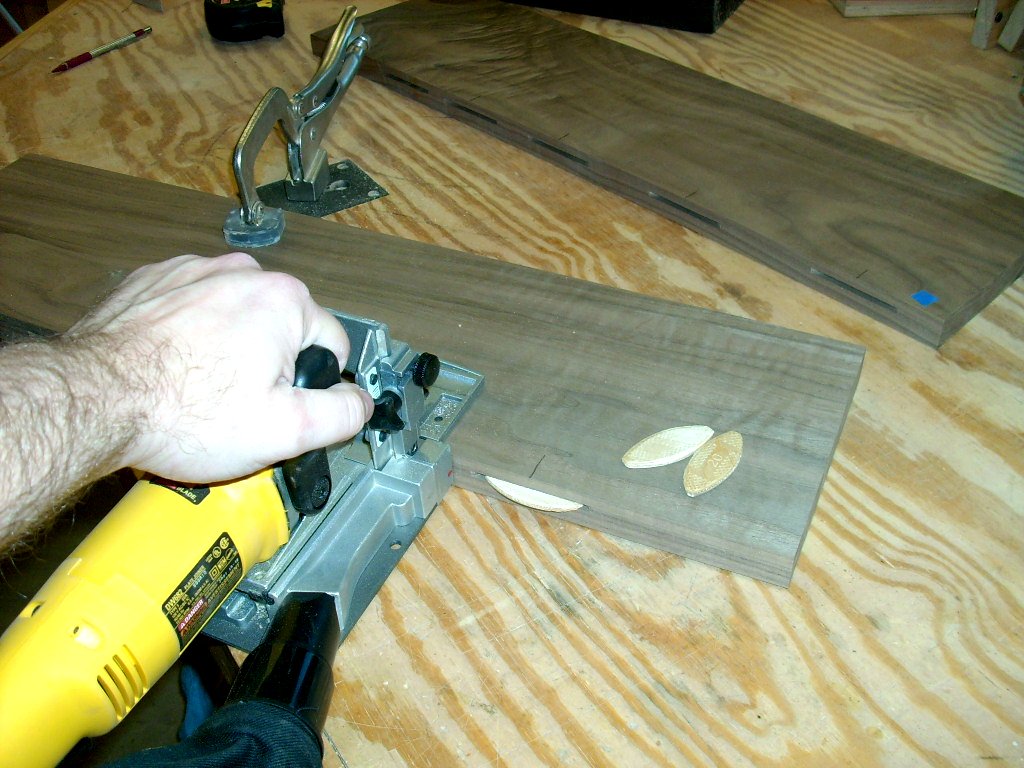 I
reinforced this joint with biscuits for some extra holding power and
so they'll stay aligned during the glue up. Then into the
clamps they go. I'll leave this to dry overnight. Check
out that sexy grain swirl in the lower left of the panel. Some
carpenters think this is a defect and reject the wood. I'm
glad you enjoy the beauty that nature offers and want to celebrate
it. That grain will really pop once the finish is applied. I
reinforced this joint with biscuits for some extra holding power and
so they'll stay aligned during the glue up. Then into the
clamps they go. I'll leave this to dry overnight. Check
out that sexy grain swirl in the lower left of the panel. Some
carpenters think this is a defect and reject the wood. I'm
glad you enjoy the beauty that nature offers and want to celebrate
it. That grain will really pop once the finish is applied. |
|
| November 24, 2009 | |
   |
|
|
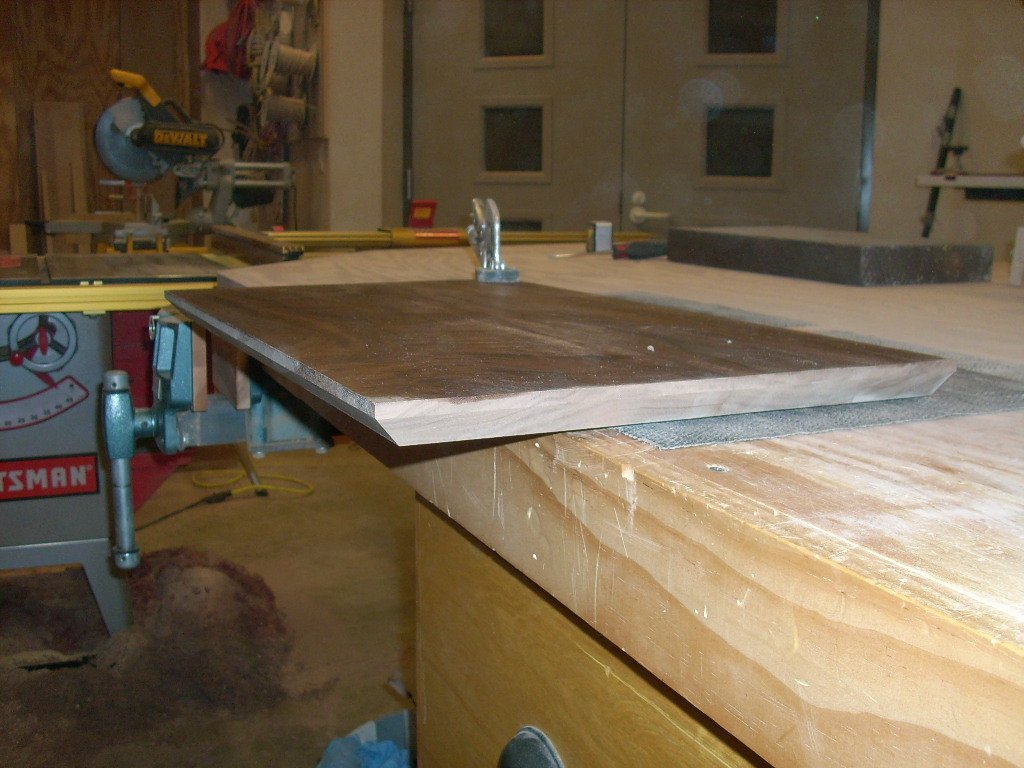
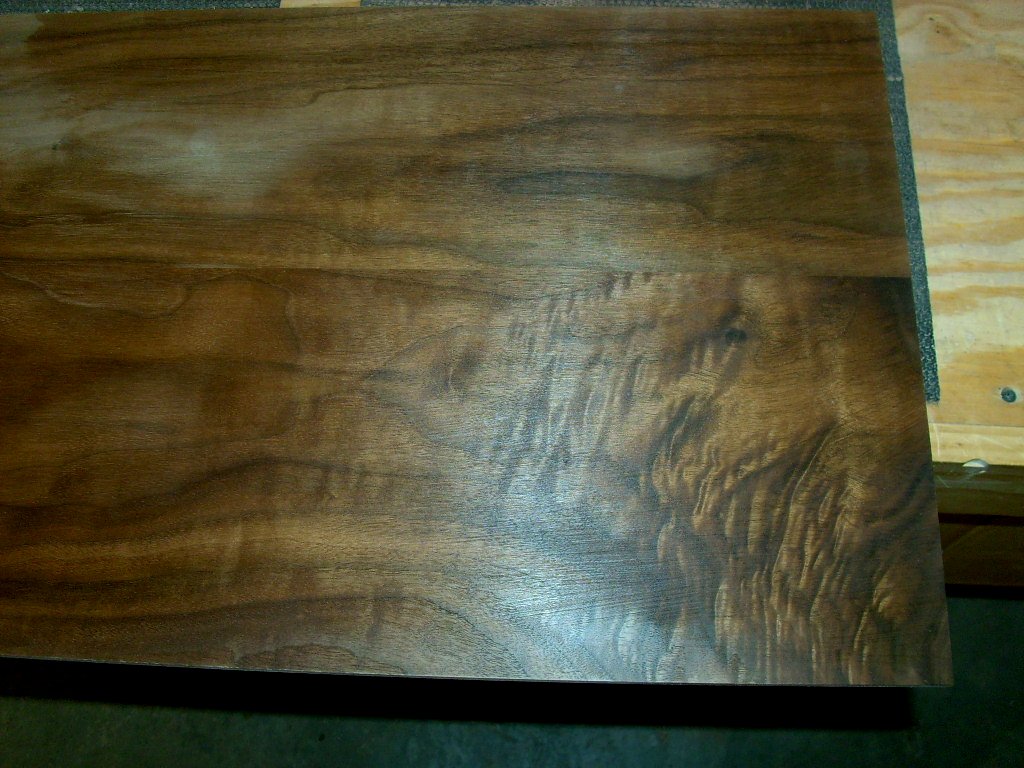
I got a lot done over the long holiday weekend! After the
table top set up overnight, it was trimmed to final size and the
edge bevel was cut. This will give the top a lighter
appearance and it will coordinate with the bevels which will be put
on the cabinet case sides. The right photo shows the top
wetted down with mineral spirits to mimic how it will look once the
finish is applied. That swirly grain looks hot! |
|
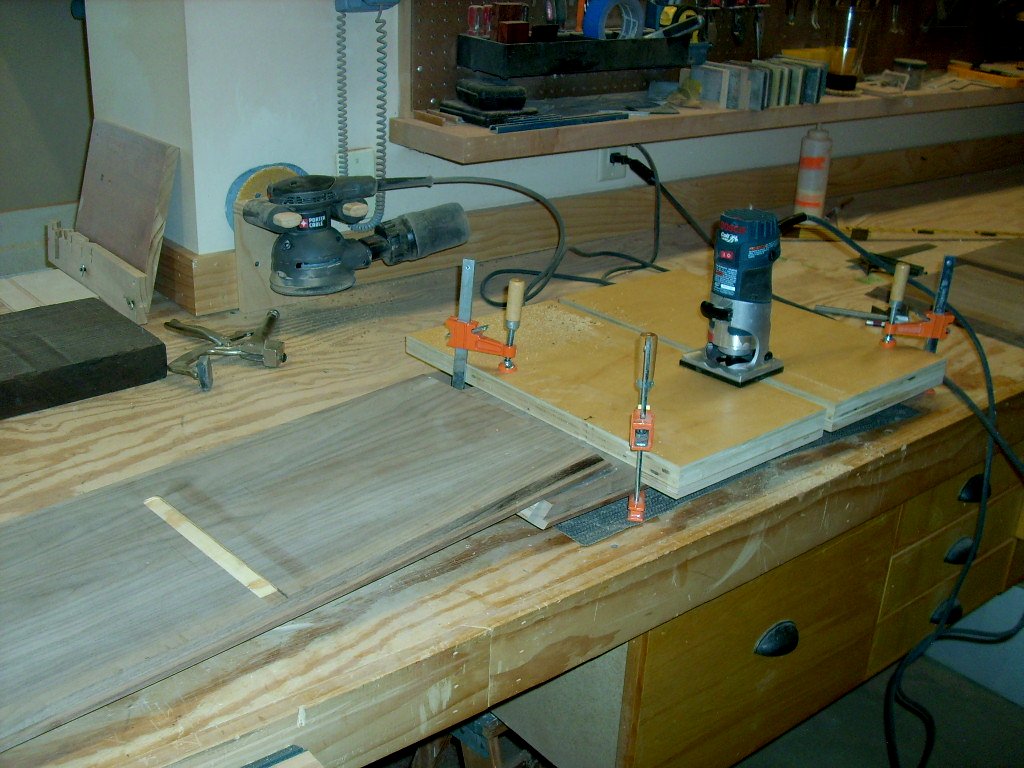
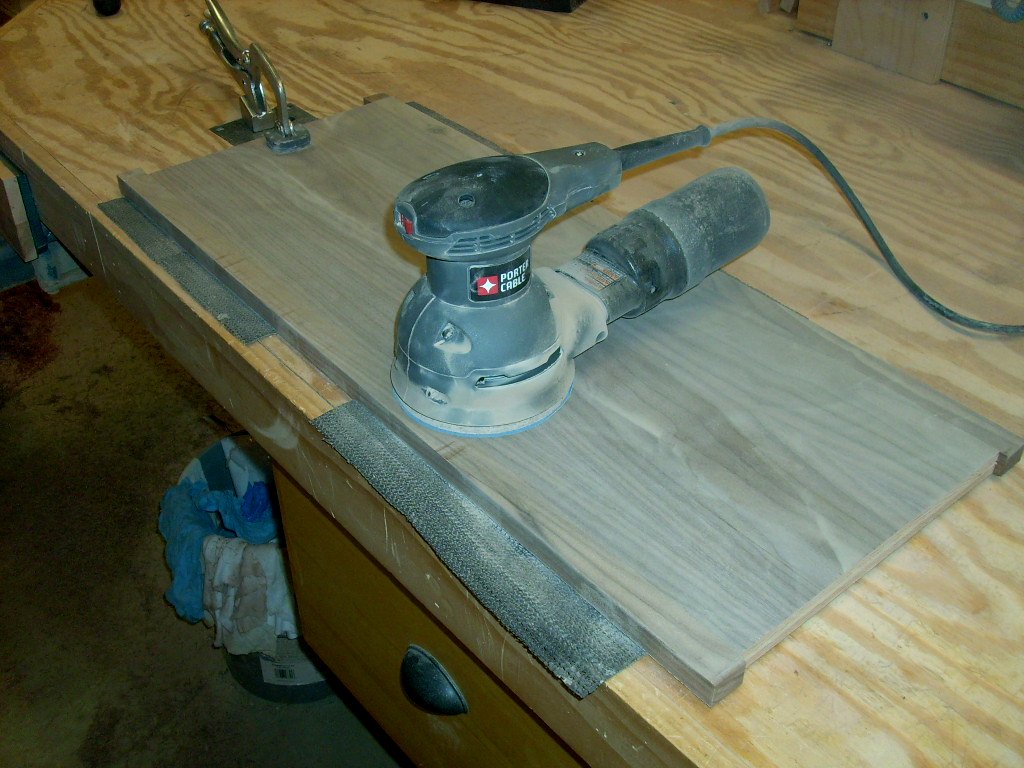  Now
over to the case sides. The edges of the case will get a
decorative detail which can not be cut directly from the plywood
since you would expose the plies. Here the edge banding is
getting flushed up with a trim router and smoothed out with some
sanding. Now
over to the case sides. The edges of the case will get a
decorative detail which can not be cut directly from the plywood
since you would expose the plies. Here the edge banding is
getting flushed up with a trim router and smoothed out with some
sanding. |
|
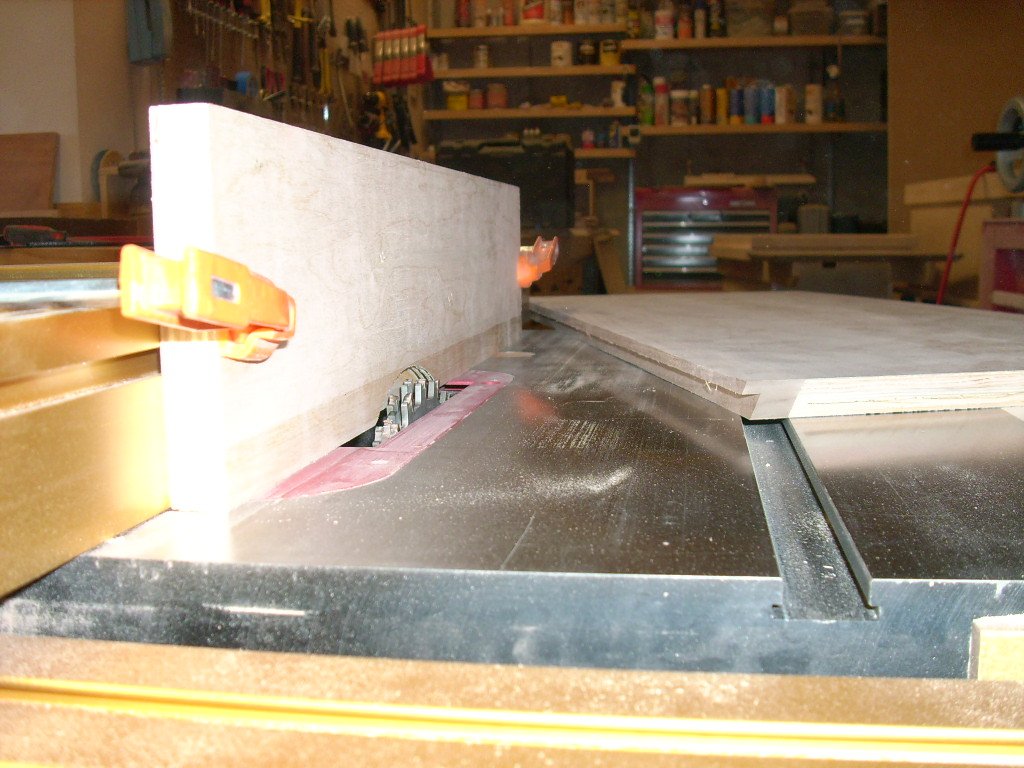  Per
your design, the
front edges of the case got a 45 degree bevel. This will
recess the door fronts and lend some three dimensionality to the
piece. The back edges received a simple rabbet, a groove in
which the back of the case will eventually reside. It's much
easier to add these details before the case gets glued up. Per
your design, the
front edges of the case got a 45 degree bevel. This will
recess the door fronts and lend some three dimensionality to the
piece. The back edges received a simple rabbet, a groove in
which the back of the case will eventually reside. It's much
easier to add these details before the case gets glued up. |
|
   |
|
|
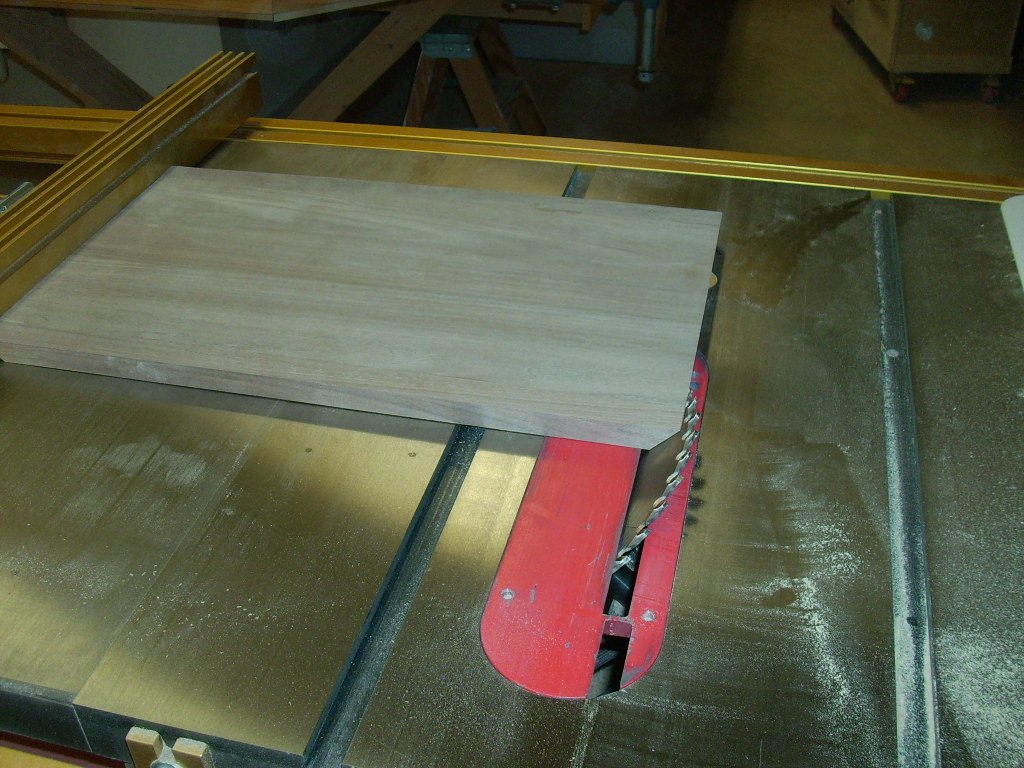
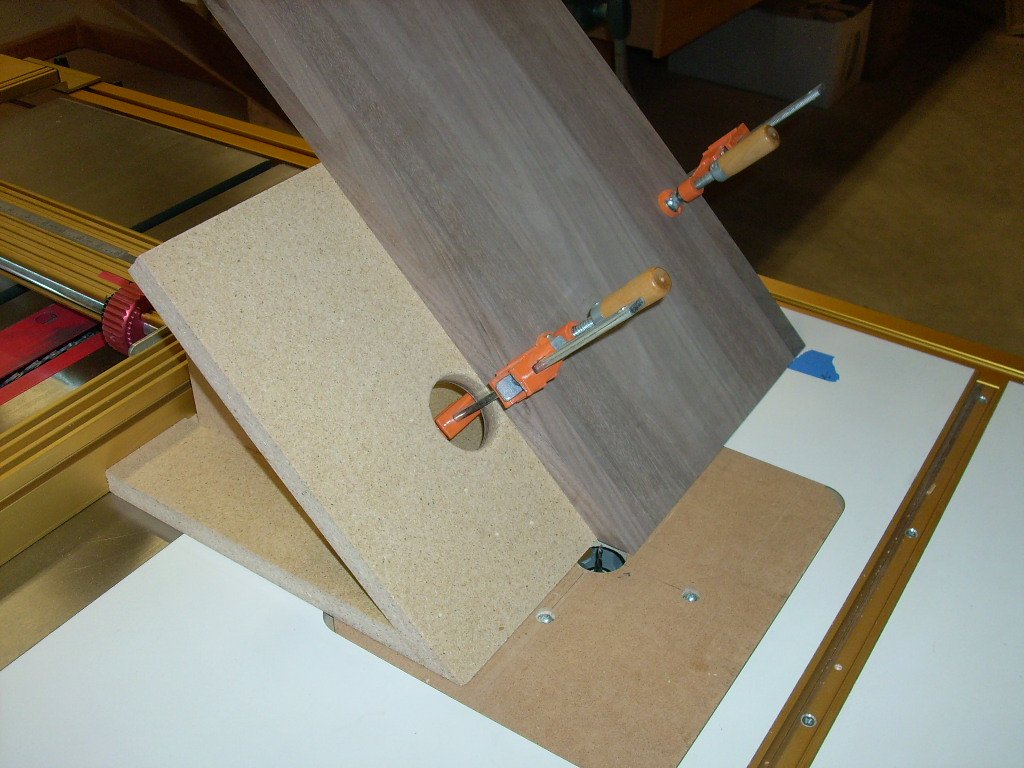
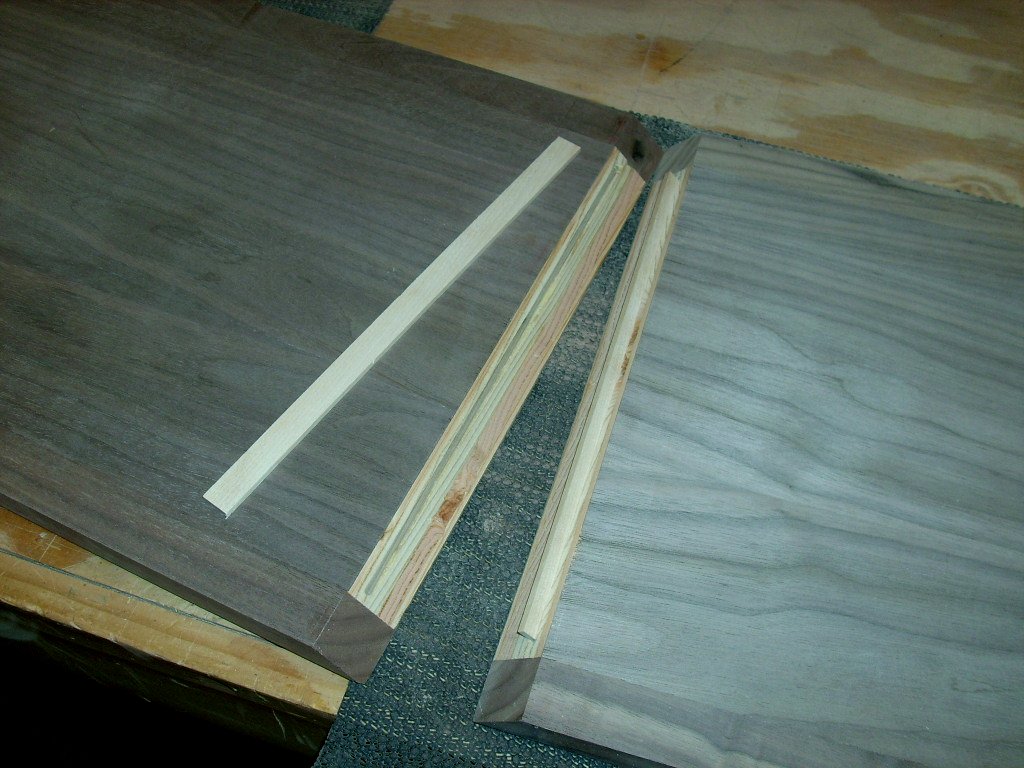
All the case sides will be mitered together so that the fancy front
bevel detail will wrap around the sides to the top and bottom and
appear nice and continuous. First the edges were beveled.
Since a plain old miter joint is not the strongest, I slotted the
face of the bevel to receive a tiny piece of wood called a spline.
This was done at the router table with that funky looking jig to
hold the panel in place at the correct angle. The spline will lock the joint
together especially during glue up when everything wants to slide
around. It also provides a lot more surface area for the
glue to hold things together forever. |
|
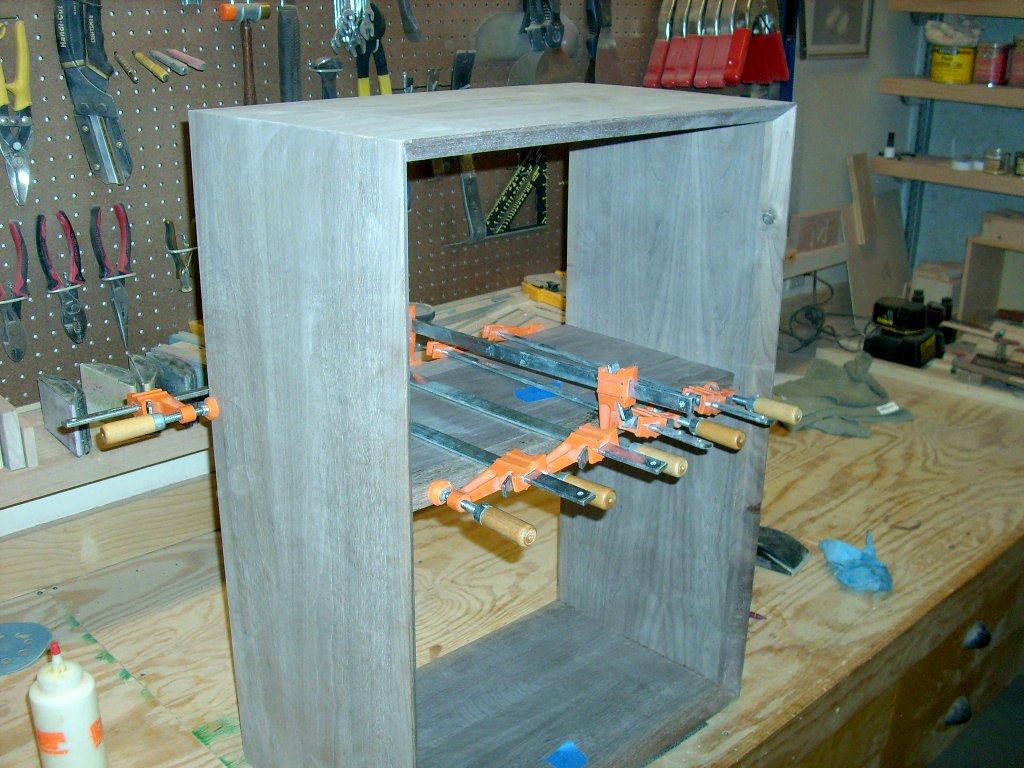
  The
last thing to do before gluing up the case is to rout a dado for the
interior shelf. This little groove will lock the shelf in
place and help hold the case sides from bowing out of whack.
The dado has to stop short of the front of the case so it had to be
cut with a router and squared off with a chisel. Then, almost
anti-climactically by now, the case was glued up. The
last thing to do before gluing up the case is to rout a dado for the
interior shelf. This little groove will lock the shelf in
place and help hold the case sides from bowing out of whack.
The dado has to stop short of the front of the case so it had to be
cut with a router and squared off with a chisel. Then, almost
anti-climactically by now, the case was glued up. |
|
| November 25, 2009 | |
   |
|
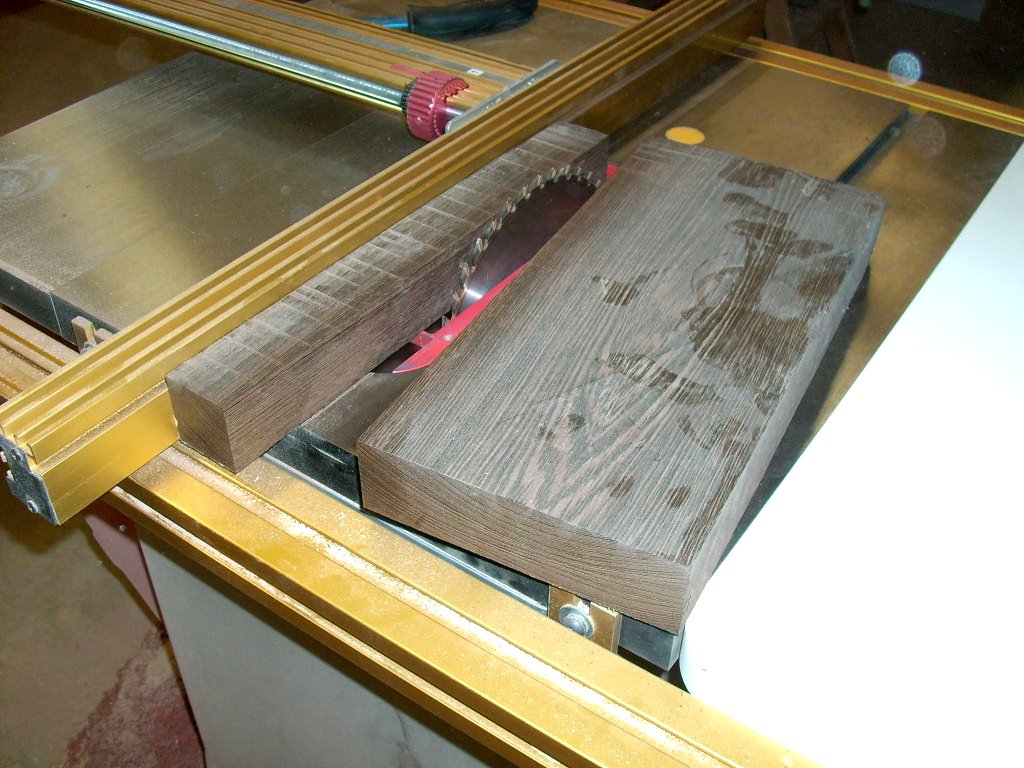
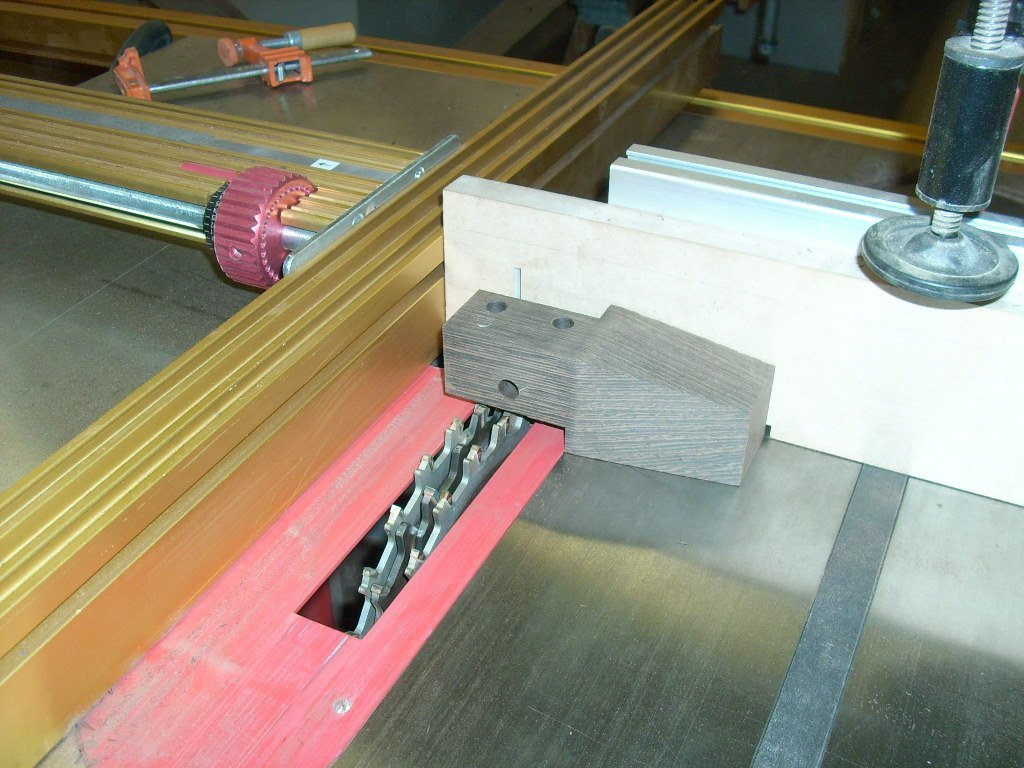
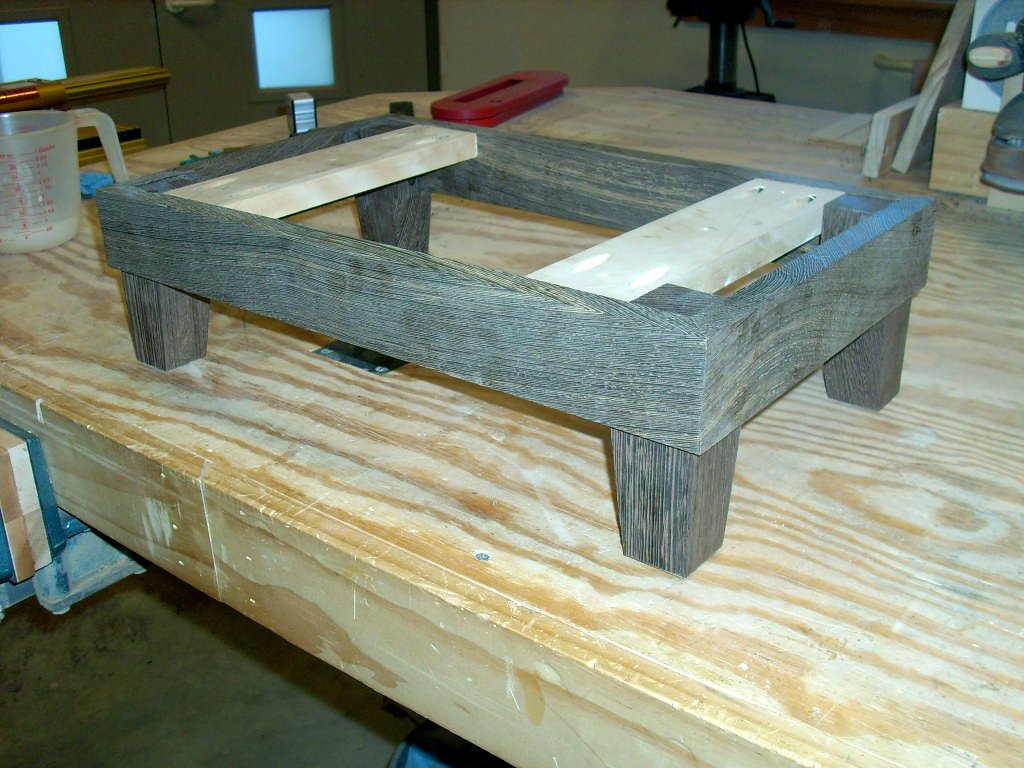 For
the legs, I basically started out with a tree trunk! This
chunk of wenge wood was diced up into four legs, dimensioned on the
planer, and cut to length. There is a slight taper on two
sides of each leg which was done on the table saw using a tapering
jig - something to hold the short pieces of wood while cutting so I
avoid loosing a finger. Mounting holes were predrilled for
screws and then the legs were notched to fit into the base.
The legs were glued and screwed into the base and a couple mounting
boards were added so that the case above can be screwed down. For
the legs, I basically started out with a tree trunk! This
chunk of wenge wood was diced up into four legs, dimensioned on the
planer, and cut to length. There is a slight taper on two
sides of each leg which was done on the table saw using a tapering
jig - something to hold the short pieces of wood while cutting so I
avoid loosing a finger. Mounting holes were predrilled for
screws and then the legs were notched to fit into the base.
The legs were glued and screwed into the base and a couple mounting
boards were added so that the case above can be screwed down. |
|
| November 27, 2009 | |
  I
sized the shelf and glued on some front edge banding. The
shelf will get the same 45 degree bevel treatment as did the top and sides.
The shelf was then permanently glued into the cabinet. The
back of the cabinet was sized to fit and screwed into place.
It's easier to work on the case and apply finish to it while the
back is off, so I promptly removed the back and set it aside until
final assembly. I
sized the shelf and glued on some front edge banding. The
shelf will get the same 45 degree bevel treatment as did the top and sides.
The shelf was then permanently glued into the cabinet. The
back of the cabinet was sized to fit and screwed into place.
It's easier to work on the case and apply finish to it while the
back is off, so I promptly removed the back and set it aside until
final assembly. |
|
   |
|
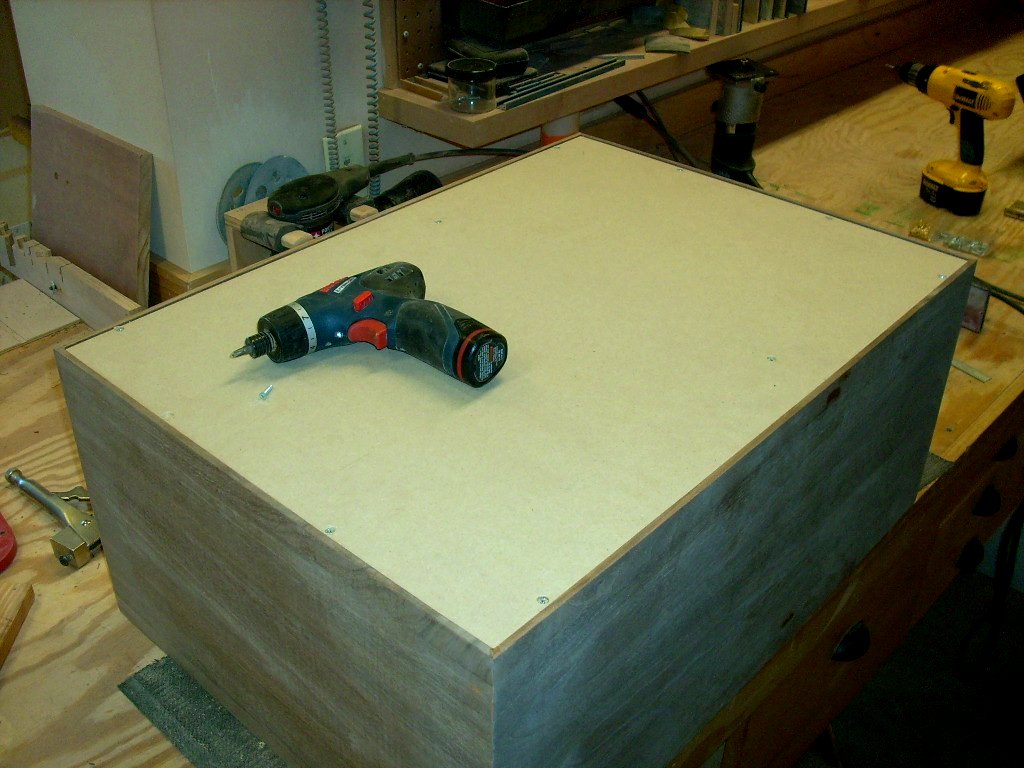
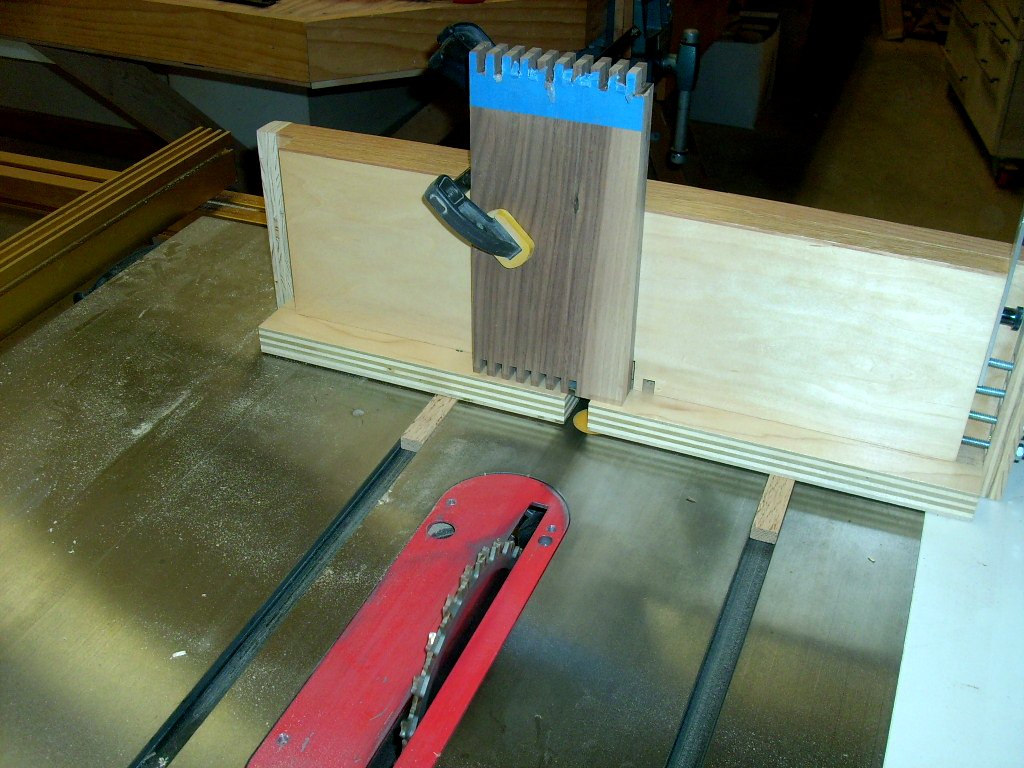
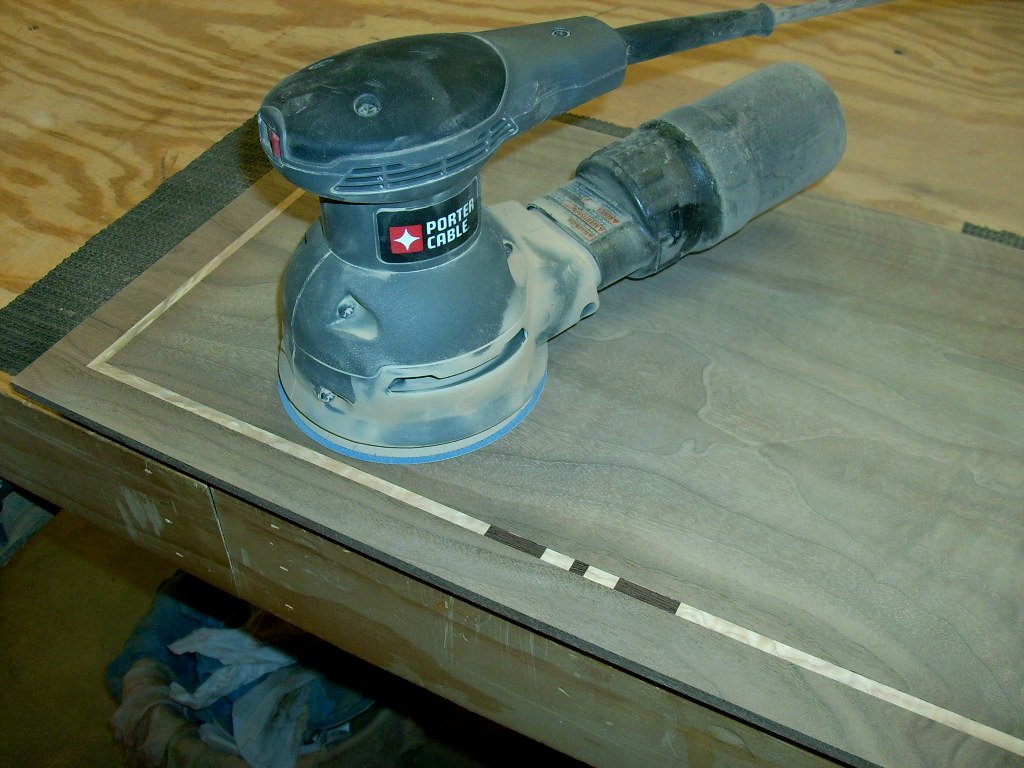
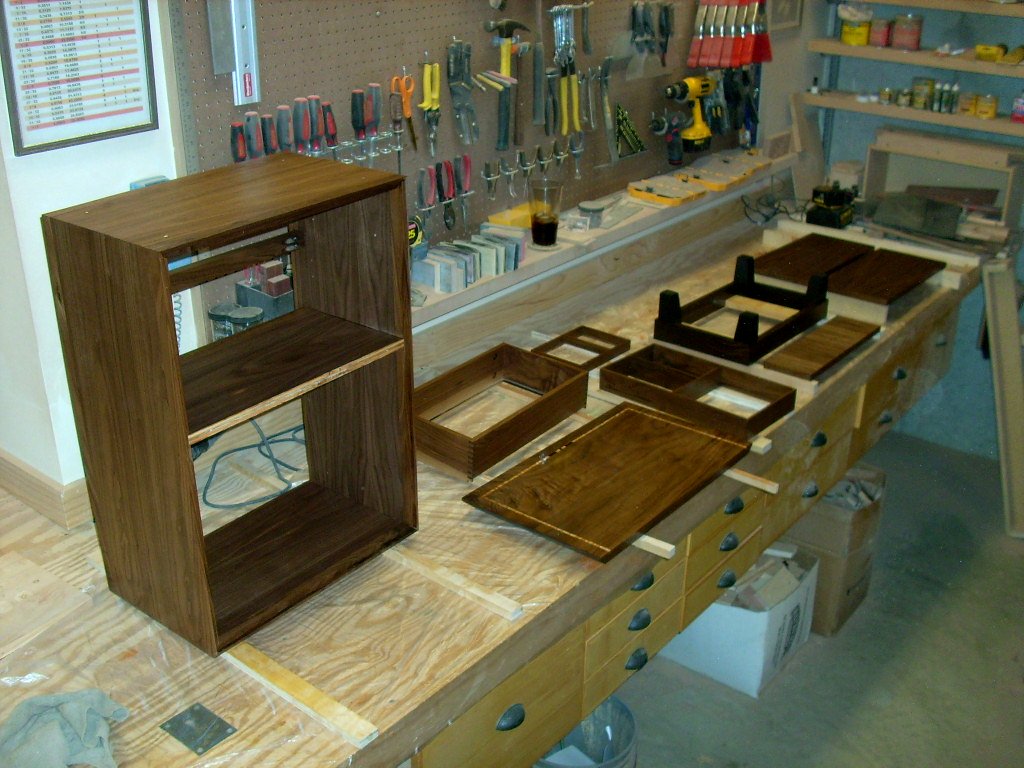
| Now that the case is assembled, accurate dimensions can be taken from it so that the drawer can be sized properly. When using ball-bearing drawer slides, you have about 1/32" of tolerance to work with; you have to be right on or the drawer won't work. The drawer sides were cut to length and planed down to 1/2" thickness. The box joint I like to use on the drawer's corners will never fail. The joint's fingers are cut using a table saw jig. All of the interlocking fingers provide an acre of gluing surface. After the glue dries, everything is sanded smooth and flush. | |
| November 28, 2009 | |
   |
|
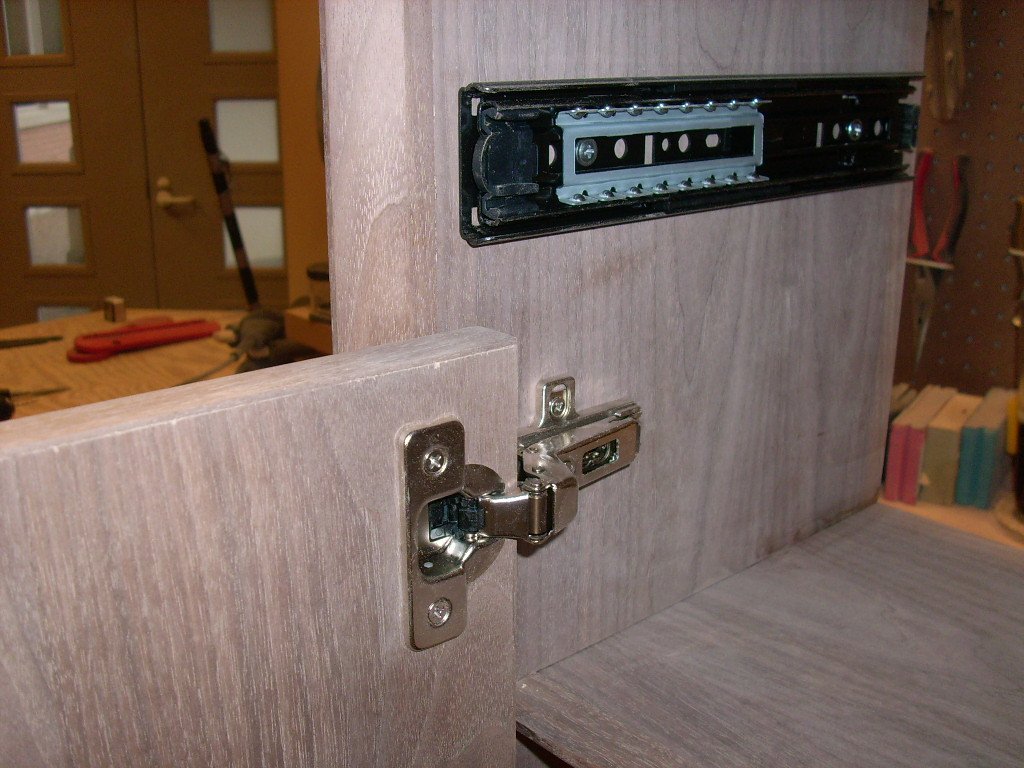
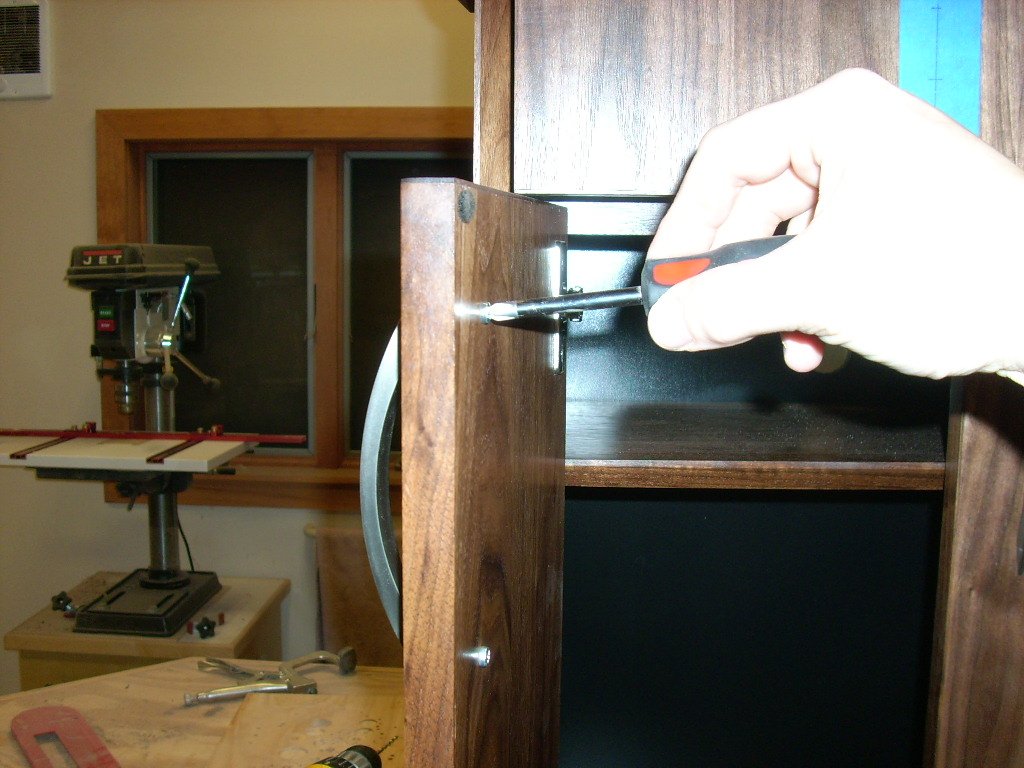
|
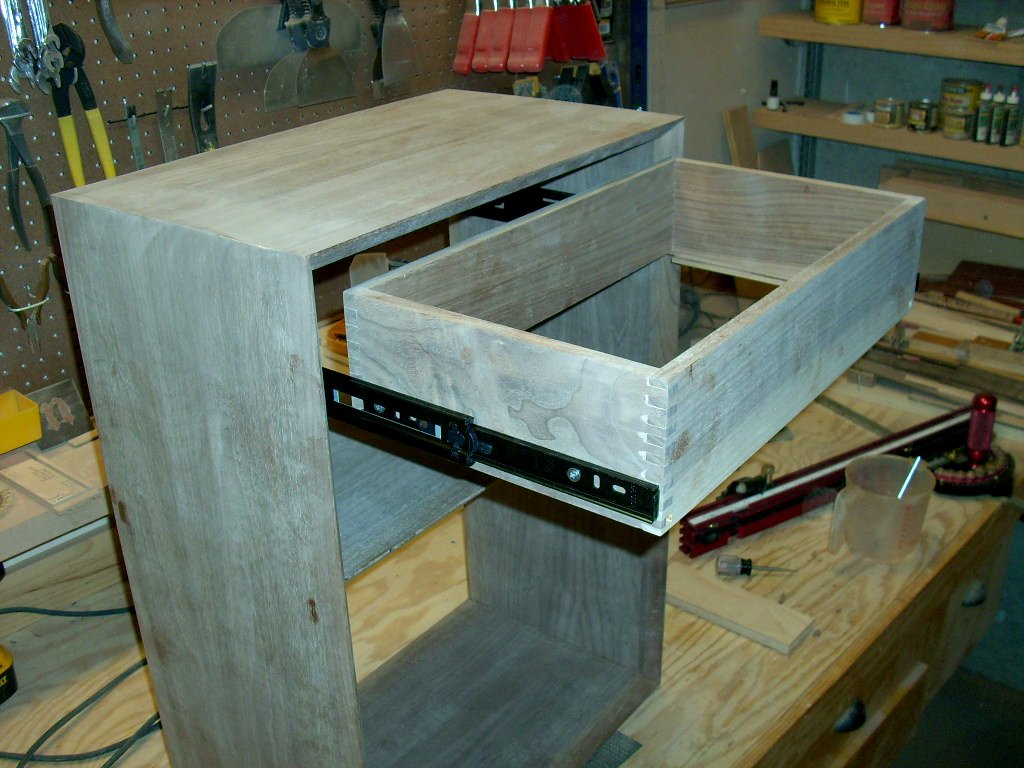
The design using the overly recessed door/drawer fronts was challenging. It took working on the cabinet upside-down
with a
bunch of temporary spacers clamped on so that the reveals would end
up in the correct plane. But once installed, the ball-bearing
slides worked smoothly and the over-travel feature will project the
drawer out past the table top so you can get to everything. As
with the case back, the drawer bottom was cut to fit and then
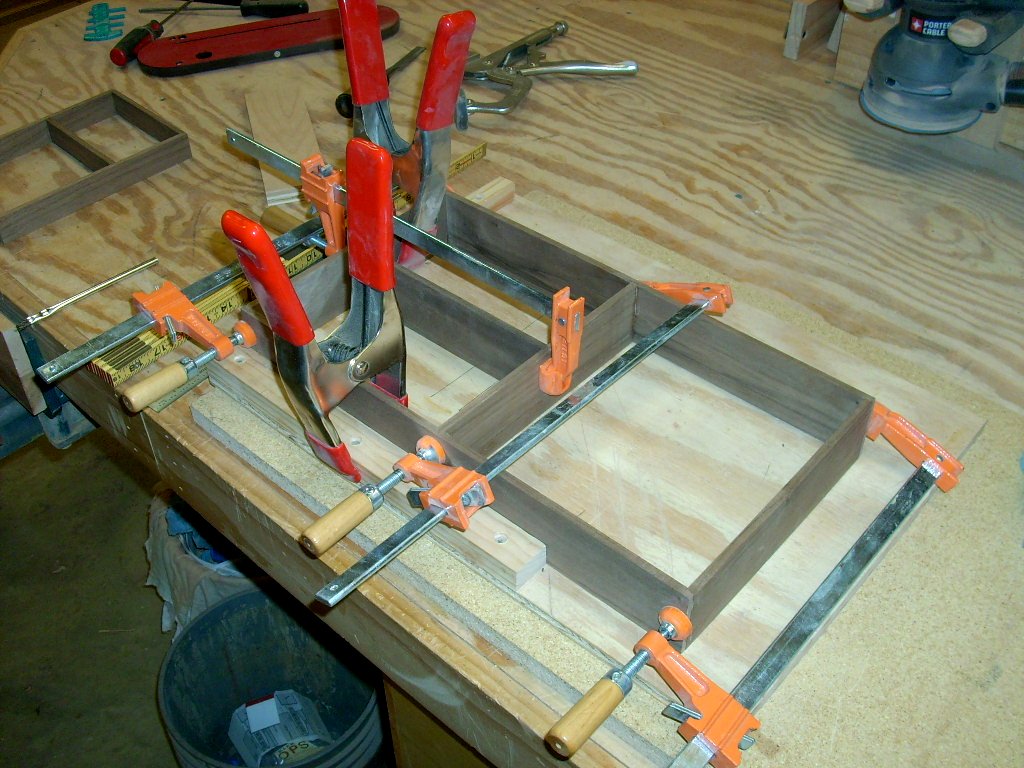
removed until final assembly. The interior of the drawer will receive some custom dividers to keep all the clutter organized. This takes many tiny pieces of wood with many tiny interlocking joints and a dozen clamps to hold it while the glue dries. This is a custom piece and I think it demands these extra finishing touches which you just don't get with a store bought piece. |
|
   |
|
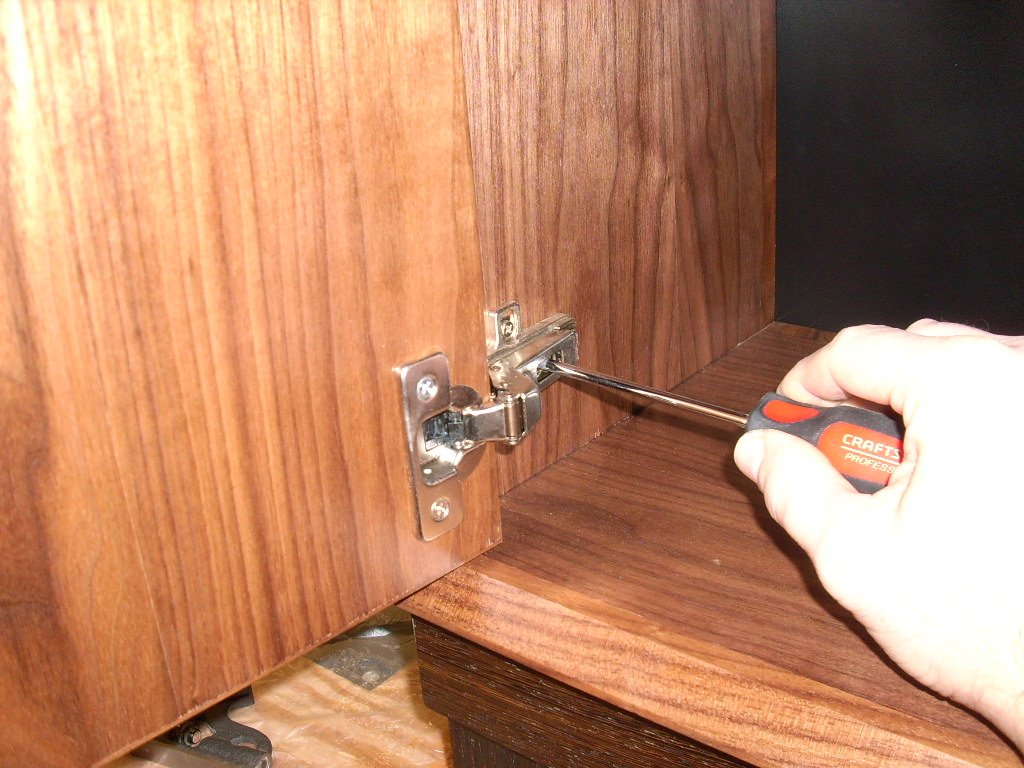
| For the door fronts, edge banding was cut to cover up the exposed plywood edges. As with the edging on the case sides, the glue was left to dry and then the edging was trimmed and sanded flush with the face. Finally, the hinges were installed and the doors mounted into the cabinet where they were centered and leveled. | |
| December 1, 2009 | |
 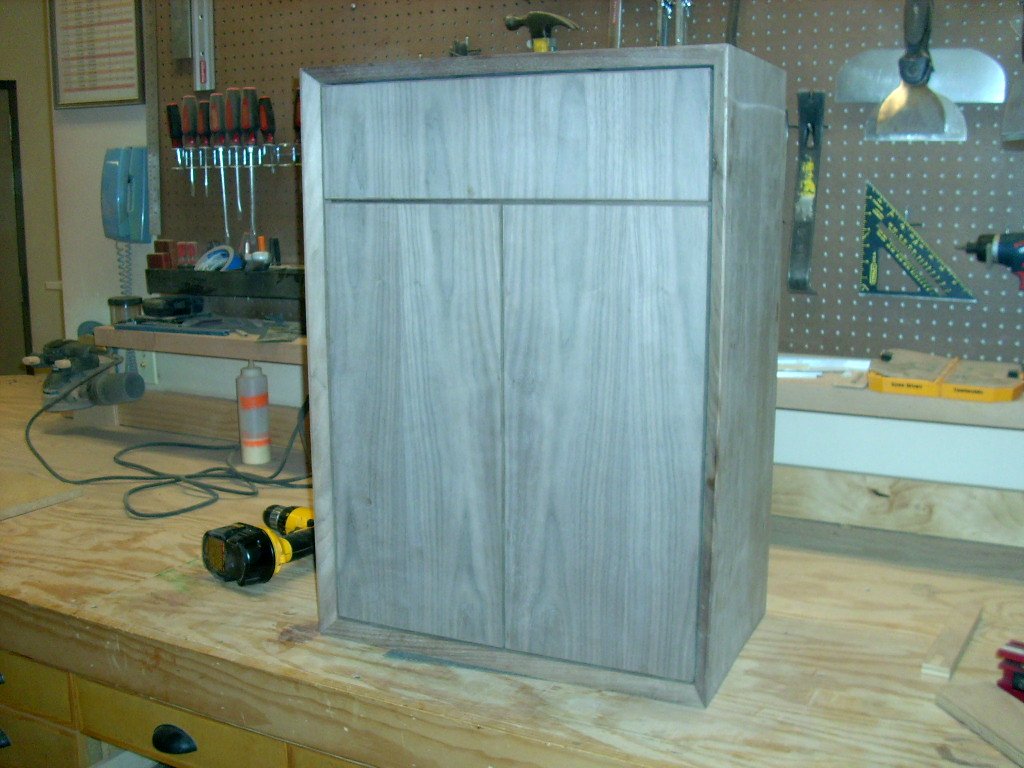 Finally,
the drawer front was added and carefully centered so all the reveals
were the same around all the door and drawer fronts. It's
beginning to look like something now. Finally,
the drawer front was added and carefully centered so all the reveals
were the same around all the door and drawer fronts. It's
beginning to look like something now.The cabinet was then flipped over and the base/legs attached. Some protective feet were added to keep things from scratching the floor. |
|
| December 4, 2009 | |
   |
|
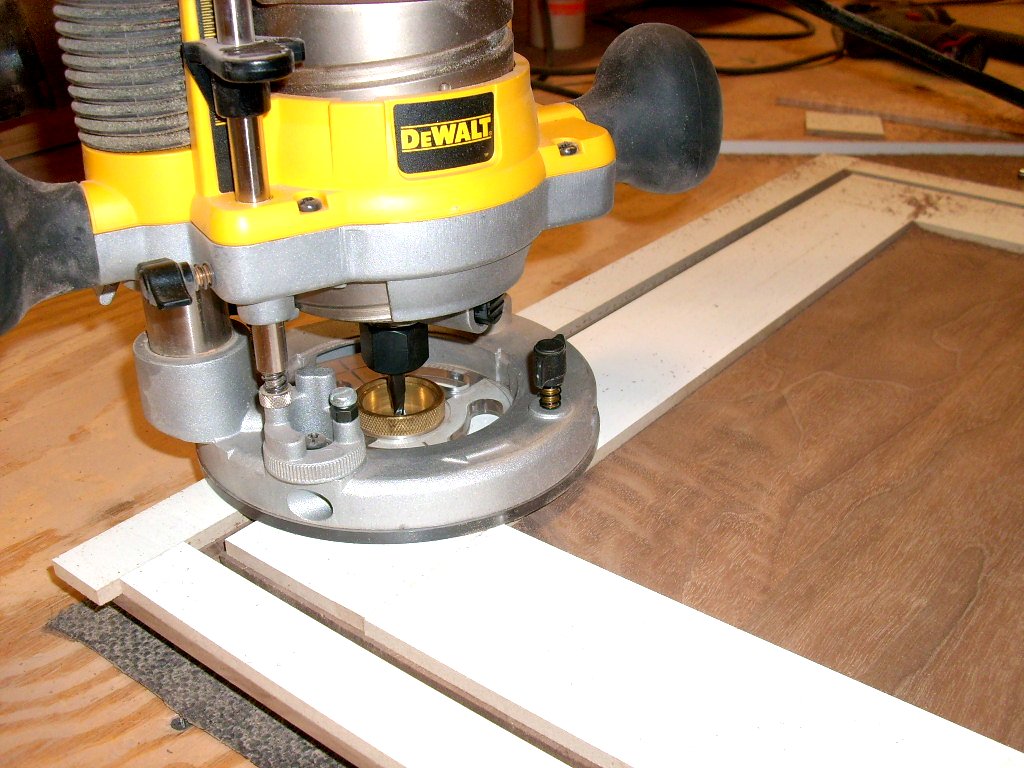
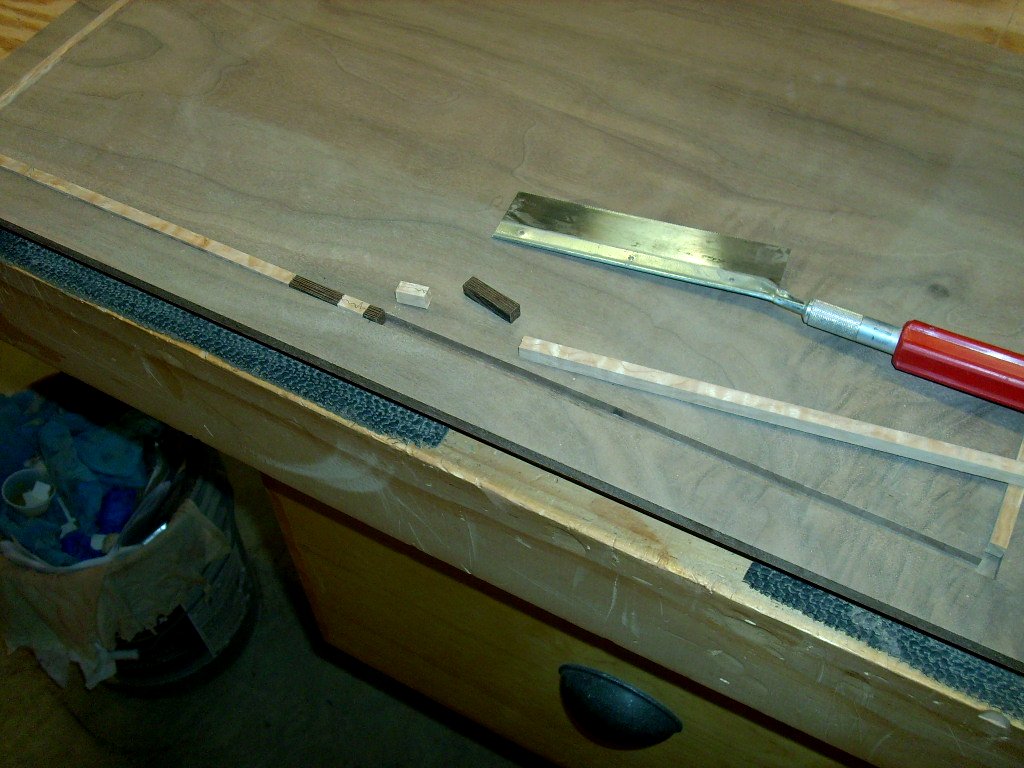
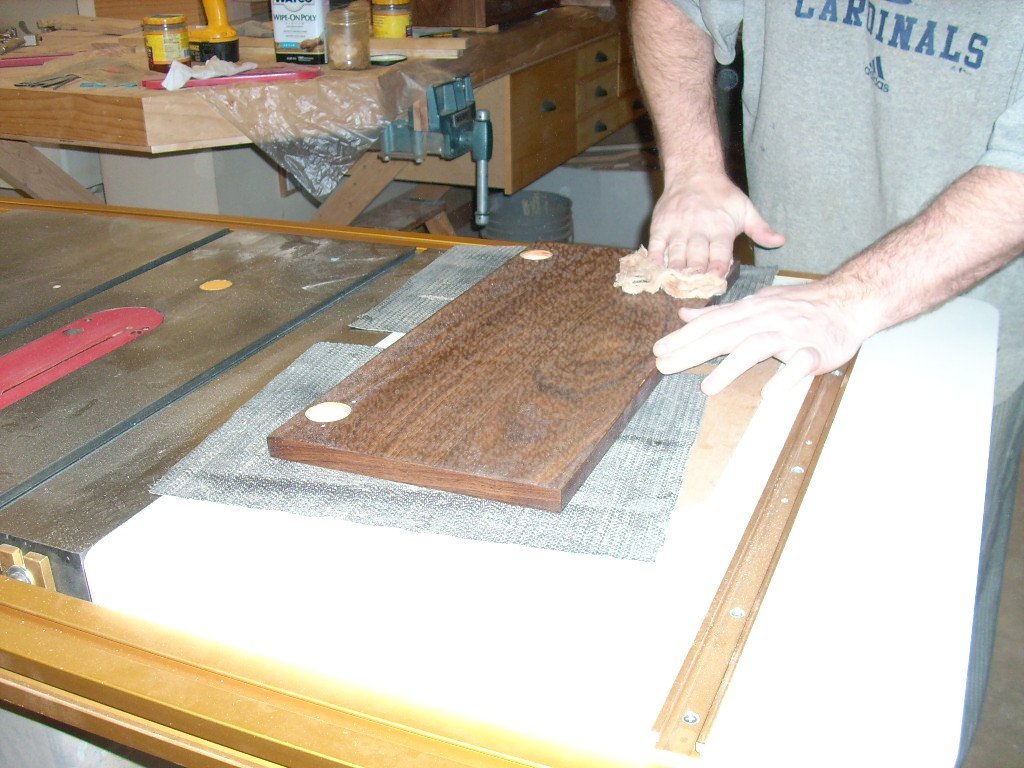
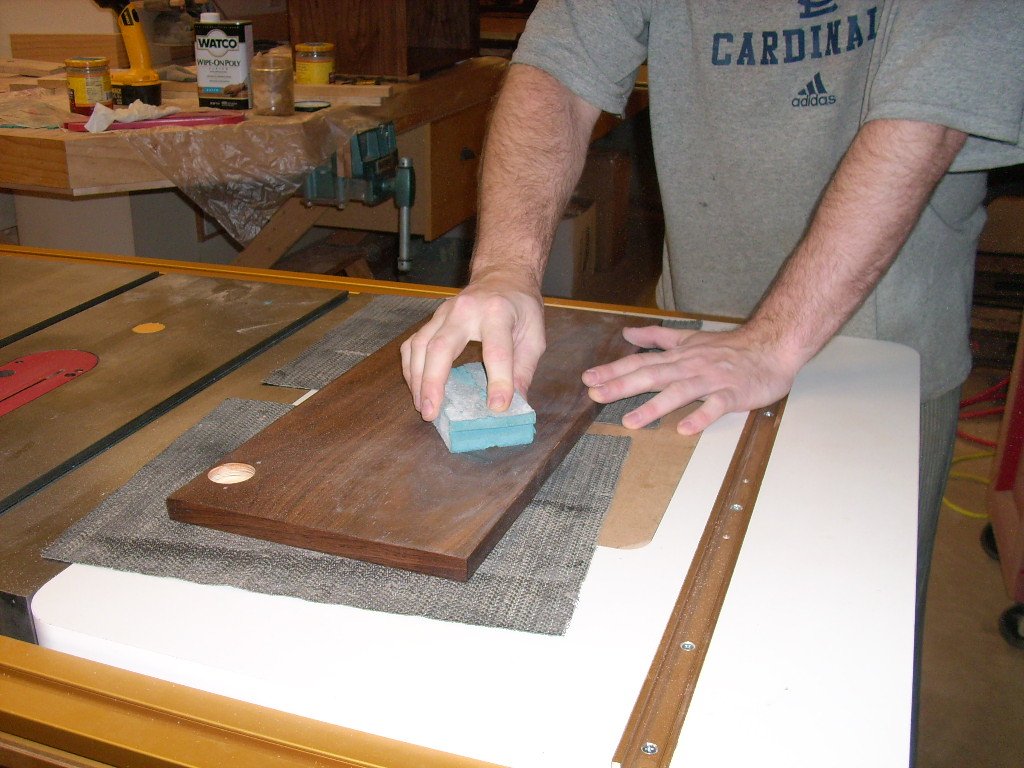
| The inlay banding on the table top looks deceptively simple, but requires some time and patience. The limits of the inlay were determined and a guide channel was created for the router out of thin pieces of scrap. This keeps the router perfectly on track; no one wants crooked lines. The routed groove was cleaned up with a chisel. I have a stash of very fancy (and expensive) woods which can be used for inlay, but I didn't have any pieces as wide as the table. Instead of just seaming the pieces together with noticeable joints, I used the opportunity (and some artistic license) to add a small design for some visual interest. Working with tiny pieces of wood with large power tools is difficult, so I broke out the hobby saw. All the pieces were sanded for a good, tight, press-in fit. Once everything was in and the glue set up, it was all sanded flush with the top. Since the top will be the most often touched area, I continued sanding it by hand up through 600 grit, very smooth. | |
| December 5, 2009 | |
 Everything
must be completely built first to know that it fits and works.
Then everything must be taken apart in order to apply the finish -
every screw, hinge, and drawer slide. A last thorough check
was made for any additional sanding needed. Everything
must be completely built first to know that it fits and works.
Then everything must be taken apart in order to apply the finish -
every screw, hinge, and drawer slide. A last thorough check
was made for any additional sanding needed.One coat of boiled linseed oil was applied. This really pops the grain out and richens up the color. This will be followed by the clear, protective coats. Mark wanted a thin, barely-there appearance, so we'll be going with with three coats of a wipe-on, satin polyurethane. This will take about a week since the previous coat must be completely dry before the next coat is applied. |
|
| December 14, 2009 | |
  After
two coats of polyurethane, everything is looking pretty good.
So now it's time to take the sandpaper to it to make it all messy
again. This knocks down all the little nubs and high spots and
will provide an even surface for the final coat of poly.
Following the sandpaper, I wiped the surface with a tack cloth which
picked up all the sanding dust. After
two coats of polyurethane, everything is looking pretty good.
So now it's time to take the sandpaper to it to make it all messy
again. This knocks down all the little nubs and high spots and
will provide an even surface for the final coat of poly.
Following the sandpaper, I wiped the surface with a tack cloth which
picked up all the sanding dust. |
|
| December 15, 2009 | |
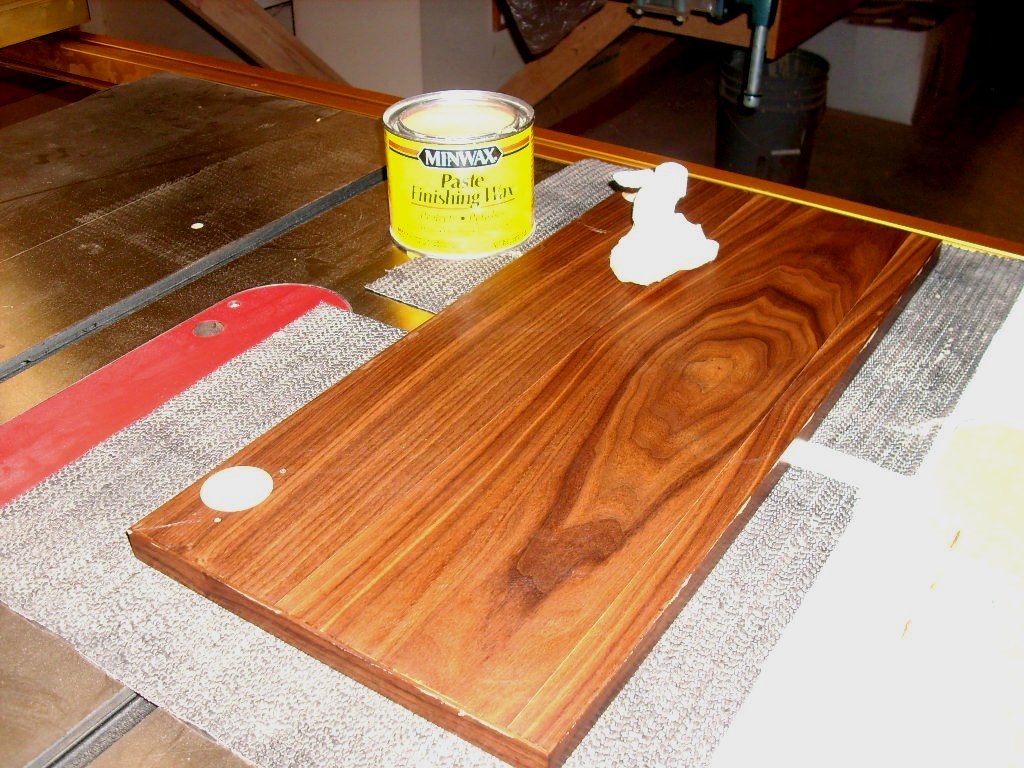 Because
of the light sanding, the last coat of polyurethane laid down
ultra-smooth. I hit it again with a very fine grit pad to
knock down any last dust nibs. Next I applied a coat of paste
wax. This gives the piece a subtle glow and enhances the
tactile experience. It's hard to explain, but when you wax
your wood it's just nicer to touch. Because
of the light sanding, the last coat of polyurethane laid down
ultra-smooth. I hit it again with a very fine grit pad to
knock down any last dust nibs. Next I applied a coat of paste
wax. This gives the piece a subtle glow and enhances the
tactile experience. It's hard to explain, but when you wax
your wood it's just nicer to touch. |
|
| December 16, 2009 | |
   |
|
|
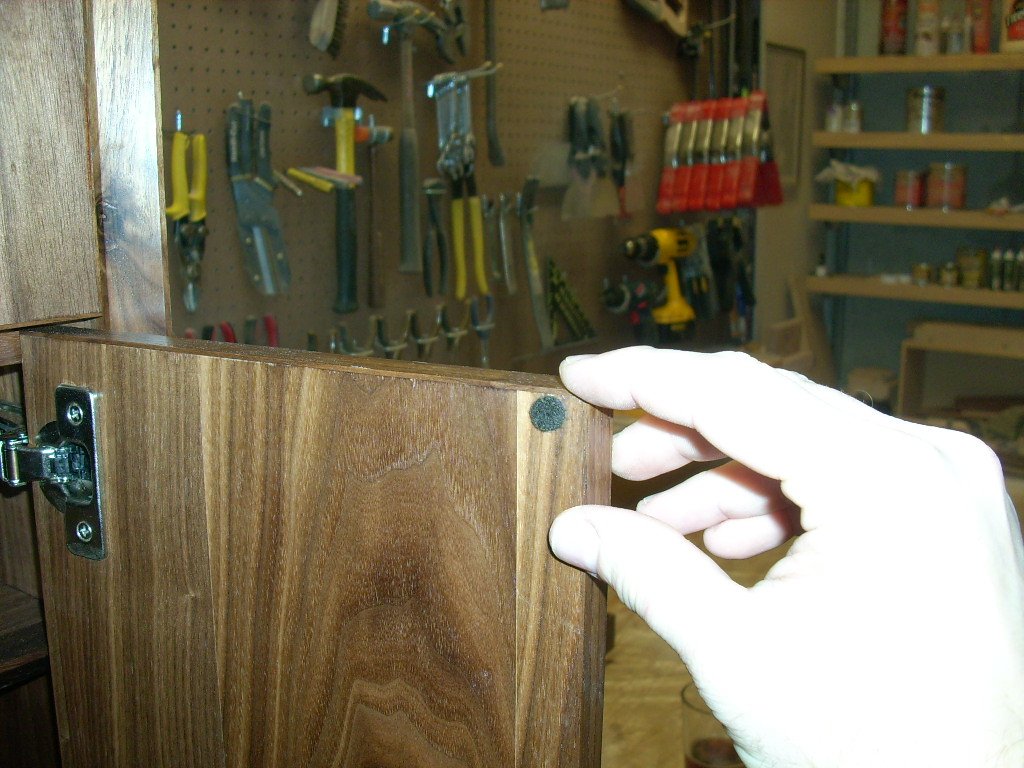
Final assembly! Everything was screwed back together.
The hinges were installed and I made a final tweak of the
door/drawer alignment. Other finishing touches were added like
felt bumpers on the moving parts. The pull hardware was laid
out and installed. |
|
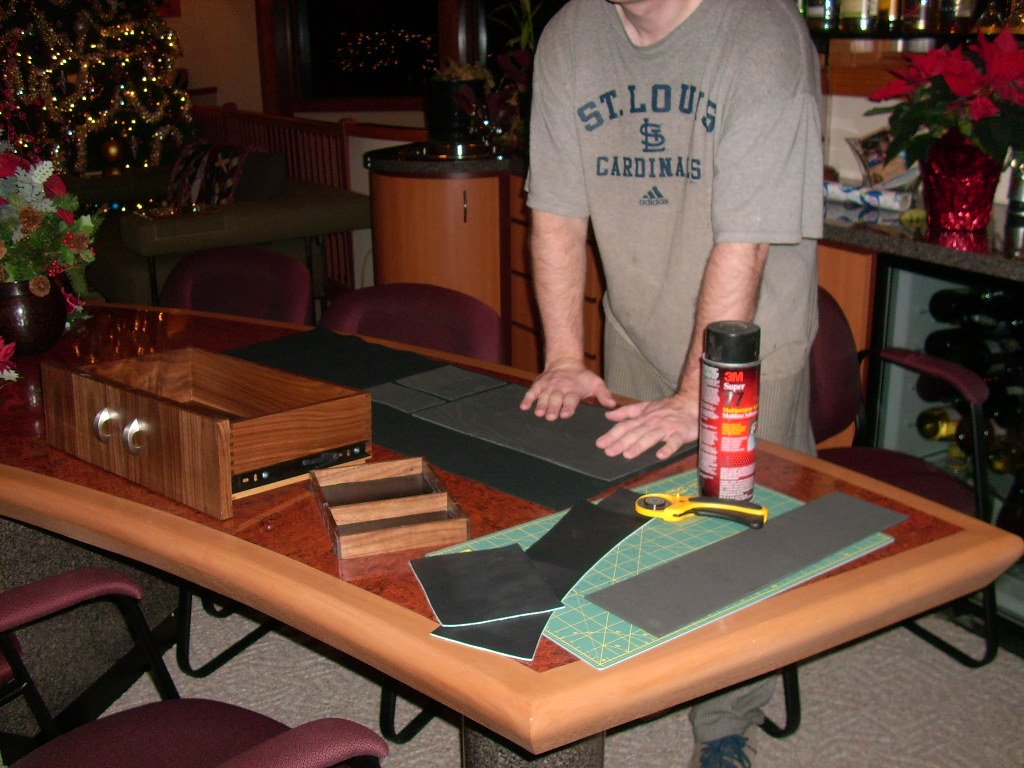  This
is a quality, custom piece. I will not send it out unless the
drawer compartments are lined. 1/8" thick foam padding was cut to
fit then glued onto a piece of leather. Once the glue has set,
the pieces will be cut from the leather and precisely fit into their
individual compartments. This
is a quality, custom piece. I will not send it out unless the
drawer compartments are lined. 1/8" thick foam padding was cut to
fit then glued onto a piece of leather. Once the glue has set,
the pieces will be cut from the leather and precisely fit into their
individual compartments. |
|
| December 17, 2009 | |
|
Done! Mark had a particular function in mind for this piece and a spot reserved in his Dining Room in which it was to reside. The cabinet he needed was not offered at the furniture store; thus, going with a custom piece was the way to go. Mark presented me with some design ideas and sketches including some critical dimensions. We discussed the materials and other design possibilities. I prepared construction documents for the cabinet which he could then double-check to verify that all of his considerations were included. Mark wanted to be involved with the construction of the piece, so he went with me to personally select his own wood and he could periodically peruse this web page and follow the build process from start to finish. Having a custom piece made for you allows this individual involvement. Now please enjoy a quick tour of the finished product. Remember, beauty is in the details; click on the photos to see them in a larger size. |
|
  The
piece is primarily made from walnut. It is modestly sized, but
was designed to fit perfectly where it was intended. Your eye
is immediately drawn to the top. The curly grain of the wood
offers an interesting depth (almost three dimensional) and the
quilted, spalted maple inlay adds some pop. Also notice how
the grain flows continuously across the face of the drawers and
doors. The
piece is primarily made from walnut. It is modestly sized, but
was designed to fit perfectly where it was intended. Your eye
is immediately drawn to the top. The curly grain of the wood
offers an interesting depth (almost three dimensional) and the
quilted, spalted maple inlay adds some pop. Also notice how
the grain flows continuously across the face of the drawers and
doors. |
|
 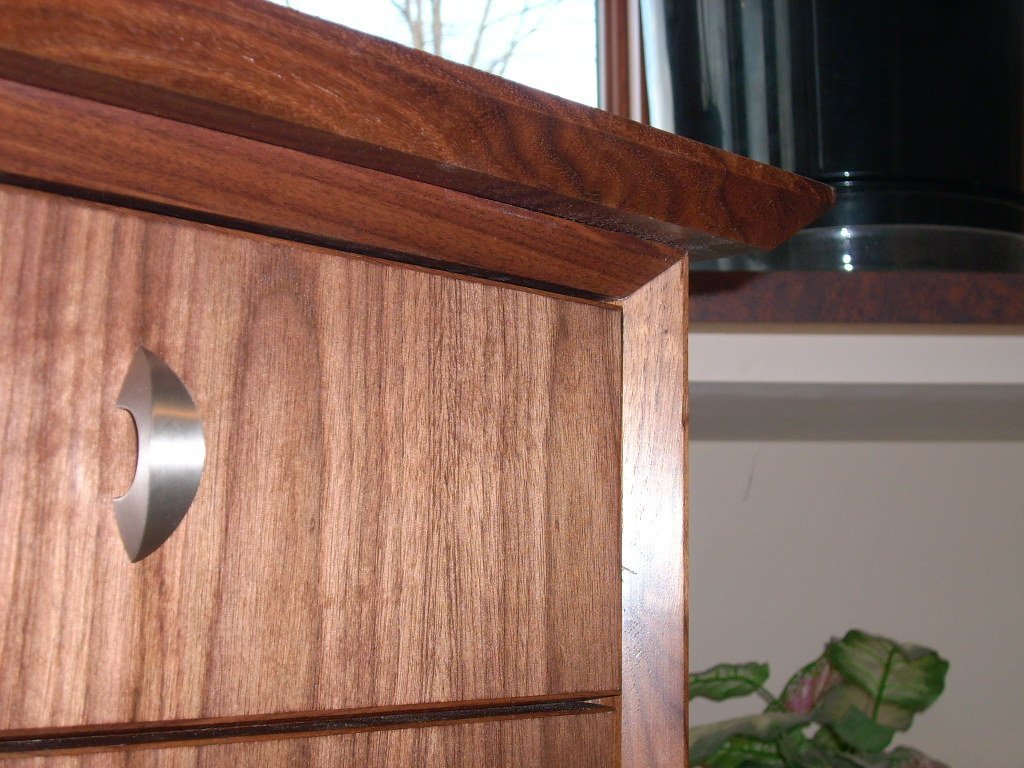 The
beveled design on the edges coordinates with other furniture already
in place. Mark personally selected the brushed stainless steel
pulls. The apron and base were made from wenge wood from
Africa. The darker tone lends visual contrast. The
beveled design on the edges coordinates with other furniture already
in place. Mark personally selected the brushed stainless steel
pulls. The apron and base were made from wenge wood from
Africa. The darker tone lends visual contrast. |
|
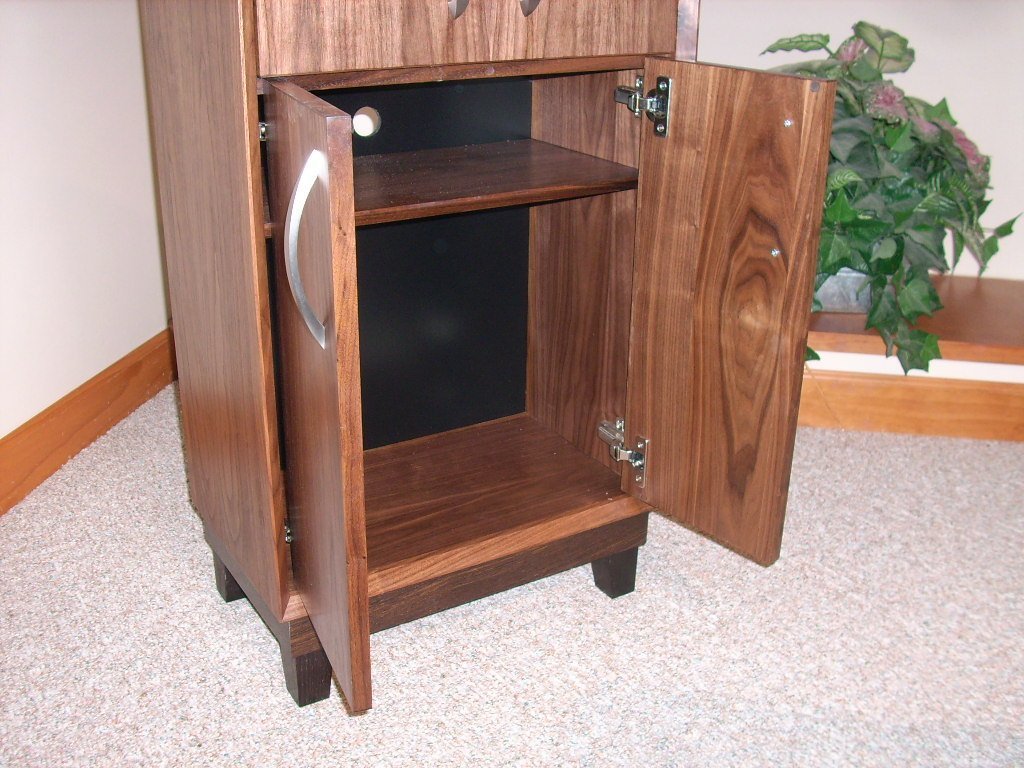 Upon
opening the doors, you will immediately feel the quality.
These hinges are dampened and one can not slam these doors.
Try it and the hinges will stop the door several inches out and
gently pull them into their final resting place. The shelf
will provide storage for small electronics and the hole in the rear
will allow for the associated cords. The lower cabinet area
was designed specifically to fit a bottle of Milagro Silver Tequila,
and I'm sure it will be kept company by a few other carefully
selected spirits. Upon
opening the doors, you will immediately feel the quality.
These hinges are dampened and one can not slam these doors.
Try it and the hinges will stop the door several inches out and
gently pull them into their final resting place. The shelf
will provide storage for small electronics and the hole in the rear
will allow for the associated cords. The lower cabinet area
was designed specifically to fit a bottle of Milagro Silver Tequila,
and I'm sure it will be kept company by a few other carefully
selected spirits. |
|
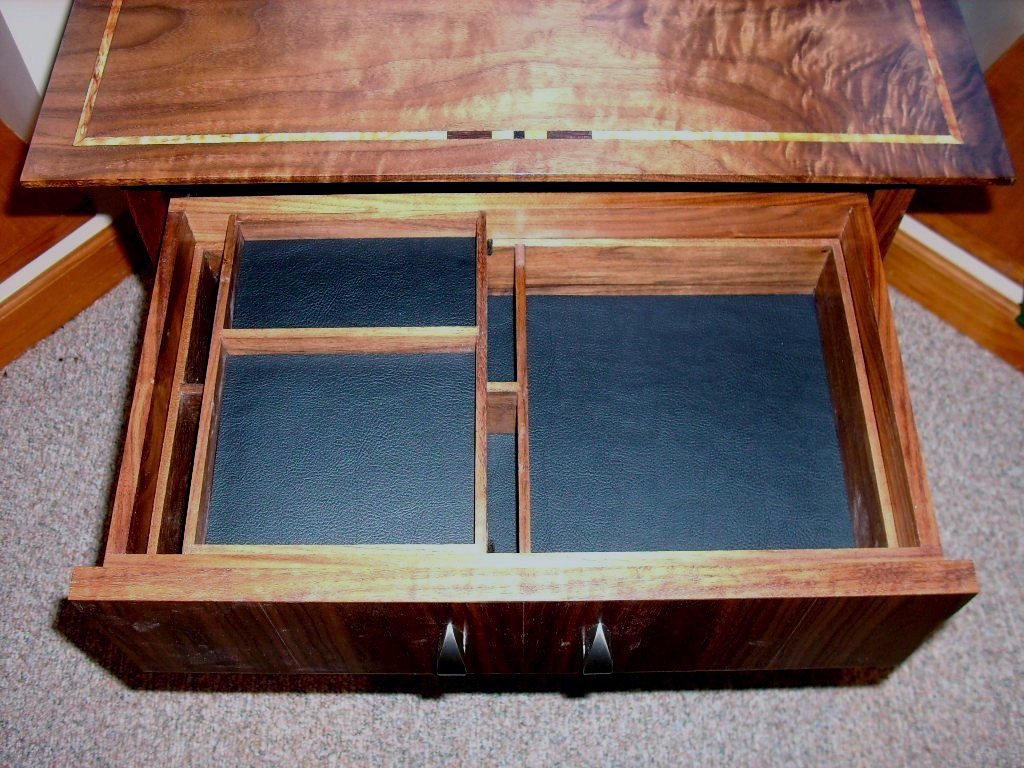  Open
the drawer and again feel the quality. Over-extension,
ball-bearing drawer slides operate smoothly and allow complete
access to the entire drawer. The box joint corner construction
is incredibly strong and will never fail. The interior of the
drawer is subdivided and a sliding tray above offers even more
organizational possibilities. All the compartments are lined
with padded leather. Open
the drawer and again feel the quality. Over-extension,
ball-bearing drawer slides operate smoothly and allow complete
access to the entire drawer. The box joint corner construction
is incredibly strong and will never fail. The interior of the
drawer is subdivided and a sliding tray above offers even more
organizational possibilities. All the compartments are lined
with padded leather. |
|
| I'm confident that Mark will enjoy this piece of furniture for many years to come, and he can rest assured that if there ever is a problem of any kind, it will be covered by a lifetime guarantee - period; no fine print nor disclaimers here. | |


