 |
|
| Beauty is in the details. Click on the photos to see them in a larger size. Use your browser's "Back" button to return. | |
| January 29, 2011 | |
 Welcome,
Gay! Welcome,
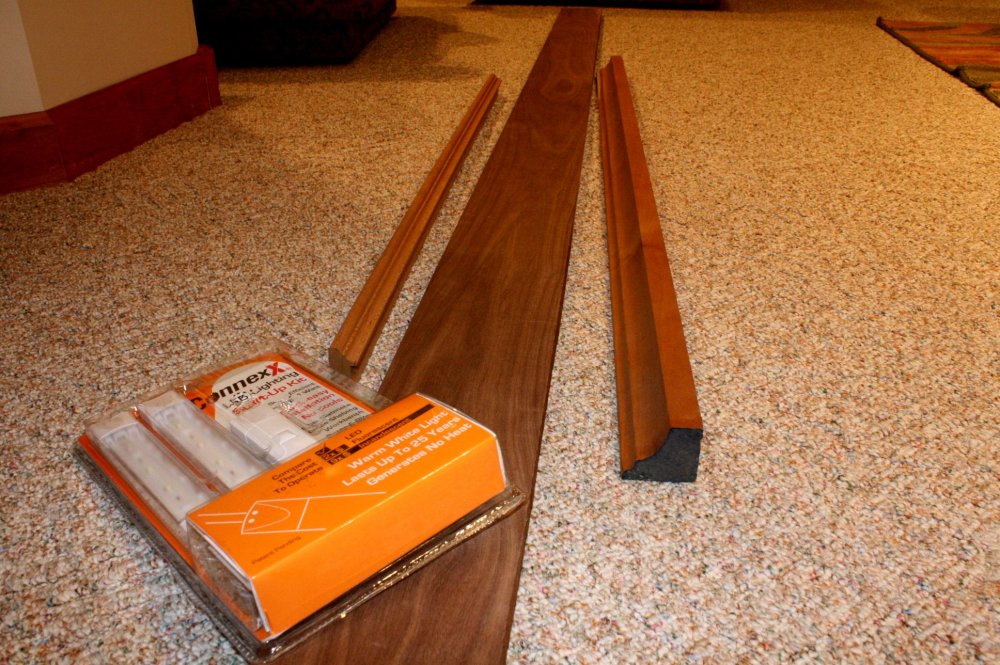
Gay!Your new memorial is going to look great. What an awesome way to remember a dear friend. I selected your wood and picked up your LED lights today. I picked some walnut for the frame's "box" which is a very dark brown, and I found some cherry for the trim, which should come close to your existing color scheme. The construction of your piece won't take but a couple-three weeks, but I'll keep you posted on the progress here with photos. Feel free to share this link with any of your friends or family who might be interested. |
|
| February 1, 2011 | |
   |
|
|
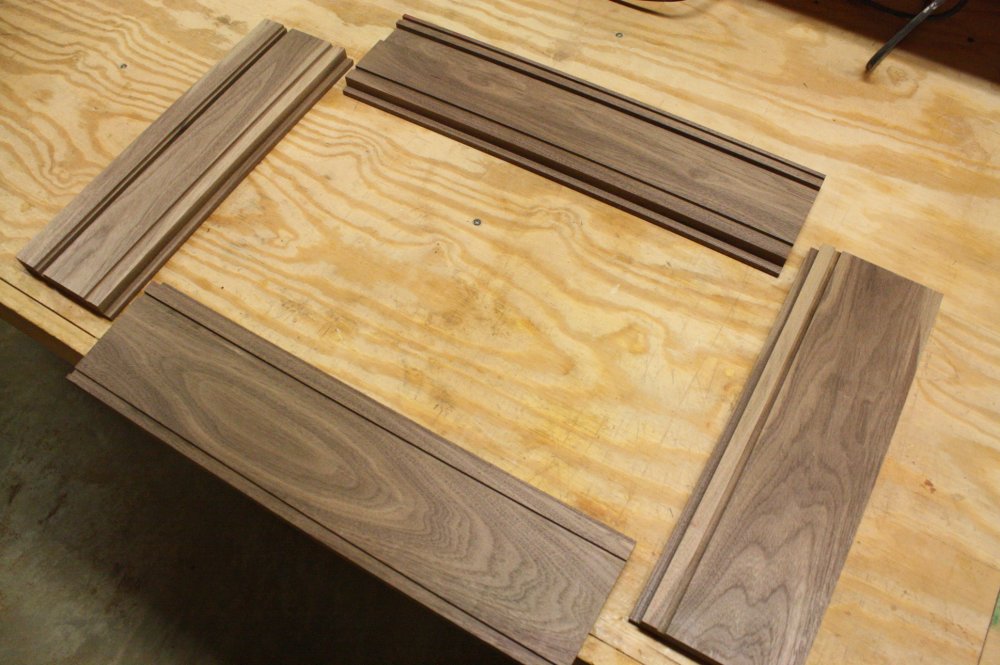
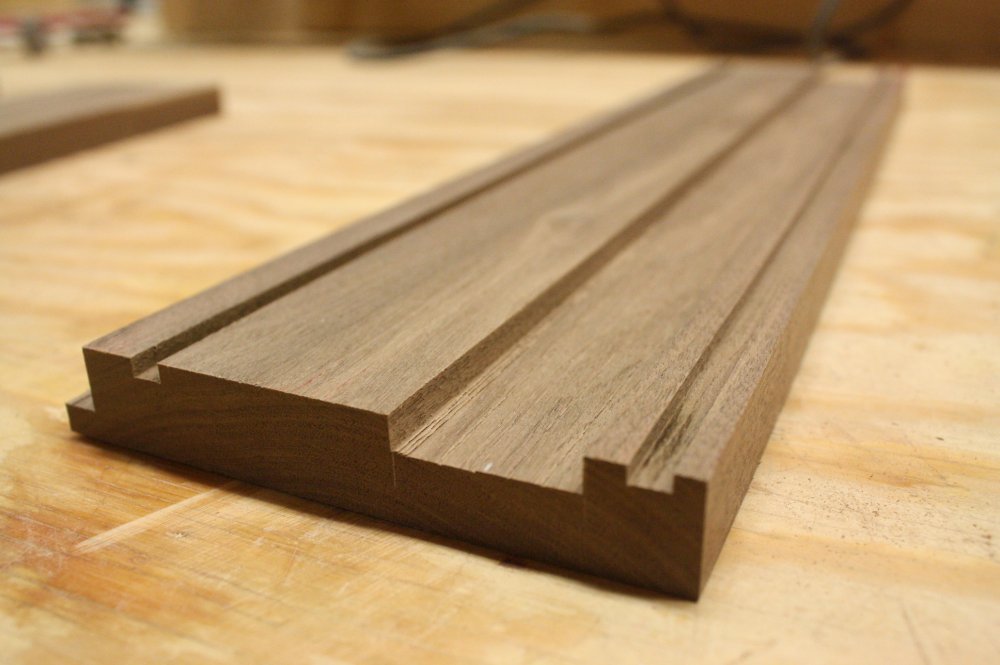
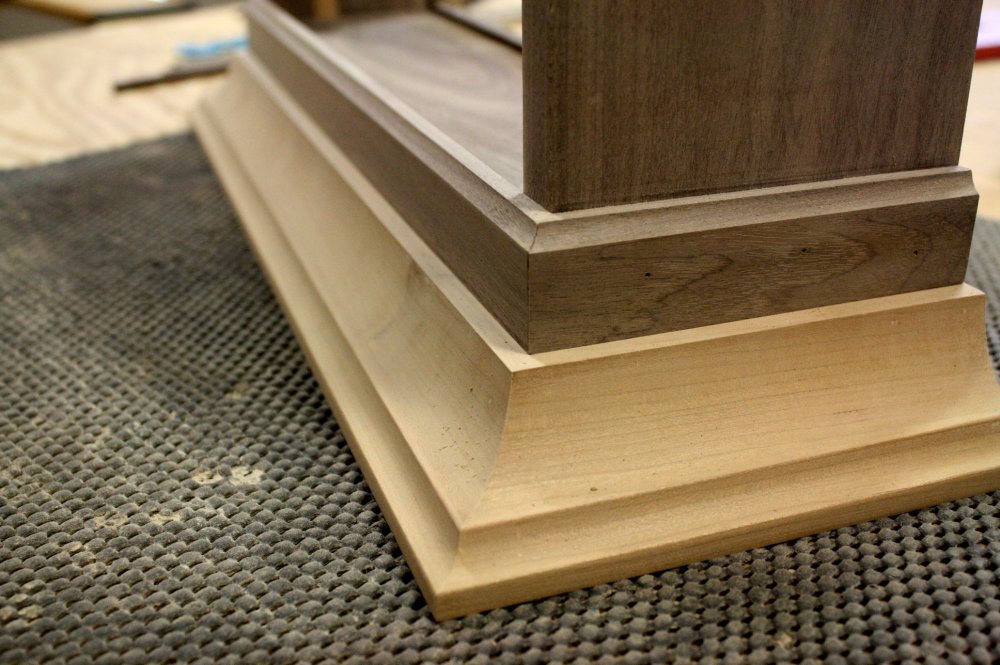
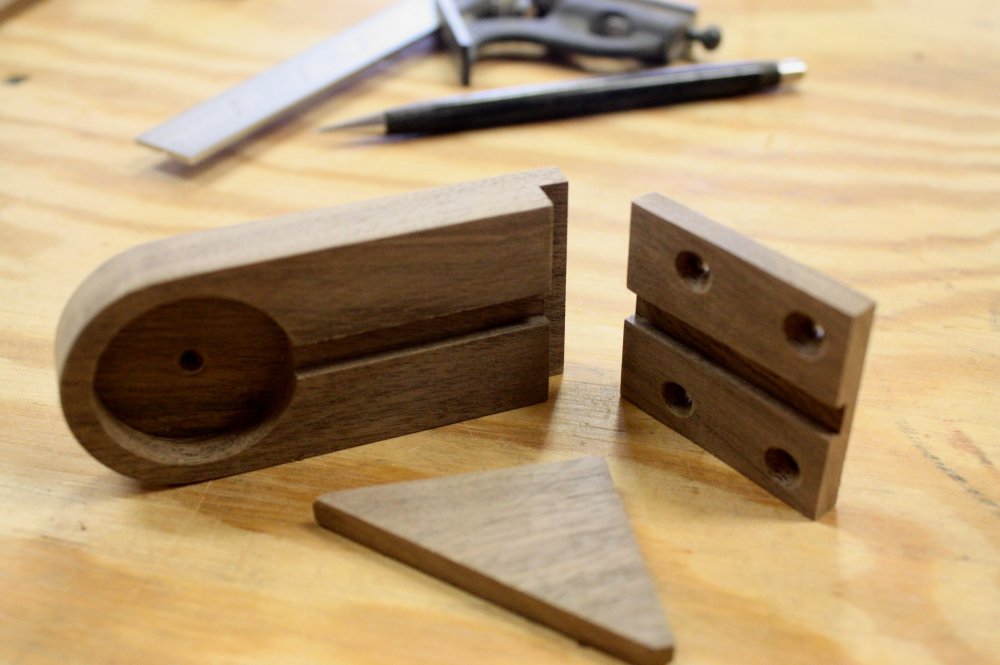
Snow Day! I stayed home from work today so I could, well,
work. But that means lots of progress for you. Each
frame piece of the shadow box gets some grooves cut into it (check
out the plan I sent you if you want to follow along). These
grooves will hold little pieces of wood called "stops" which will
give your photos and glass something to "stop" them from falling out
the front, something to rest against. In the middle photo, you
can see a large groove in the top frame into which the light strip
will recess. It will give you that glow where you won't be
able to see the actual bulb (unless you lay on the floor and look up
at it). When everything was ready, I spread on some glue and
clamped it up. |
|
 Then
I moved down to the base, which looks a little weird in the photo
because it's upside down. The base will house the transformer
for the LED lighting. The little "carriage" which is getting
clamped up here, will allow me to slide in the transformer later.
Since the transformer has an integral switch on it, I drilled a hole
in the back of the base so you can reach it with
your finger (look closely; you can click on any photo for a larger
view) . Don't worry, the bottom will get covered up. Then
I moved down to the base, which looks a little weird in the photo
because it's upside down. The base will house the transformer
for the LED lighting. The little "carriage" which is getting
clamped up here, will allow me to slide in the transformer later.
Since the transformer has an integral switch on it, I drilled a hole
in the back of the base so you can reach it with
your finger (look closely; you can click on any photo for a larger
view) . Don't worry, the bottom will get covered up. |
|
| February 4, 2011 | |
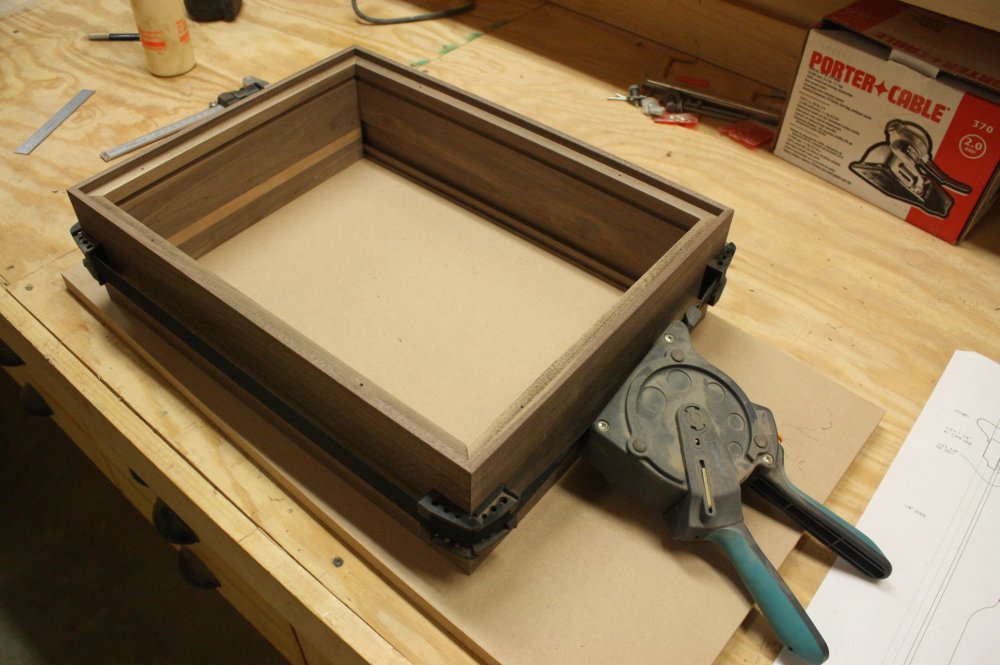
 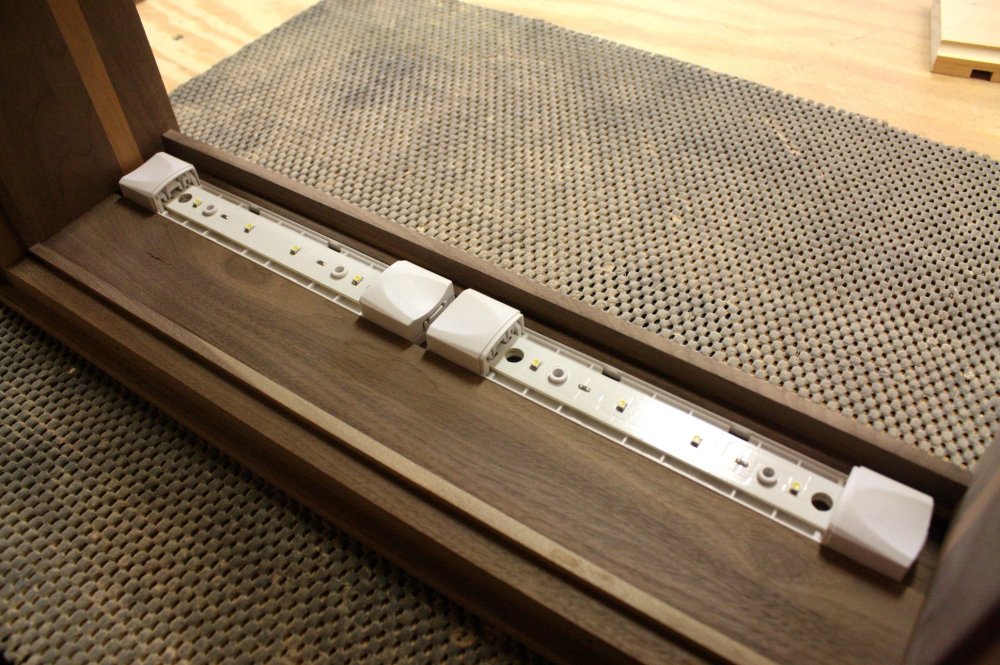 Everything
has to be pre-installed then taken back out before applying the
finish. You don't want to find out something doesn't fit after
you've got it all stained up and pretty. With careful design
and planning, the lights went in perfectly. Everything
has to be pre-installed then taken back out before applying the
finish. You don't want to find out something doesn't fit after
you've got it all stained up and pretty. With careful design
and planning, the lights went in perfectly.Notice that the stops are in place now. Where we cut the grooves earlier, little strips of wood were glued in and sit proud of the surface. The one in the rear of the photo will hold the front glass, and the one nearest in the photo will hold your glass, matt, and photos. Keep in mind you're look at this thing upside-down and through the back. The shadow box frame also found its permanent resting place on top of the base. I think the walnut and cherry woods make a nice contrast and will make an attractive composition. Things will darken up a bit when the finish is applied. |
|
| February 6, 2011 | |
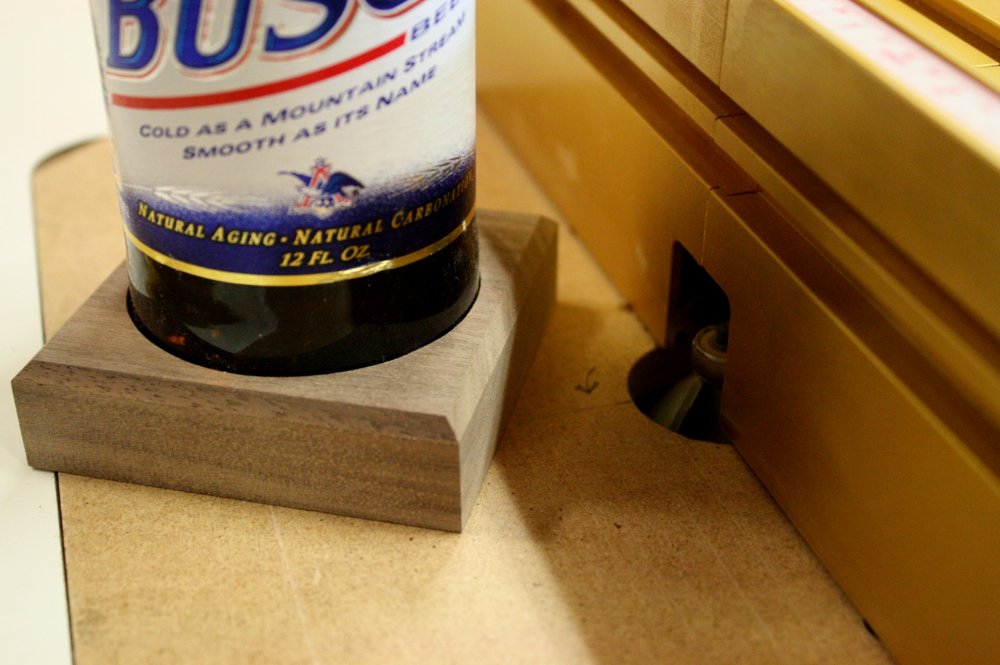  Don't
you ever wish that you could just walk into Walmart and buy a beer
bottle display stand? I didn't think so. The bottle
needs to be secured so it doesn't flop around inside the box, so we
need top and bottom supports. They also don't make huge, weird
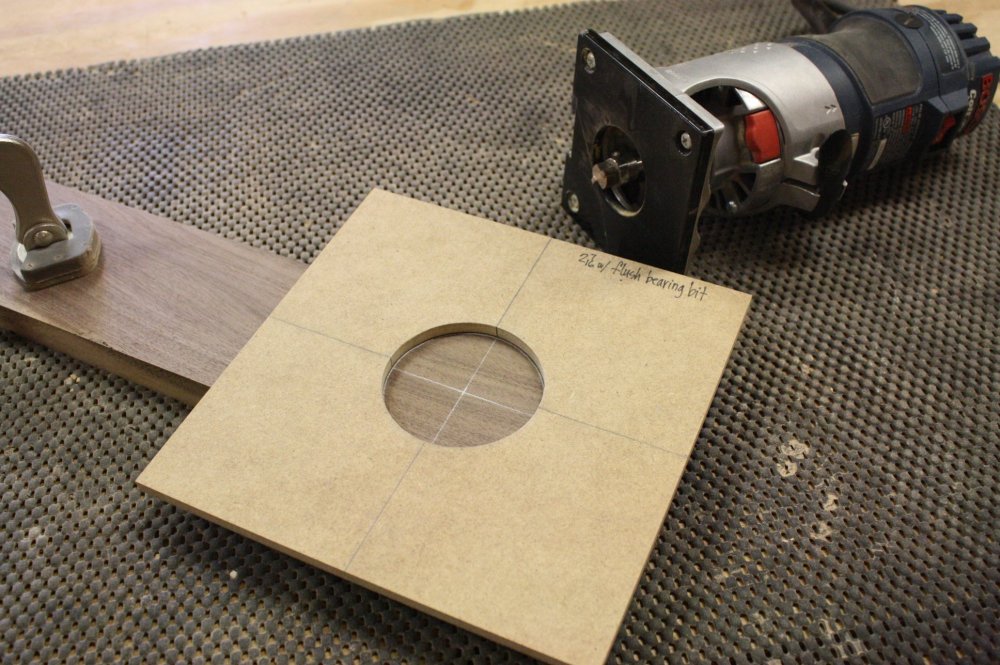
sized drill bits. For a perfect fit, I made a template and
carved out a recess with a router. After I cut the block to
size, I chamfered the edges to make it look pretty. Don't
you ever wish that you could just walk into Walmart and buy a beer
bottle display stand? I didn't think so. The bottle
needs to be secured so it doesn't flop around inside the box, so we
need top and bottom supports. They also don't make huge, weird
sized drill bits. For a perfect fit, I made a template and
carved out a recess with a router. After I cut the block to
size, I chamfered the edges to make it look pretty. |
|
  Beauty
is in the details, and I was sweating this detail out. Big
power tools and small, intricate joinery are a tough mix. But
now you can shake the shadow box to your heart's content and that
bottle ain't going anywhere. Just don't shake it too much;
there is still beer in the bottle. Beauty
is in the details, and I was sweating this detail out. Big
power tools and small, intricate joinery are a tough mix. But
now you can shake the shadow box to your heart's content and that
bottle ain't going anywhere. Just don't shake it too much;
there is still beer in the bottle. |
|
| February 10, 2011 | |
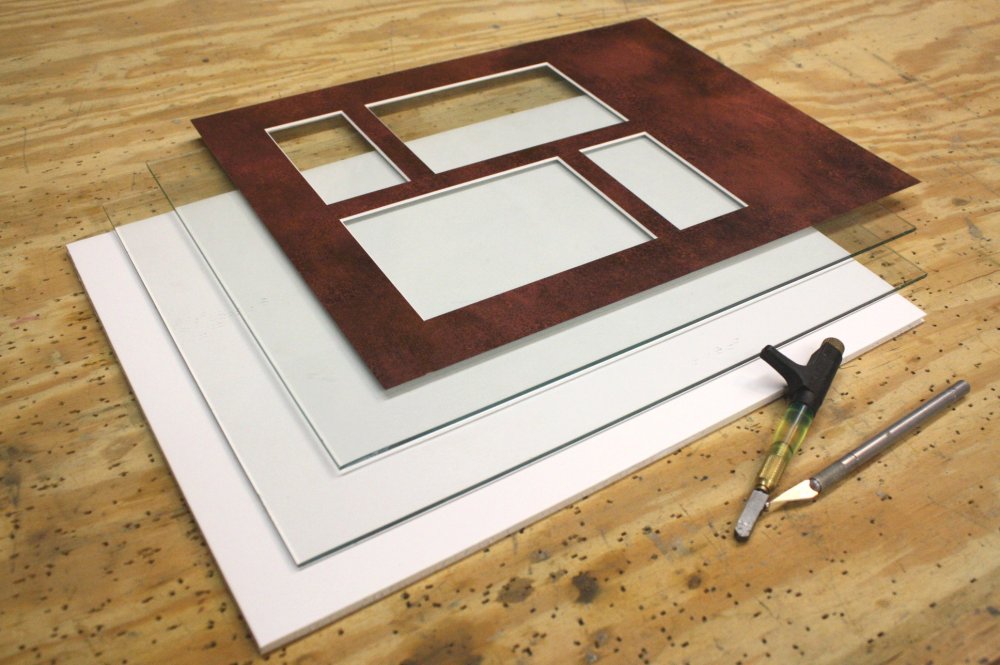 This
week I'm applying one coat of linseed oil and three coats of
polyurethane to the piece. I'm not going to show you any
photos of that since I don't want to spoil the surprise. While
I'm waiting for the poly to dry, I cut up the glass and mat board
which will frame your photos and cards. The wider area on the
right will be the backdrop for the bottle. This
week I'm applying one coat of linseed oil and three coats of
polyurethane to the piece. I'm not going to show you any
photos of that since I don't want to spoil the surprise. While
I'm waiting for the poly to dry, I cut up the glass and mat board
which will frame your photos and cards. The wider area on the
right will be the backdrop for the bottle. |
|
| February 12, 2011 | |
   |
|
|
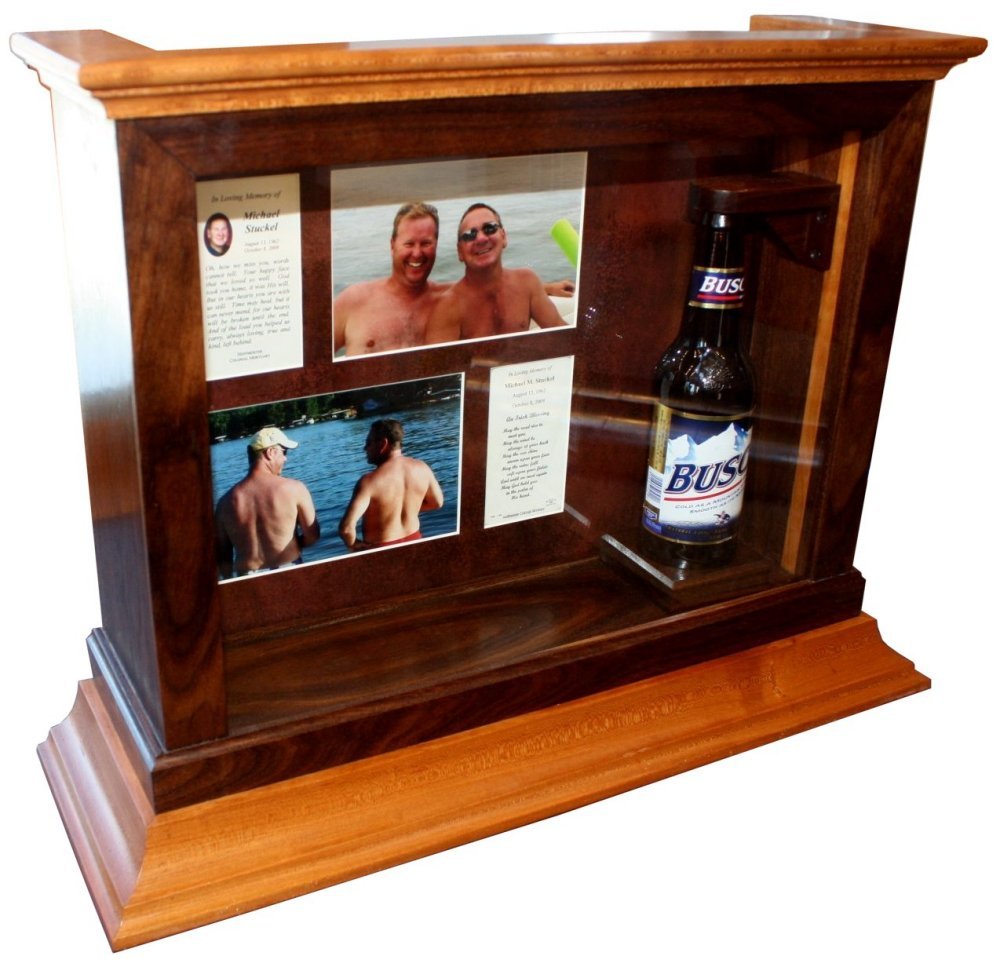
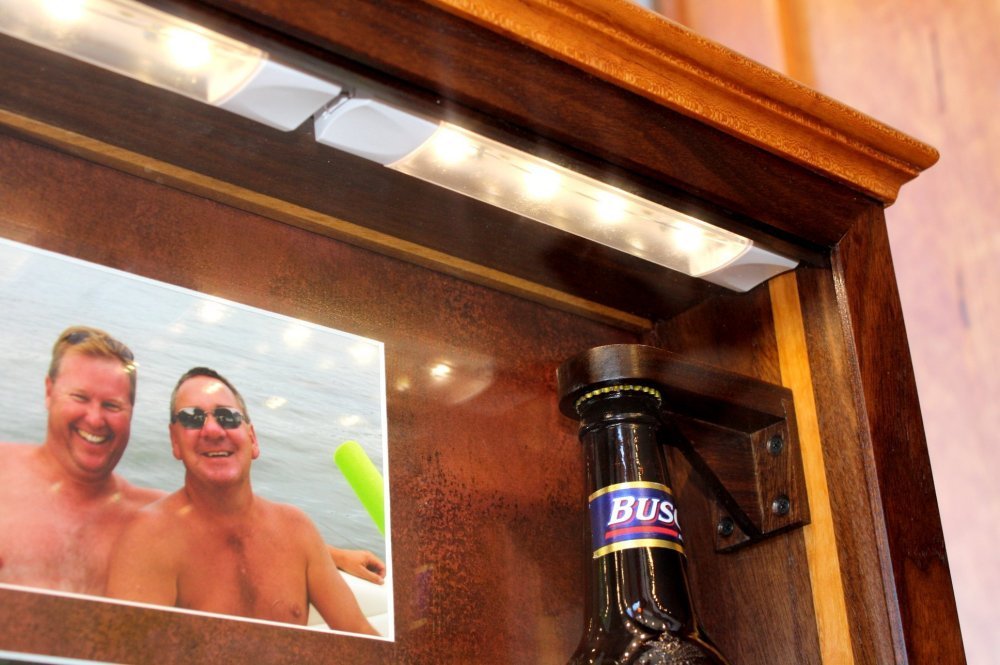
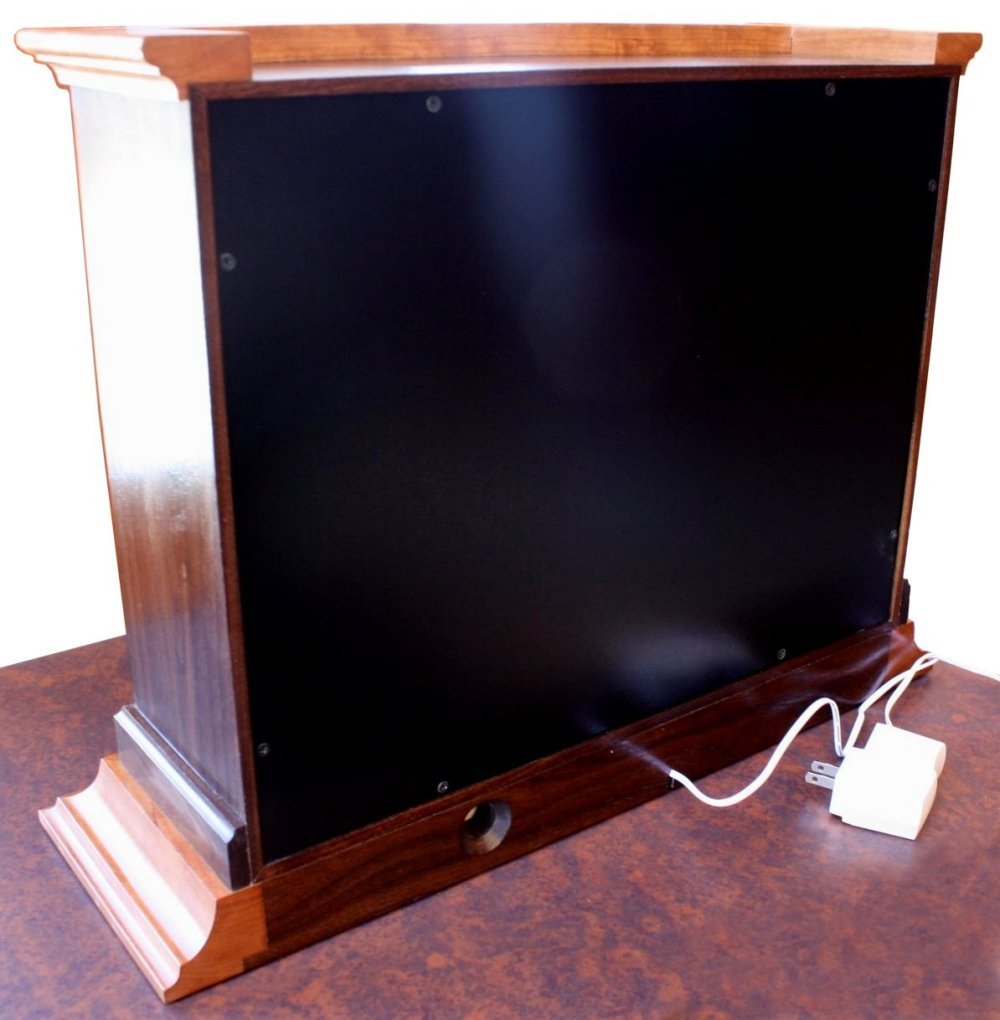
Wow! It all came together great! The lights are an
excellent touch; I'm glad we added them. Everything inside is
protected by a glass front. The beer bottle is secured with a
custom-made stand and bracket. The lighting is recessed into
the top creating a warm glow. The back is sealed up, but it is
removable in case you want to swap out photos or add another
personal object that will make you smile. The lighting control
box and switch are located in the base, which also is accessible.
You can store the electric cord and plug in the base if you want. I hope this memorial will help recall fond memories of your friend every time you share a beer with him. And please rest assured that all of my work carries a lifetime warranty. |
|


