 |
|
| Beauty is in the details. Click on the photos to see them in a larger size. Use your browser's "Back" button to return. | |
| March 2, 2013 | |
 Welcome,
Brian & Diane! Welcome,
Brian & Diane!Brian and Diane already know what they're getting, but for the rest of you, here's a brief run-down. Their house was built a few years ago, but they felt they needed a little more of a focal point in the space. Between the windows, they're having stone installed to match the outside of the house to tie everything together. Then they asked me to provide a new mantel! The TV is no longer going to occur at this location. However, since the TV cables are already there, I will include hook-ups within the mantel just in case someone down the line wants to reinstall it. I'll be working from their architect's design which has a Prairie School flair to it, right up my alley. This should be a fun project to put together. I'll post here periodically so please check back. |
|
| March 8, 2013 | |
 The
mantel will hang from a wood bracket mounted to the wall. This
will go up before the stone is installed and screwed to the wood
studs within the wall. Since there will be a couple of inches
of stone going on, the bracket needs to be pretty thick to extend
out past it. The
mantel will hang from a wood bracket mounted to the wall. This
will go up before the stone is installed and screwed to the wood
studs within the wall. Since there will be a couple of inches
of stone going on, the bracket needs to be pretty thick to extend
out past it.This photo shows a couple slabs of poplar wood being glued together. This will then be cut on the table saw to the appropriate profile so later I can easily attach the mantel to it. This will all be neatly tucked away inside the mantel when everything's done. |
|
| March 16, 2013 | |
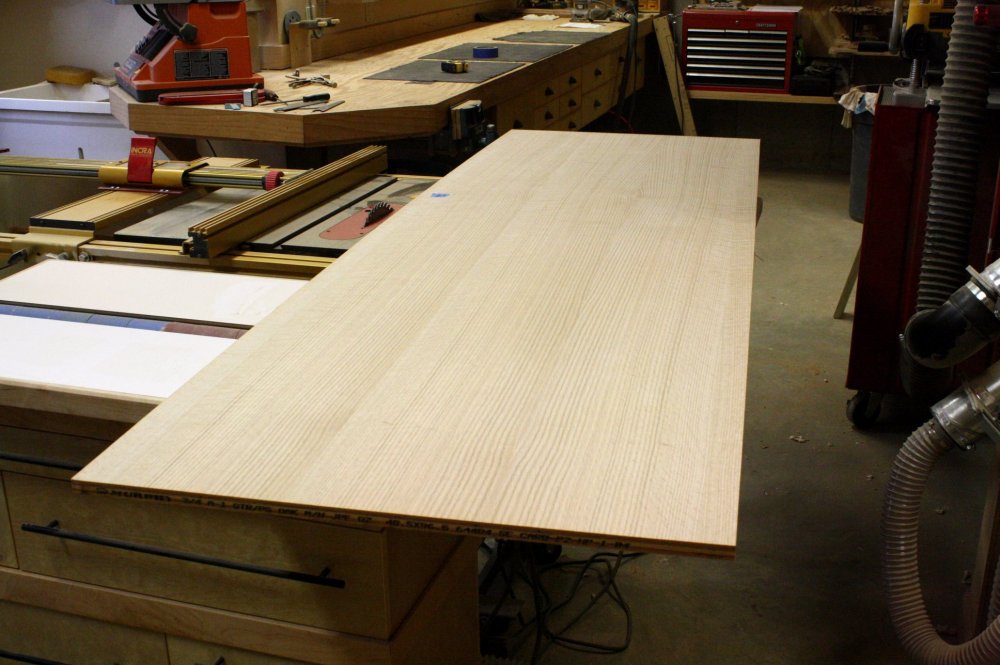  I
bought the wood today! The palette will be predominately red
oak to match the existing hardwood flooring. The wood store
had some nice red oak which was "quartersawn." This means that
it will have nice straight lines and some additional figuring which
occurs when the wood is cut perpendicular to the grain.
There's a little premium to the price, but this will be something
hanging on the wall at eye level and it's asking me to be made
special. I also picked up some cherry wood for the banding and
trim pieces. Everything will be stained to coordinate with the
existing flooring. I
bought the wood today! The palette will be predominately red
oak to match the existing hardwood flooring. The wood store
had some nice red oak which was "quartersawn." This means that
it will have nice straight lines and some additional figuring which
occurs when the wood is cut perpendicular to the grain.
There's a little premium to the price, but this will be something
hanging on the wall at eye level and it's asking me to be made
special. I also picked up some cherry wood for the banding and
trim pieces. Everything will be stained to coordinate with the
existing flooring. |
|
| March 18, 2013 | |
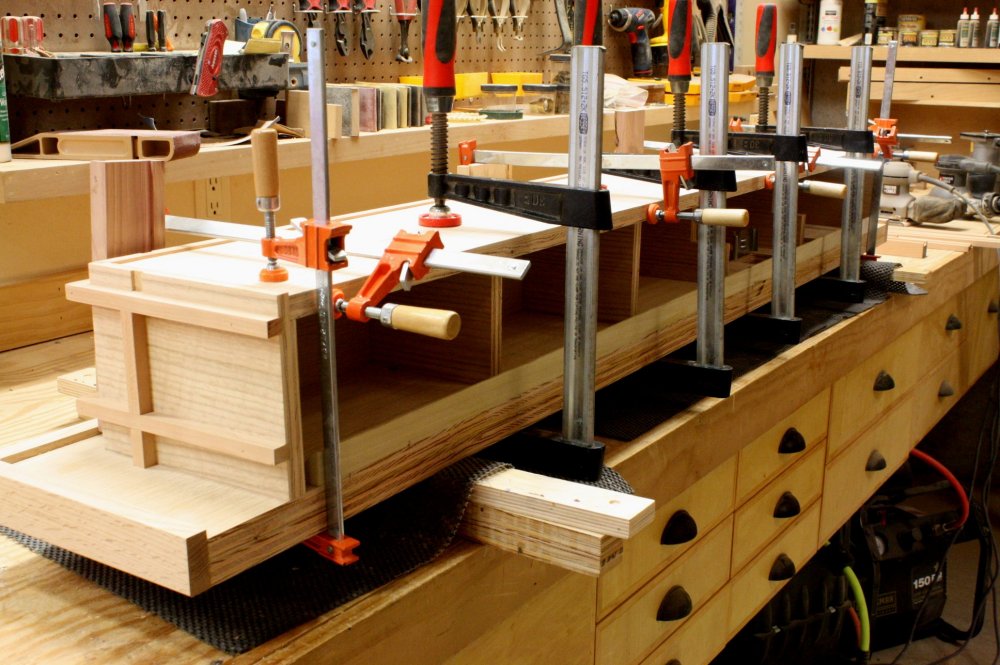
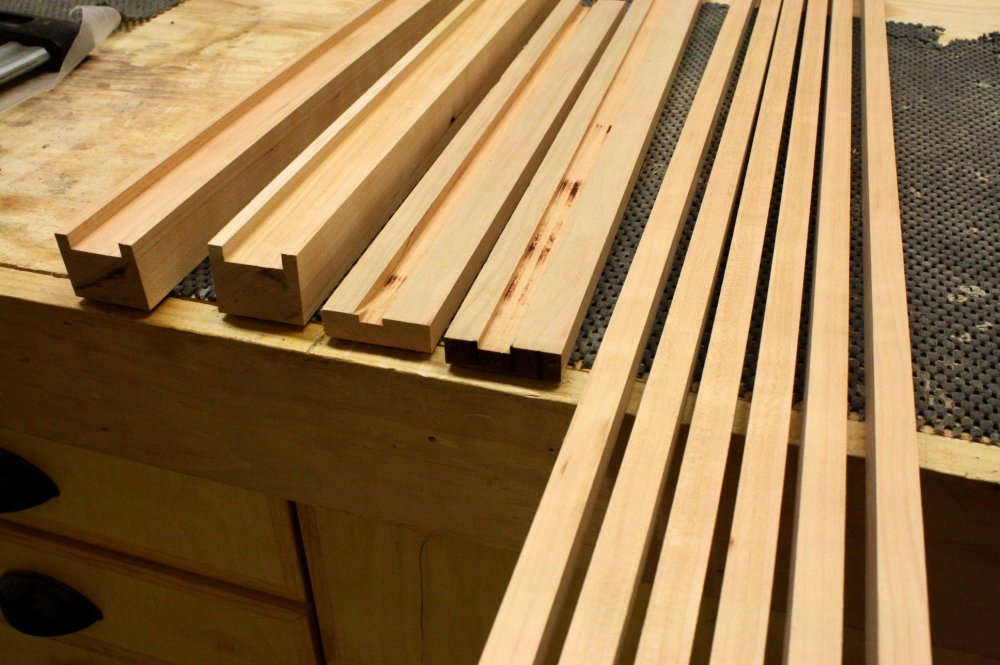 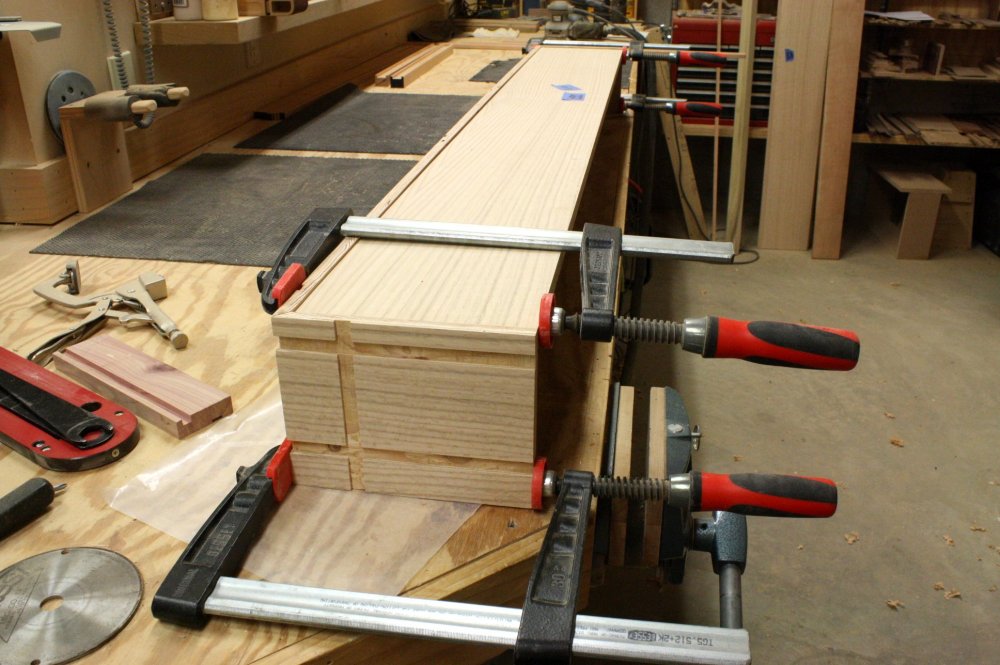 I
had a little time between a couple other projects to get a start on
things. The mantel "case" was glued up (it's upside-down and
backwards in the left photo). The banding you see in the right
photo will fit into those grooves you see on the case. There's
a few other trim pieces shown which will eventually find their way
into the mix. I
had a little time between a couple other projects to get a start on
things. The mantel "case" was glued up (it's upside-down and
backwards in the left photo). The banding you see in the right
photo will fit into those grooves you see on the case. There's
a few other trim pieces shown which will eventually find their way
into the mix. |
|
| March 24, 2013 | |
   |
|
|
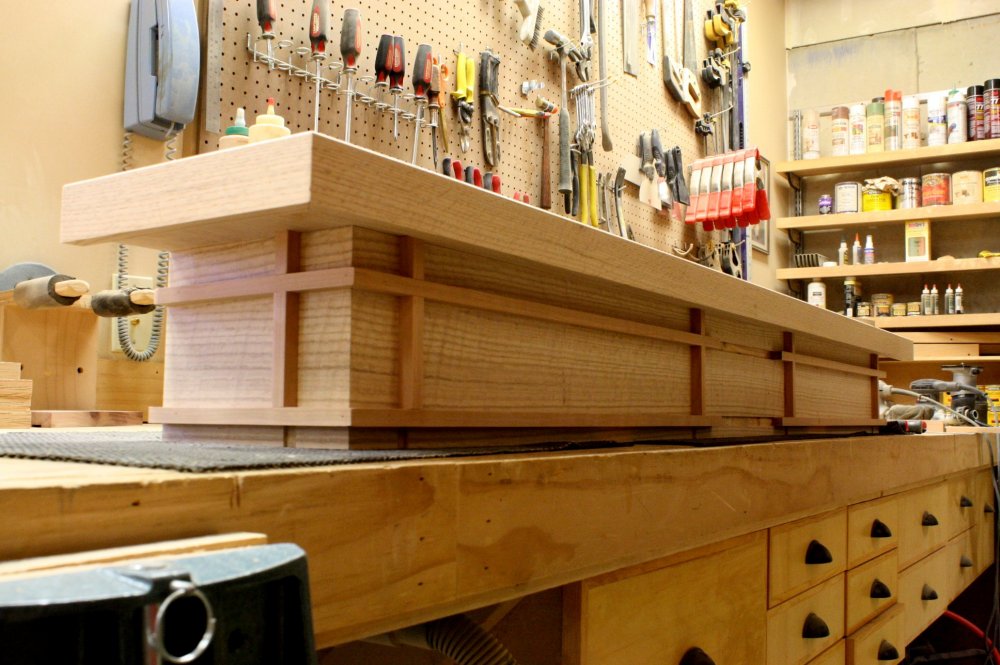
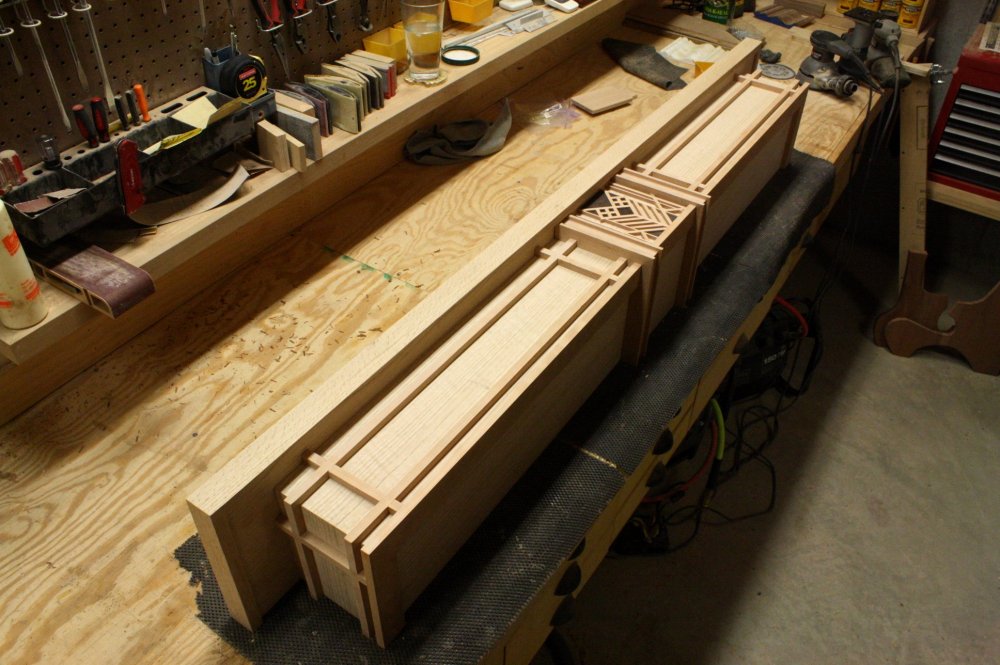
The top went on last week. It's double-thick layers of plywood
so it'll be plenty solid. I nice band went around the outside
of the top to dress things up and hide the plywood edges. Most
of the cherry banding was installed, too. That leaves the
centerpiece left to go, which has a lot of small detail on it. The top has a pretty cool feature. The owners had a TV above the fireplace originally, but were not going to reinstall at this time. The wires are already there, and they didn't want to lose future functionality if they decided to add the TV back. So I recessed the electric outlet and TV wire boxes into the top, and made matching wood covers to cover the boxes. Everything on the top is nice, level, and coordinated. If a TV is added later, just loosen up a couple screws and you're good to go. The last photo in the series above shows the bottom being glued on. If you click on the photo to blow it up, you'll see the hanging cleat and a lot of internal structural ribs. Rest assured that when this thing goes on the wall, it ain't coming back down. |
|
| April 1, 2013 | |
   |
|
|
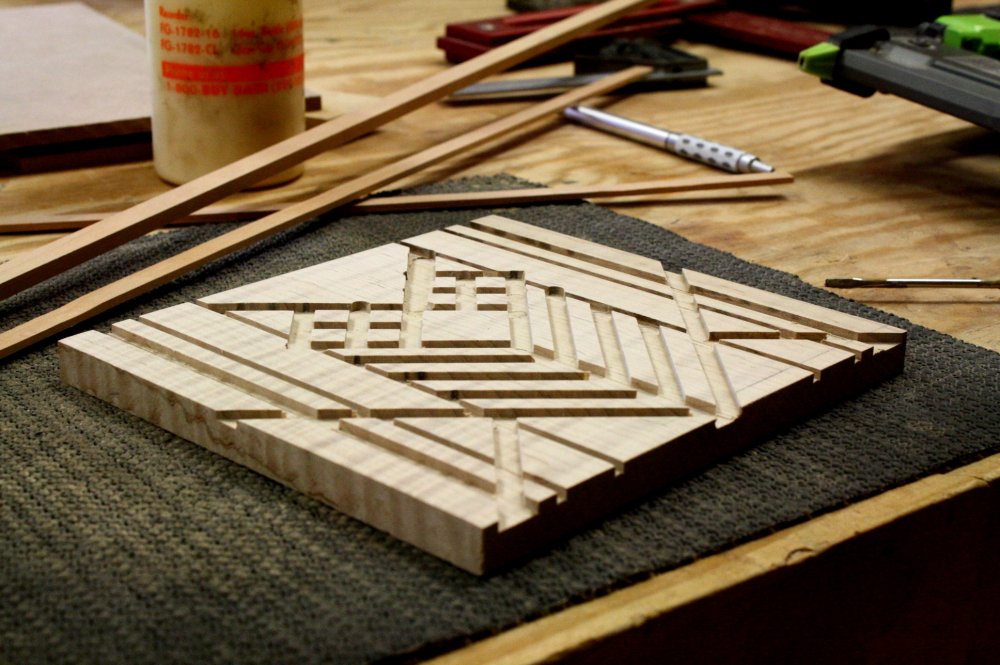
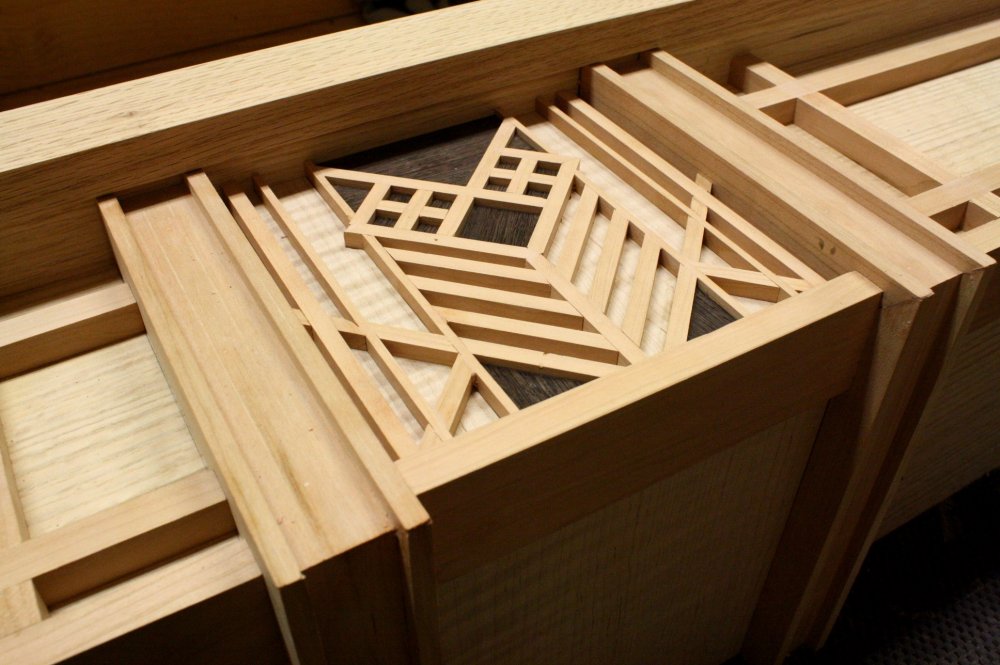
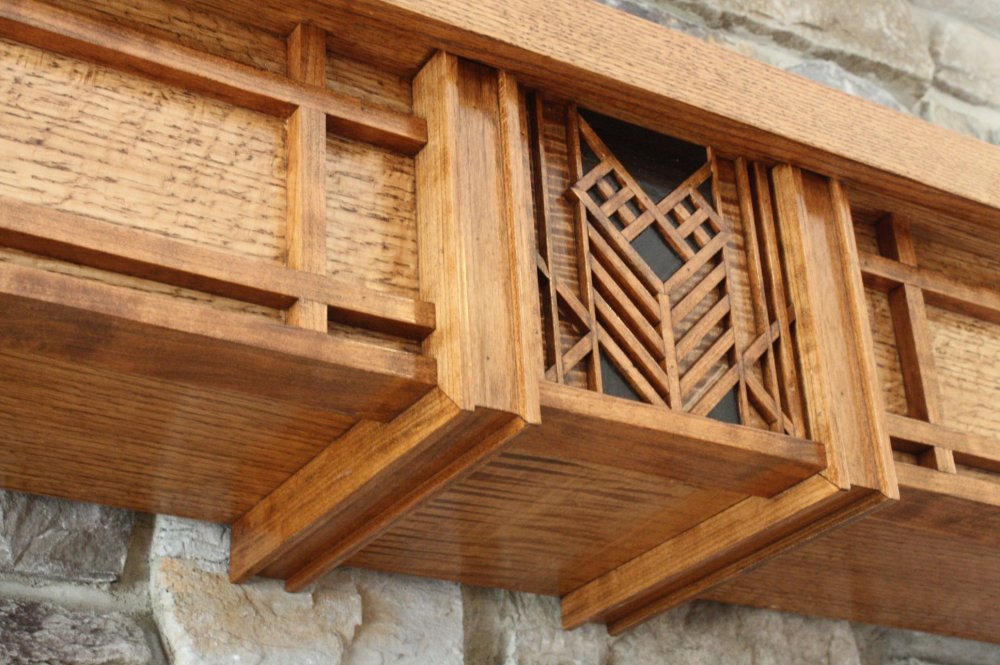
The architect designed a very intricate design for the centerpiece
on the front of the mantel. Those little tiny toothpicks of
wood don't want to stay where you put them. When you apply the
glue, they just want to slide around all over the place. It's
a little better connection to actually route out shallow grooves in
the back plate, then cut, fit, and glue the short segments of wood
making up the design. They kinda press-fit into the grooves
and hold themselves until the glue dries. The centerpiece is rather striking. I used a curly maple back plate, the lines are done in cherry, then I added a few darker wenge wood insets to give it more of a three-dimensional quality. The whole mantel will receive a coat of stain to match the home's existing hardwood floors. |
|
| April 7, 2013 | |
 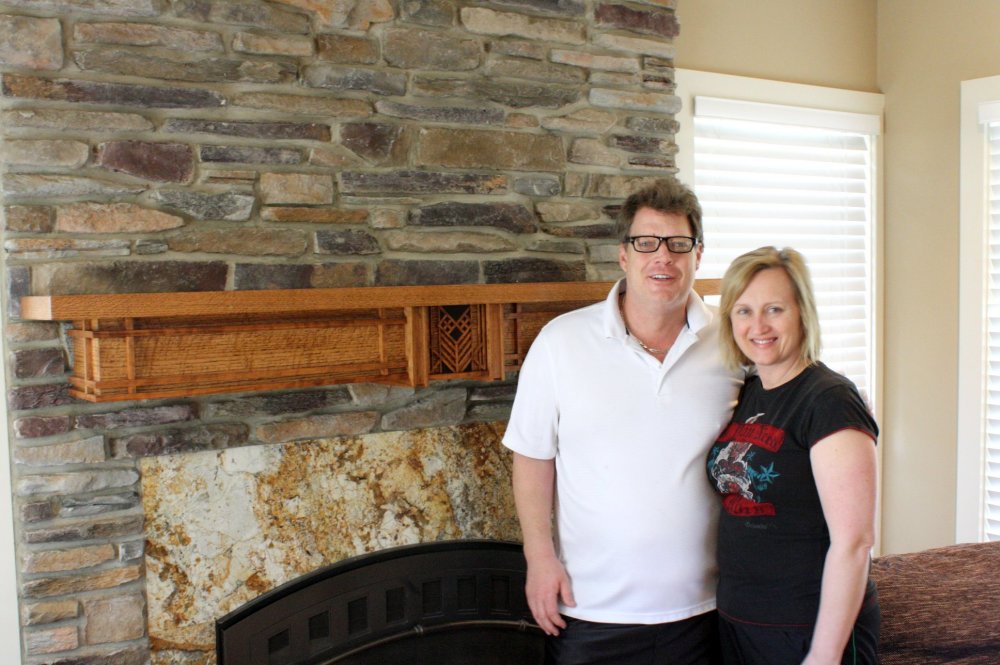 Installation
day! With all the prep work and coordination with the stoners,
the mantel went up without a hitch. The whole ensemble really
lends some texture to the space. Scroll back up and see the
"before" photo. Quite a difference. The centerpiece on
the mantel came out great and it provides another level of detail
and interest. Installation
day! With all the prep work and coordination with the stoners,
the mantel went up without a hitch. The whole ensemble really
lends some texture to the space. Scroll back up and see the
"before" photo. Quite a difference. The centerpiece on
the mantel came out great and it provides another level of detail
and interest. |
|


