 |
||
| Beauty is in the details. Click on the photos to see them in a larger size. Use your browser's "Back" button to return. | ||
| April 23, 2014 | ||
Welcome,
Matt!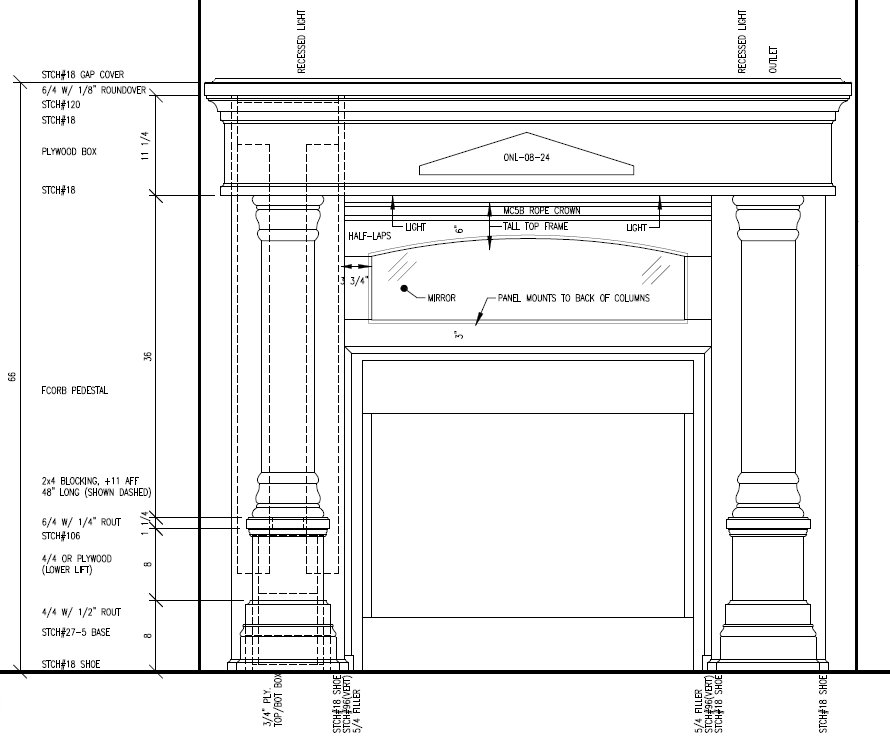 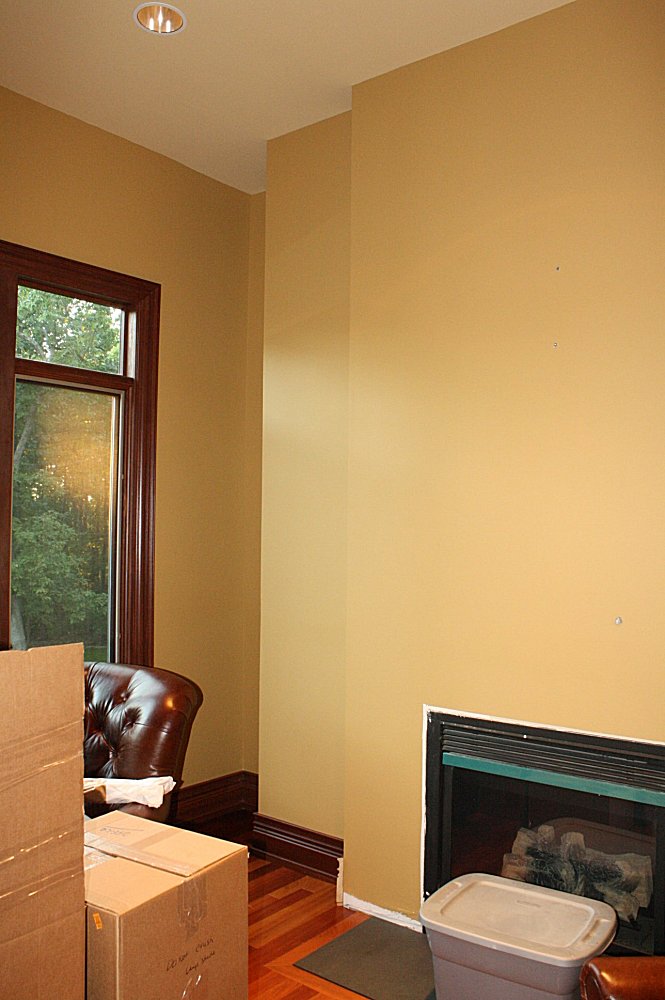 A
while back I did some work at Matt's first house in the city.
When he moved into the new place, he called me up to do some more
projects there. A
while back I did some work at Matt's first house in the city.
When he moved into the new place, he called me up to do some more
projects there.A little back-story: The previous owners moved into a brand new house. For whatever reason, the original builder did not finish a lot of odd jobs and trim work. They lived there for about seven years and never completed that work and the home remained unfinished. When Matt moved in, he created a checklist and started tackling all of those unfinished projects, both large and small. Matt gave me a call to help with some of that work which included round window trim, crown moulding, and kitchen cabinet modifications. Now it's become time to tackle the fireplace in the office. There is absolutely no trim around the existing fireplace, so I have a completely blank slate with which to work. Matt wanted things to be a bit old-school to go with the style of the home, and something with some substance to visually work with the 12 foot tall ceilings. The sketch shows where we're we'll be taking this. It will be all wood stained to match the existing decor. There will be some carved pedestals on each side of the fireplace. Just above the fireplace, we'll work in a mirror, but to keep it old-school, I'll apply some antiquing techniques to make it look like it's been there for a hundred years. The large shelf above will have both up and down lights recessed into the mantel box. Lighting always adds extra drama and really makes the piece special. I'll post here periodically as construction progresses, so please check back. |
||
| April 28, 2014 | ||
  I
always like to show a photo of the small forest of wood which will
become the final product. Scattering everything around my
basement will help motivate me to drag it into the shop and cut it
up. I
always like to show a photo of the small forest of wood which will
become the final product. Scattering everything around my
basement will help motivate me to drag it into the shop and cut it
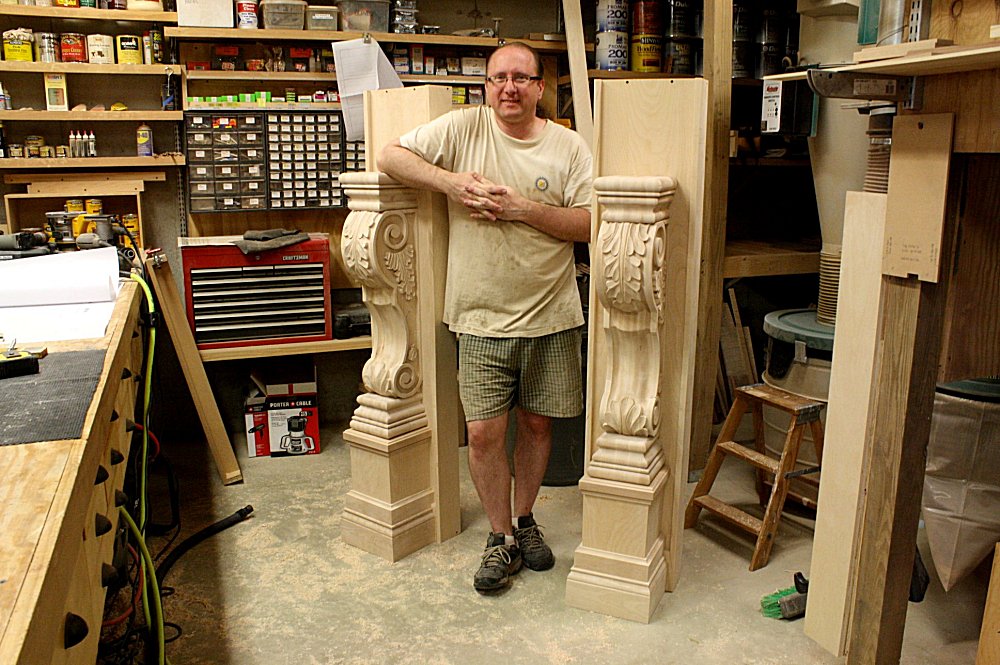
up.The hand-carved pedestals which will flank the firebox came out awesome. These will add a striking and unique element to the ensemble. |
||
| May 5, 2014 | ||
 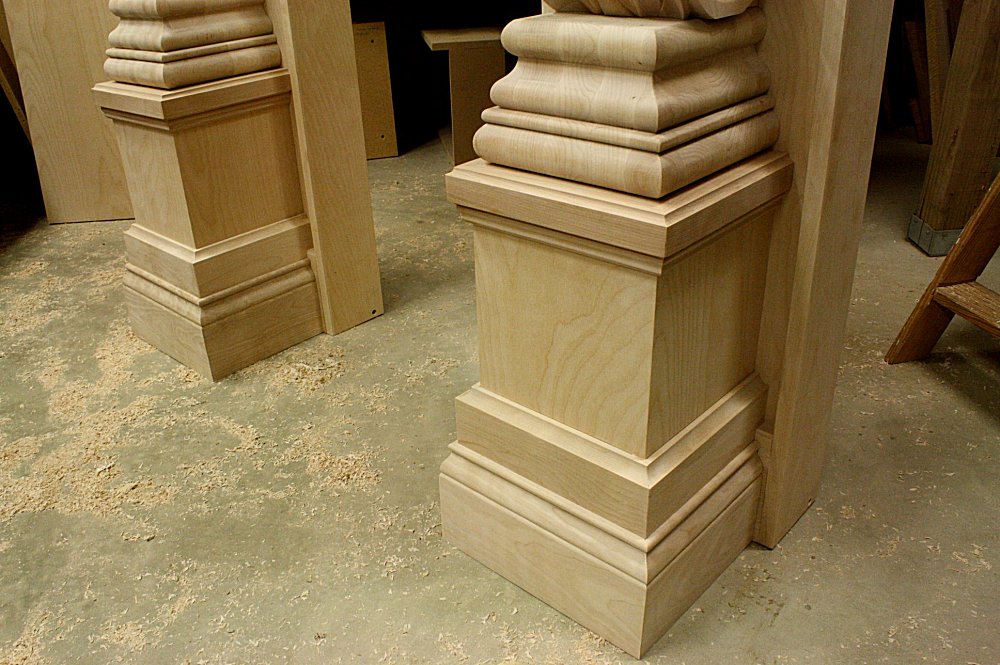 Nice
legs! This fireplace surround is pretty big. The carved
pedestals were elevated on a couple of bases and framed against some
pilasters which will be used to mount everything to the wall
securely. The mantel shelf (which I'll start next) will sit
on top of these pedestals. Nice
legs! This fireplace surround is pretty big. The carved
pedestals were elevated on a couple of bases and framed against some
pilasters which will be used to mount everything to the wall
securely. The mantel shelf (which I'll start next) will sit
on top of these pedestals. |
||
| May 12, 2014 | ||
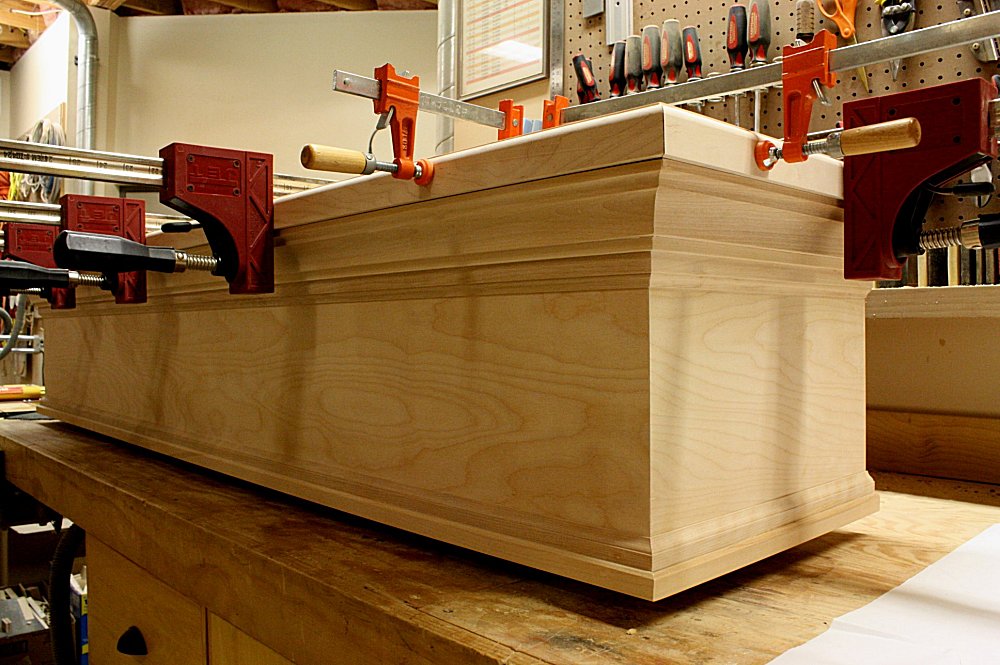 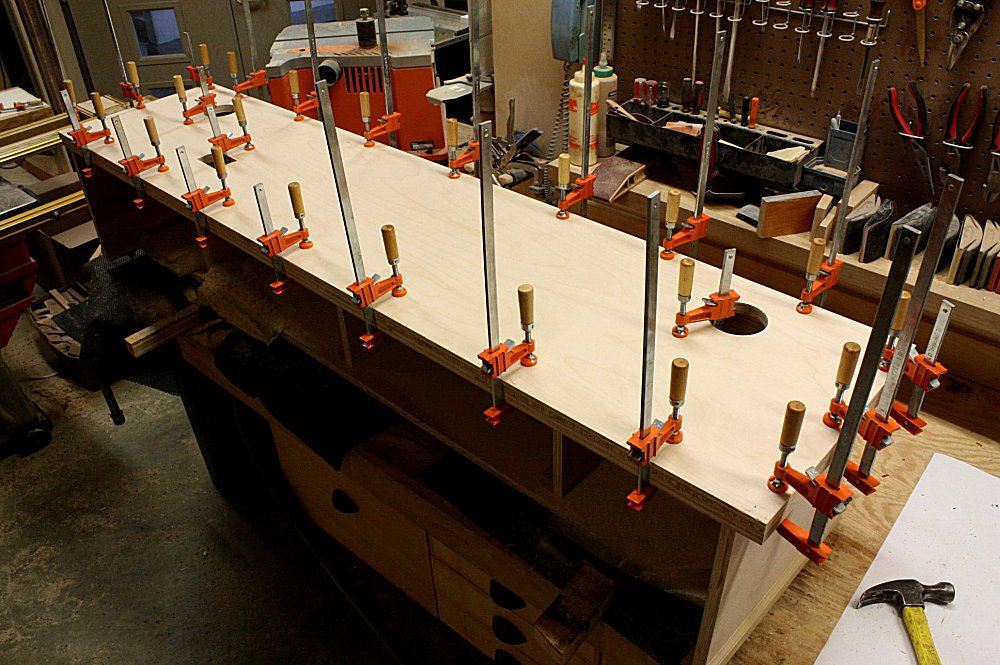 Last
week was all about the upper mantel shelf. It's a big hollow
box, but the interior has plenty of structural support braces.
The holes you see in the top are for recessed can lights.
There will be two shining up and two shining down. Lighting
adds drama and always takes a project up to the next level.
There will also be an electric outlet on top for a lamp, clock, or
Christmas display. Last
week was all about the upper mantel shelf. It's a big hollow
box, but the interior has plenty of structural support braces.
The holes you see in the top are for recessed can lights.
There will be two shining up and two shining down. Lighting
adds drama and always takes a project up to the next level.
There will also be an electric outlet on top for a lamp, clock, or
Christmas display. |
||
| May 19, 2014 | ||
 |
 |
 |
 Matt
suggested a mirror to infill the space between the top of the
firebox and the underside of the mantel. Great idea, but he
wanted to kick it old-school and give it that "aged" appearance.
Aside from scouring all the antique stores on Main Street in St.
Charles to find a mirror of the right size and visual texture, one's
options are fairly limited. Thus, a "Martha Stewart" approach
was called for. I bought a brand new, perfectly good mirror at
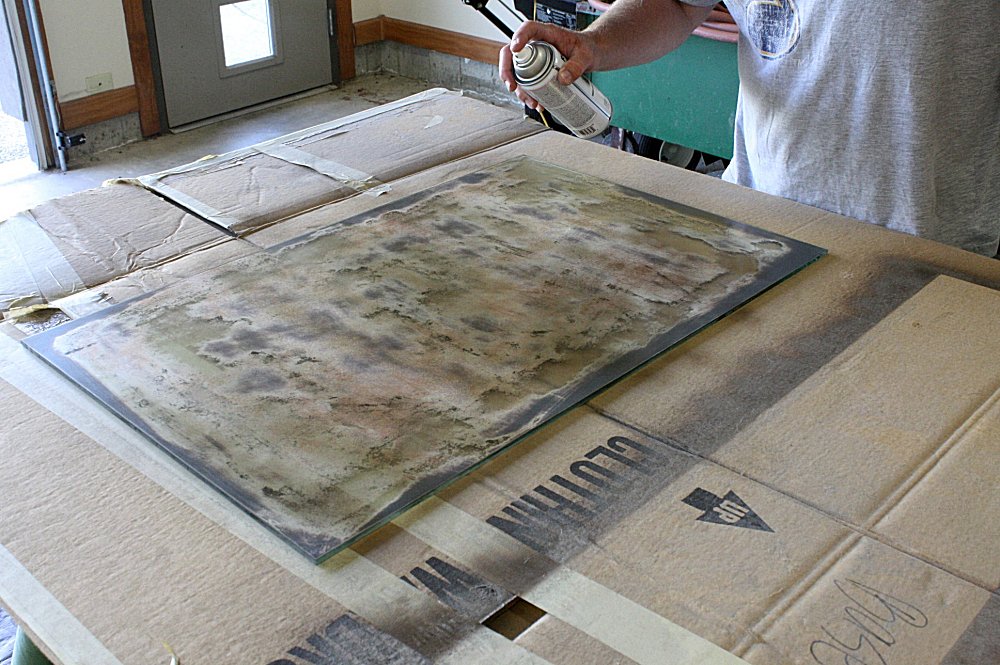
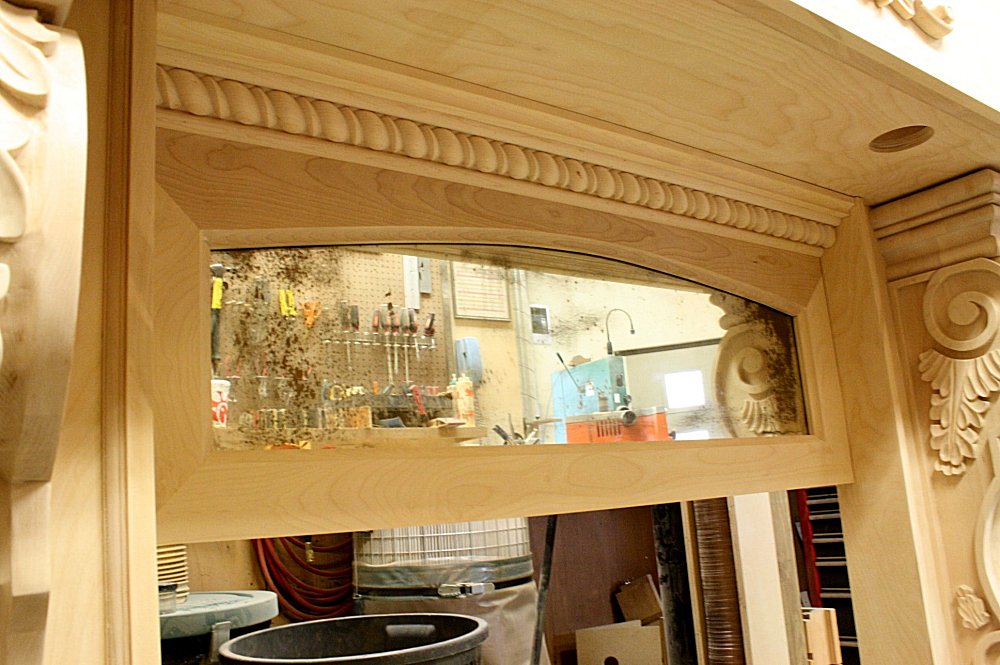
Lowe's and literally beat the crap out of it. Matt
suggested a mirror to infill the space between the top of the
firebox and the underside of the mantel. Great idea, but he
wanted to kick it old-school and give it that "aged" appearance.
Aside from scouring all the antique stores on Main Street in St.
Charles to find a mirror of the right size and visual texture, one's
options are fairly limited. Thus, a "Martha Stewart" approach
was called for. I bought a brand new, perfectly good mirror at
Lowe's and literally beat the crap out of it.First, I sanded off the protective, painted backing. Then I took all assortment of sandpaper and wire brushes to distress the reflected coating. I followed that up with a few spritzes of muriatic acid to strategically dissolve the coating a bit more. A heavy coat of metallic bronze spray paint over the back will protect the f'd up mirror forever. I cut the mirror to size and mounted it in it's final resting place. A couple other highlights: Check out that fancy rope moulding above the mirror. Really cool stuff! You'll also notice a hole in the bottom of the mantel. There are a couple recessed down-lights which will provide some drama when the fire's not lit. |
||
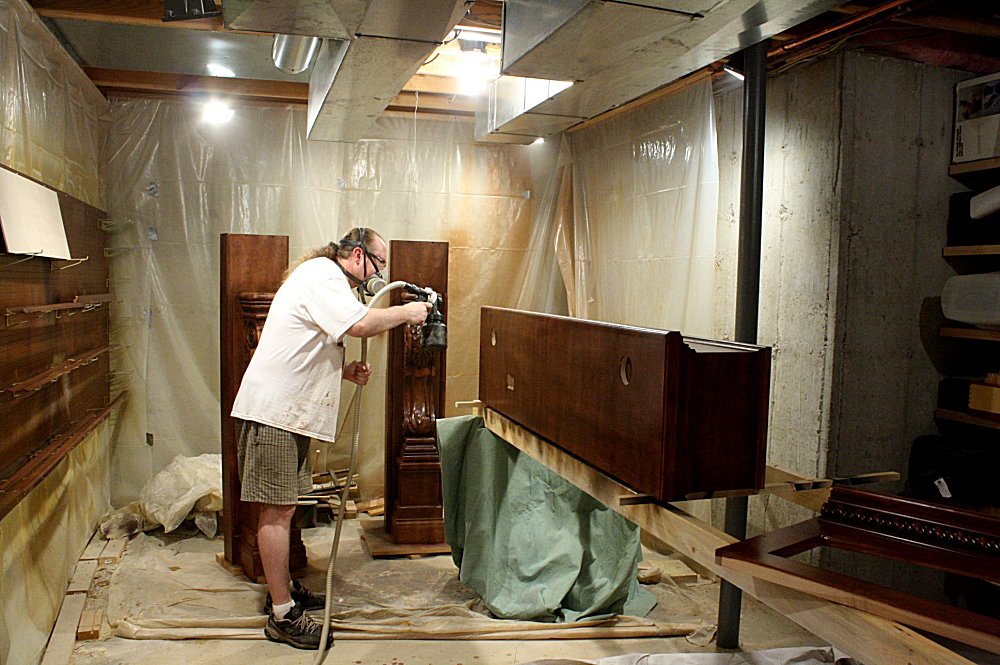
| May 26, 2014 | ||
 This
mantel and surround are quite big and heavy. It won't fit in
my truck to transport to its new home. So once everything was
screwed together and looking good, it all had to come back apart
into several more manageable pieces. This
mantel and surround are quite big and heavy. It won't fit in
my truck to transport to its new home. So once everything was
screwed together and looking good, it all had to come back apart
into several more manageable pieces.Matt wants the color to match the existing woodwork; however, the existing wood is poplar and the new wood is maple, two different colored woods. Stain is translucent; you can see through it. It allows you to see the grain, but it also telegraphs the wood color making a match more difficult. I couldn't use the same stain Matt had from previous work. I had a custom stain color made up, but I still wasn't satisfied. Thus, I mixed up a custom coat of shellac with a couple shades of dye and sprayed thin coats on until I got the color where I wanted. It was a bit tedious, but the effort was certainly worth it. |
||
| June 2, 2014 | ||
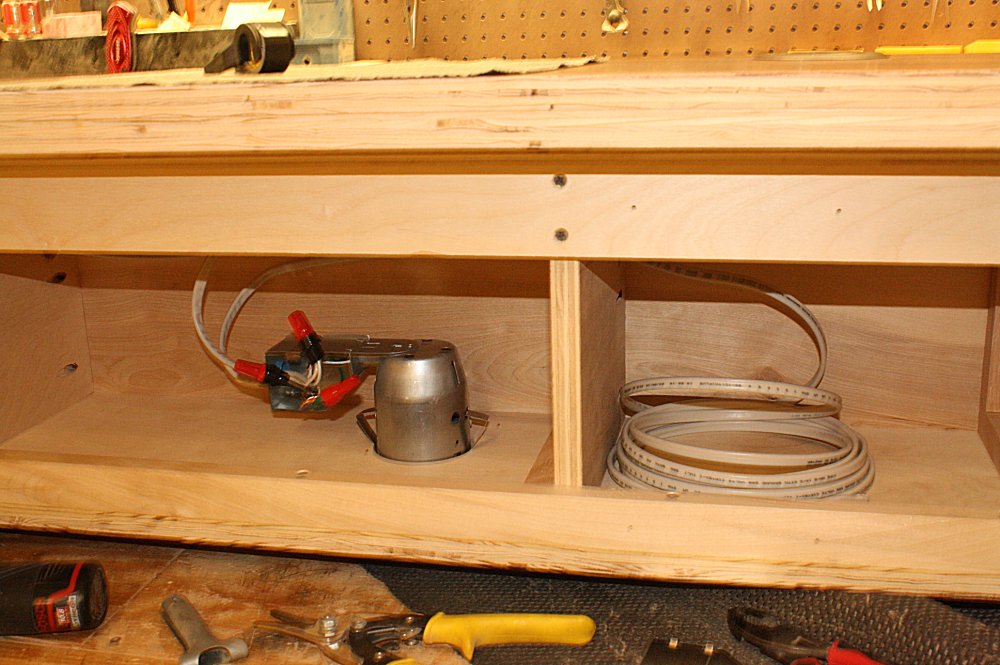 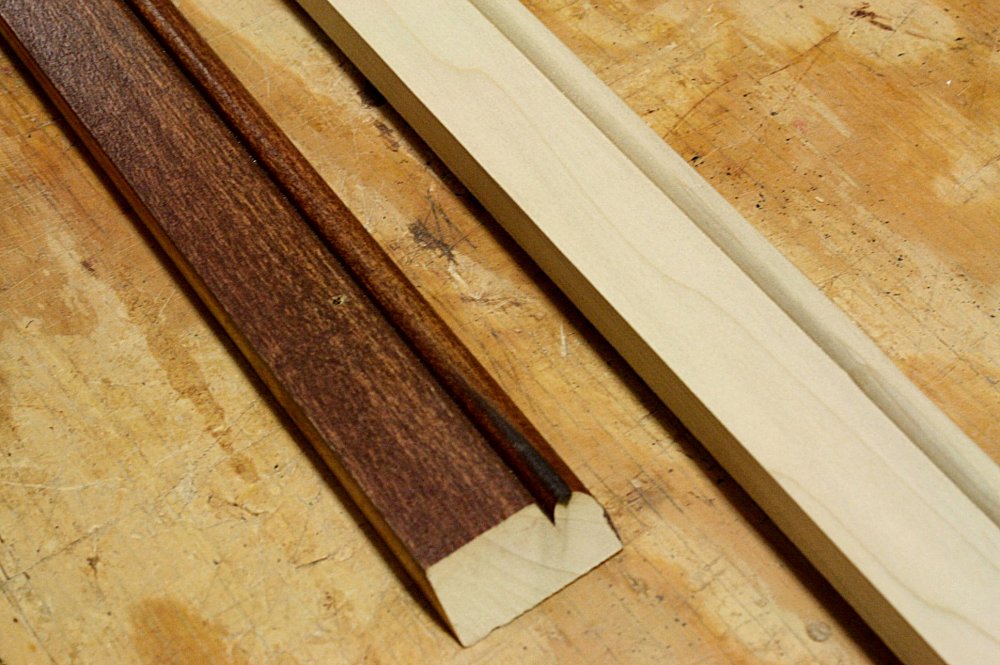 Since
this fireplace is going into a room that already has wood
baseboards, we needed some matching base to fill in the area where
the fireplace would be going. Fortunately, Matt had a stick of
the oddly-profiled base used in that room; however, he did not have
any base shoe. It sounds like an easy thing to find, but a
custom house would, of course, have a custom base shoe. It was
not stocked at any of my usual wood sources. So, I made some
from scratch. The profile was simple enough; I just needed a
router bit and some wood. Since
this fireplace is going into a room that already has wood
baseboards, we needed some matching base to fill in the area where
the fireplace would be going. Fortunately, Matt had a stick of
the oddly-profiled base used in that room; however, he did not have
any base shoe. It sounds like an easy thing to find, but a
custom house would, of course, have a custom base shoe. It was
not stocked at any of my usual wood sources. So, I made some
from scratch. The profile was simple enough; I just needed a
router bit and some wood.Now that the polyurethane has all been applied, I preinstalled as much of the electrical components as possible. The right photo above is a view from the back of the mantel. Lighting always adds drama. This mantel will have two uplights and two downlights - so double the drama! I'll also install a new outlet on the top for a lamp, a clock, or some Christmas decorations. |
||
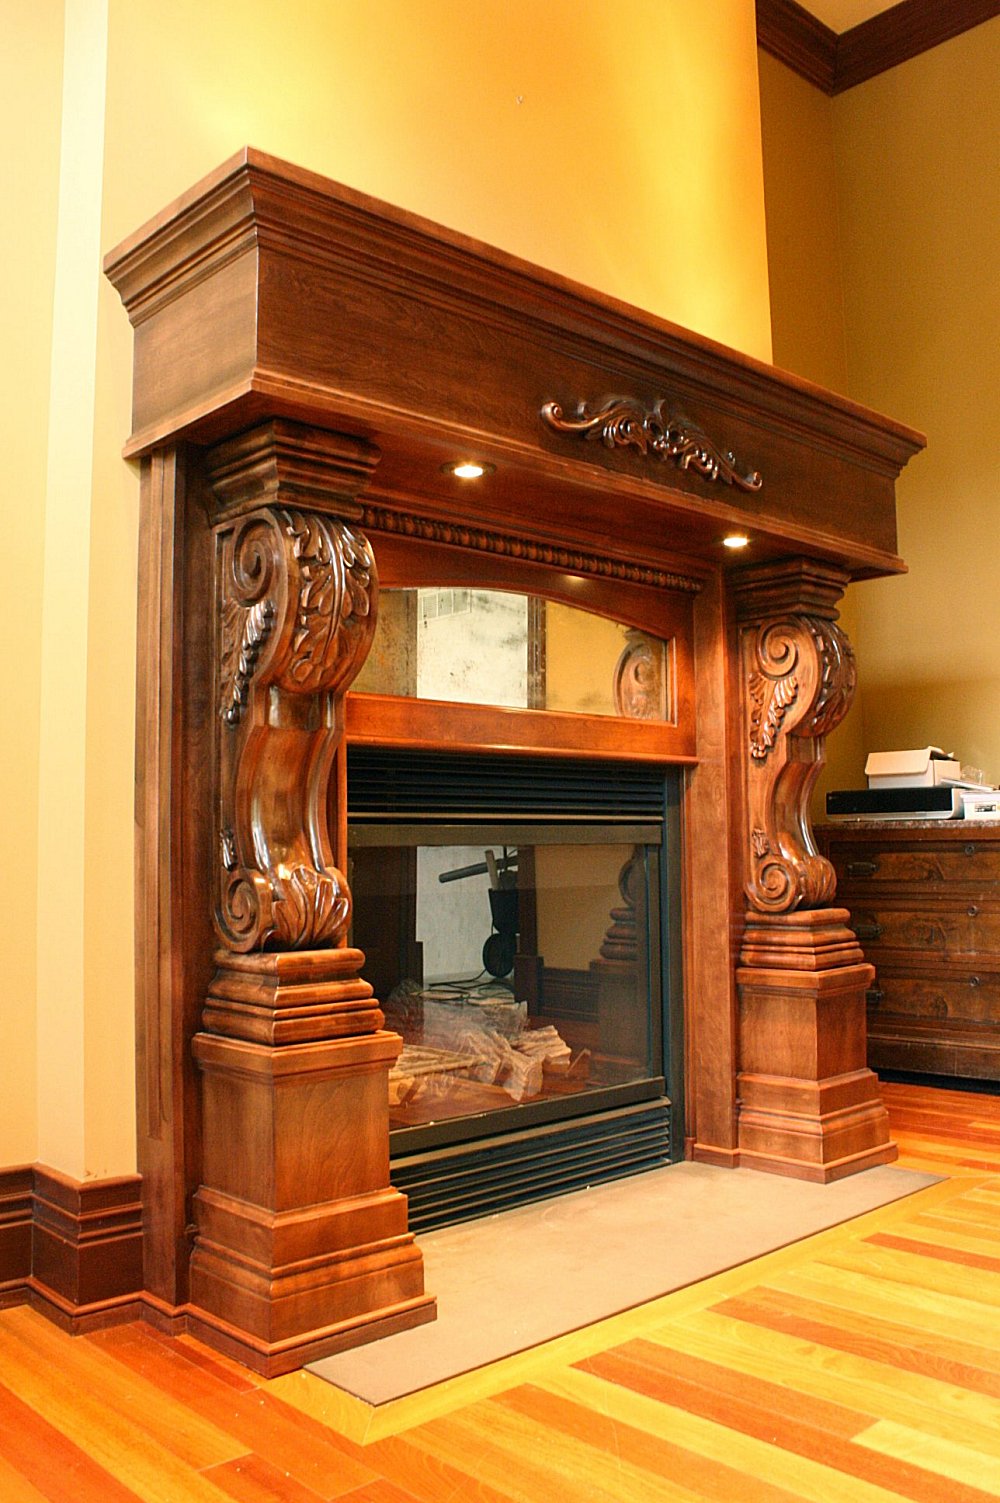
| June 2, 2014 | ||
 Installation
Day! Installation
Day!Yes, the fireplace surround looks big because it is big. It's just about 6 feet tall and 6 feet wide. It works here because the 12 foot tall ceilings can accommodate such a substantial architectural element. It also weighs in at around 300 pounds. It commands attention and is certainly the primary focal point in the room. Check out the "before" photo at the top of this page to see what a custom element can do for a room. Here's a quick breakdown of the features: ● Carved pedestals ● Carved fleur-de-lis onlay on the front ● An antiqued mirror with custom rope moulding above ● An integral outlet on top plus 2 uplights and 2 downlights wired to a dimmer ● Custom matched wood stain I've done many projects for Matt. I believe that speaks to the quality of my work and my reliability as an artist and craftsman. I can listen to his vision and turn it into something three dimensional, tangible, aesthetically pleasing, and functional. Projects (like this one) always hit the mark and exceed expectations. Let me help you realize your next dream. |
||


