 |
||
| Beauty is in the details. Click on the photos to see them in a larger size. Use your browser's "Back" button to return. | ||
| January 30, 2015 | ||
 After
the Christmas rush, there just hasn't been a lot of projects running
through the shop. So we figured it was time to do a project
for ourselves. We don't have kids, so there are two spare
bedrooms we use for "personal space." Cindy has a work table
in her room, and I used to practice music in mine. Since I'm
not in a band anymore, that room seemed to lose its primary
function. The short story is that we don't have beds in those
rooms. We recently had a guest stay with us for a week and
could only offer him a futon to sleep on - kind of embarrassing. After
the Christmas rush, there just hasn't been a lot of projects running
through the shop. So we figured it was time to do a project
for ourselves. We don't have kids, so there are two spare
bedrooms we use for "personal space." Cindy has a work table
in her room, and I used to practice music in mine. Since I'm
not in a band anymore, that room seemed to lose its primary
function. The short story is that we don't have beds in those
rooms. We recently had a guest stay with us for a week and
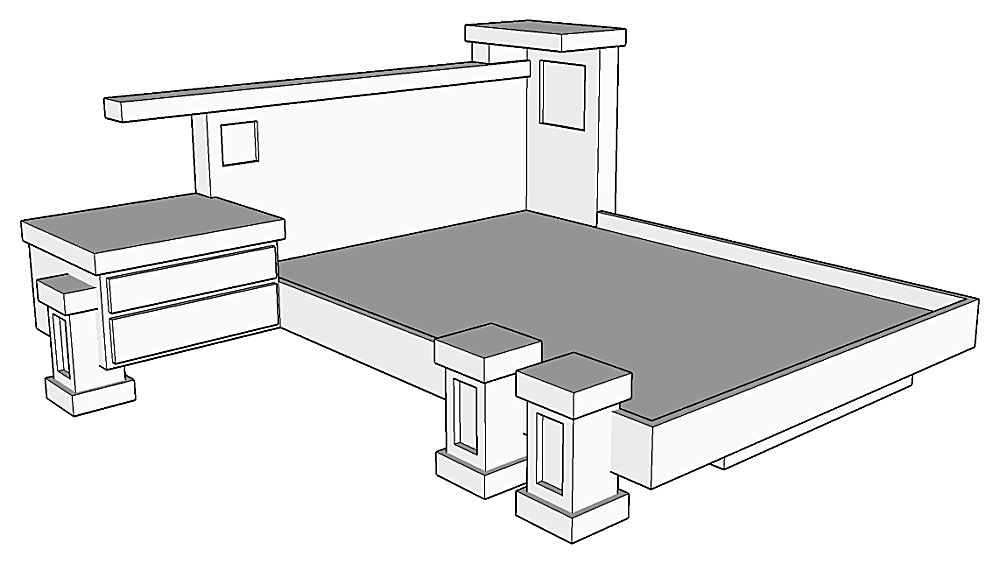
could only offer him a futon to sleep on - kind of embarrassing.We looked at some contemporary furniture stores around town, but couldn't find anything that really fit our needs. We wanted a bed for a small bedroom, a full-size mattress. The bed had to fit into the corner of the room. There is a window at the intended location, so the headboard had to stay below the sill. And there is a floor vent there which we can't cover up. After a discouraging weekend of shopping, I said to myself, "It's too bad we don't know someone who could build us one...wait a minute...of course! Why didn't we think of that?" So to the drawing board I went. Here's a SketchUp model of the design. It fits all the above listed criteria and it will be a contemporary Prairie school take, which goes with the rest of the house. I added a built-in side table, too. It will be made mostly from cherry wood with a few quilted maple accents here and there. I'll add some integral lighting into the design, as well, just to add to the coolness factor. I'll post here periodically as construction progresses, so please check back. |
||
| February 8, 2015 | ||
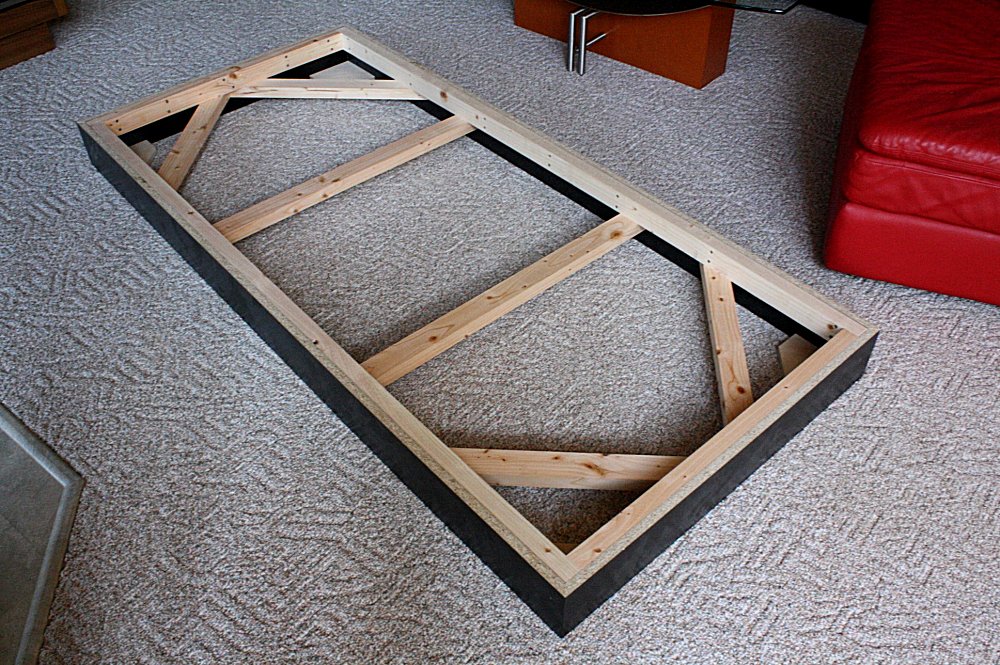 I
wanted a closed-in base because it's a lot more stable, and we
really don't need to store anything underneath. Legs can get
rocky after awhile, especially if there's any vigorous activity that
might be taking place. As you can see, it's pretty beefy
construction. A store-bought bed would have just had the
outside box without the extra bracing, but 2x4's are cheap; why not
add them? The outside is black melamine particle board.
It will look like the bed is floating when I get done. I
wanted a closed-in base because it's a lot more stable, and we
really don't need to store anything underneath. Legs can get
rocky after awhile, especially if there's any vigorous activity that
might be taking place. As you can see, it's pretty beefy
construction. A store-bought bed would have just had the
outside box without the extra bracing, but 2x4's are cheap; why not
add them? The outside is black melamine particle board.
It will look like the bed is floating when I get done. |
||
| February 15, 2015 | ||
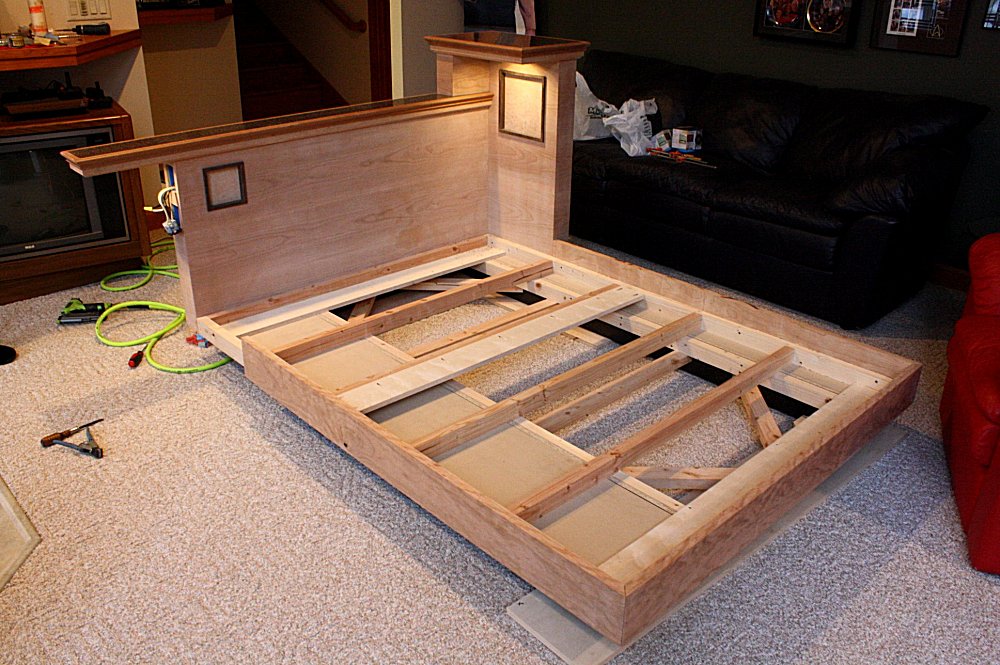
 The
mattress tray was installed. I left the 3/4" plywood deck off so
you could see the insides. Hey, I don't mess around. This is
how I can give you a lifetime warranty. Any bouncing children
(or other vigorous nocturnal calisthenics) will not damage anything
here. The
mattress tray was installed. I left the 3/4" plywood deck off so
you could see the insides. Hey, I don't mess around. This is
how I can give you a lifetime warranty. Any bouncing children
(or other vigorous nocturnal calisthenics) will not damage anything
here.If you noticed, it is a little off-center. There is a floor vent near the wall just to the left of the bed that I didn't want to cover up. If you look at the sketch at the top of the page, there will be a couple decorative legs which will keep things stable. The outside is wrapped with figured cherry wood. You can't see a lot of the figuring now, but when I add the finish, watch out! It was President's Day Weekend, so we took advantage of the sales and picked up our mattress. Movin' right along. |
||
| February 22, 2015 | ||
  I
made the
headboard last week. It's very clean and simple. It's
also lower than you would expect since it has to extend underneath a
window, and I don't want to block the window. I
made the
headboard last week. It's very clean and simple. It's
also lower than you would expect since it has to extend underneath a
window, and I don't want to block the window.For some visual interest I added a little "window" of quilted maple framed with wenge wood, "The Window To Dreamland." The top of the headboard will cantilever off to the left and I'll install a light underneath to illuminate the side table's top that will be going in below (see the conceptual sketch at the top of the page). This thing has to light up just because that adds to the coolness factor. In the zoomed in shot to the right, notice how the grain wraps around the corner. You'll only get this attention to detail with a custom piece. The electric boxes are for the light switch and a convenience outlet. |
||
| March 2, 2015 | ||
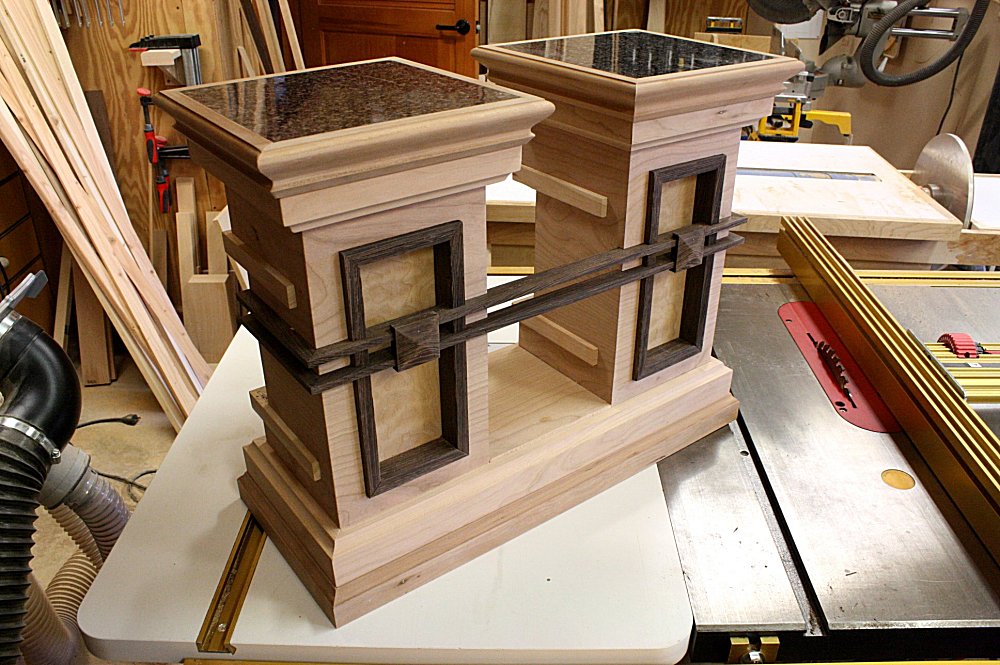
  I
call this side piece the "Tower." I added another little
"window" of quilted maple here and it is illuminated by a small LED
recessed light fixture. This one is the "Portal To Hell." I
call this side piece the "Tower." I added another little
"window" of quilted maple here and it is illuminated by a small LED
recessed light fixture. This one is the "Portal To Hell."If you click on the first photo, you'll notice that there is some pretty plastic laminate on the tops which will provide better wear and the finish looks like glossy black granite. We have this pattern elsewhere in the house and I was surprised that they still made it. One subassembly at a time and I'll be done before you know. |
||
| March 8, 2015 | ||
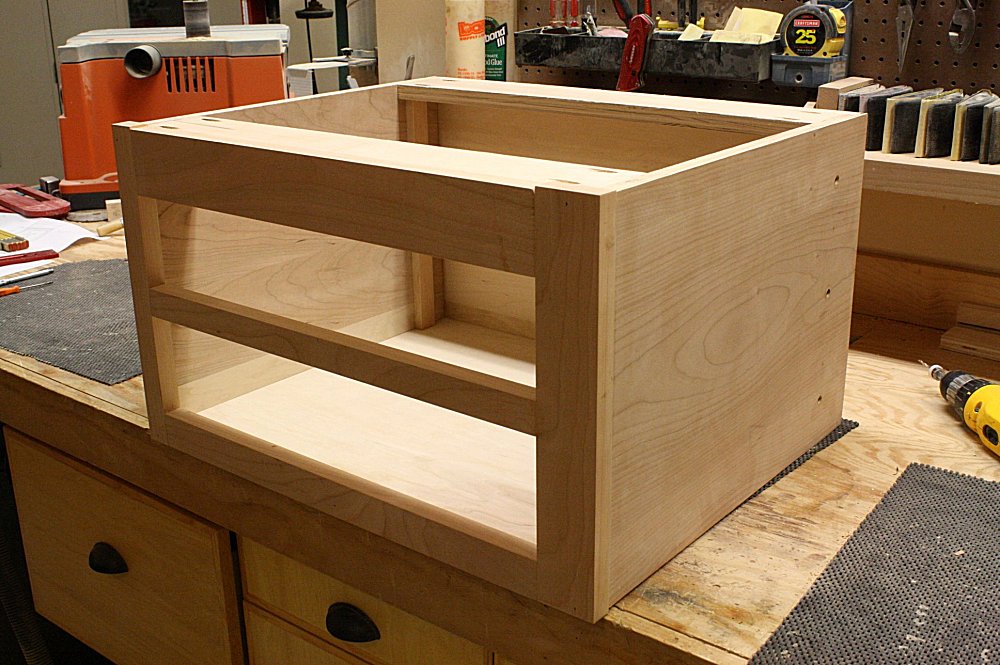  These
are the legs! Yes, there are only three of them (see the
conceptual sketch at the top of this page). They feature some
more of those quilted maple "windows." I had clever names for
the other two, so I will call these "Larry, Curly, and Moe." I
still have a lot of little fancy trim work to do on these, but it's a good start. These
are the legs! Yes, there are only three of them (see the
conceptual sketch at the top of this page). They feature some
more of those quilted maple "windows." I had clever names for
the other two, so I will call these "Larry, Curly, and Moe." I
still have a lot of little fancy trim work to do on these, but it's a good start.In the right photo, you'll see I got going on the side table. The box is done and the drawers are started. Kinda had to split my time between the legs and drawer box waiting for the glue to dry. |
||
| March 15, 2015 | ||
 |
 |
 |
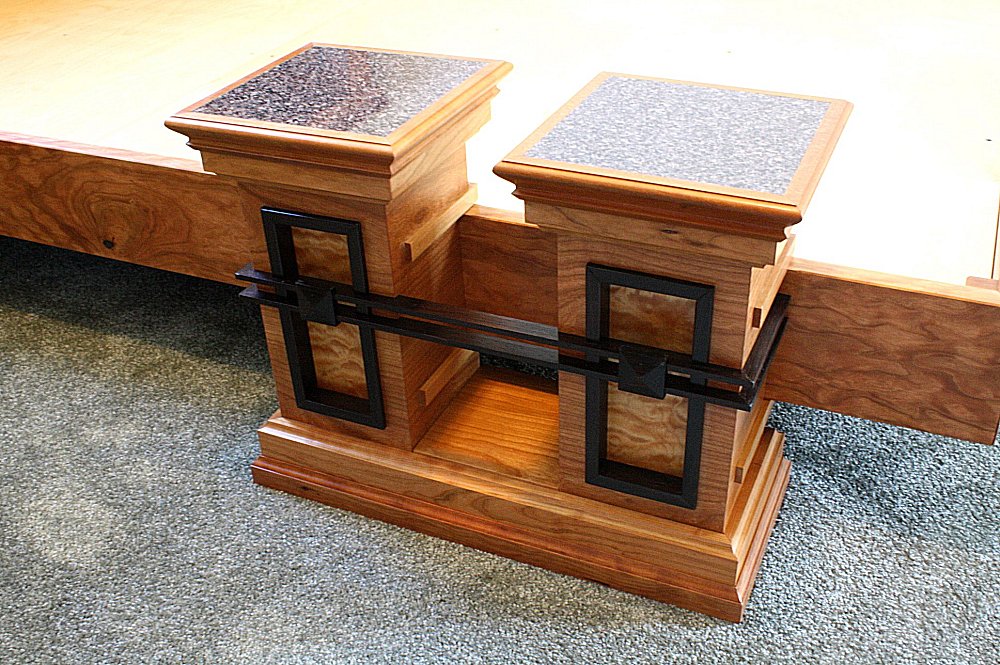
| It's starting to look like something now! The side table is attached and the legs are in place. With custom furniture, it's about attention to details and details that demand attention. Check out this leg pairing. One leg would have been enough, but two make an interesting statement. There are 70 pieces of wood in this leg pair (yes, I counted). Each one had to be milled to dimensions and cut to fit nicely with the adjacent pieces. It is a mix of cherry, wenge and quilted maple woods with faux granite tops (plastic laminate). You will not see this type of work in a store bought piece. It simply isn't available because it takes a lot of the manufacturer's time that they are not willing to spend. I will spend the time because it entertains me and this looks way cooler than a square stick of wood on the corner of the bed. The result is a stunning, one of a kind ensemble. This is heirloom furniture. | ||
| March 22, 2015 | ||
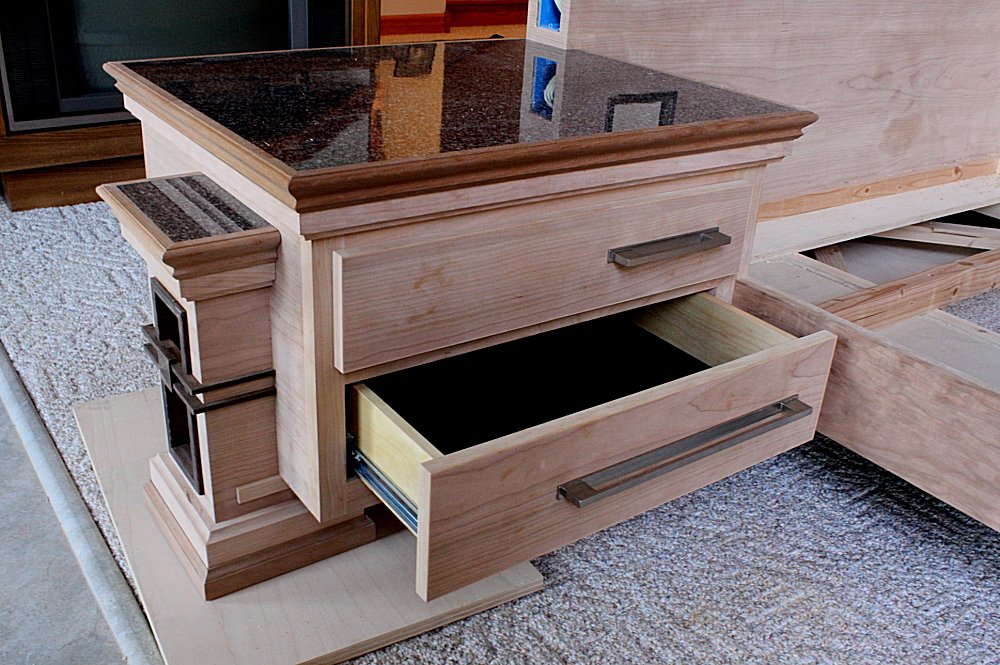 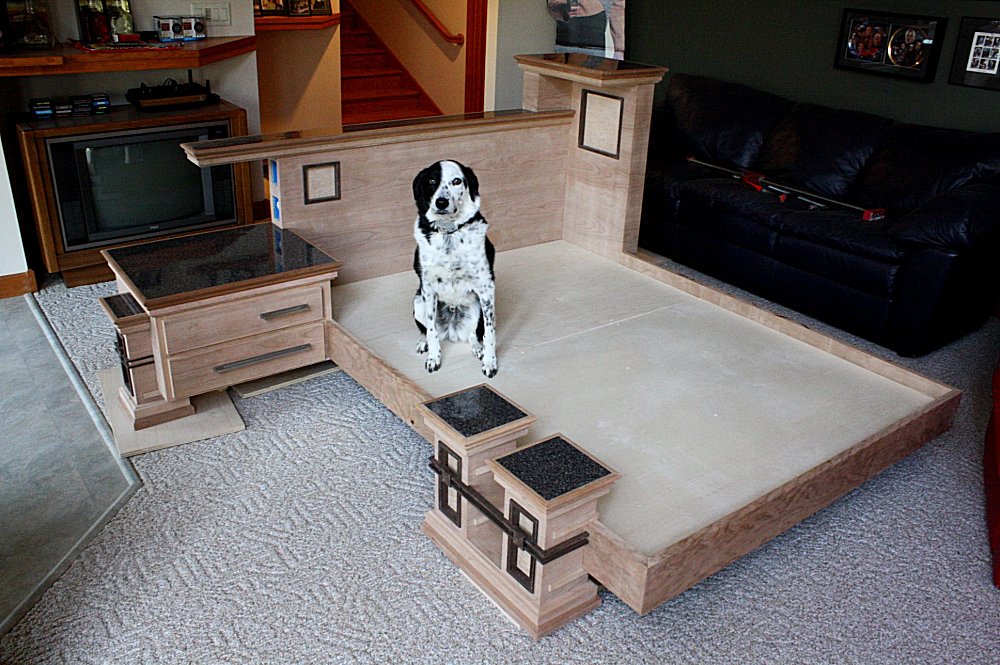 I
got all the woodworking done! Now it's time to take the whole
thing apart and apply the finish. My finishing room isn't
quite big enough so I'll have to do this in two gulps. The
overall impression looks a bit like a city skyline, very architectural. Given that I'm an architect, I guess that makes
sense. And it's border collie approved! I
got all the woodworking done! Now it's time to take the whole
thing apart and apply the finish. My finishing room isn't
quite big enough so I'll have to do this in two gulps. The
overall impression looks a bit like a city skyline, very architectural. Given that I'm an architect, I guess that makes
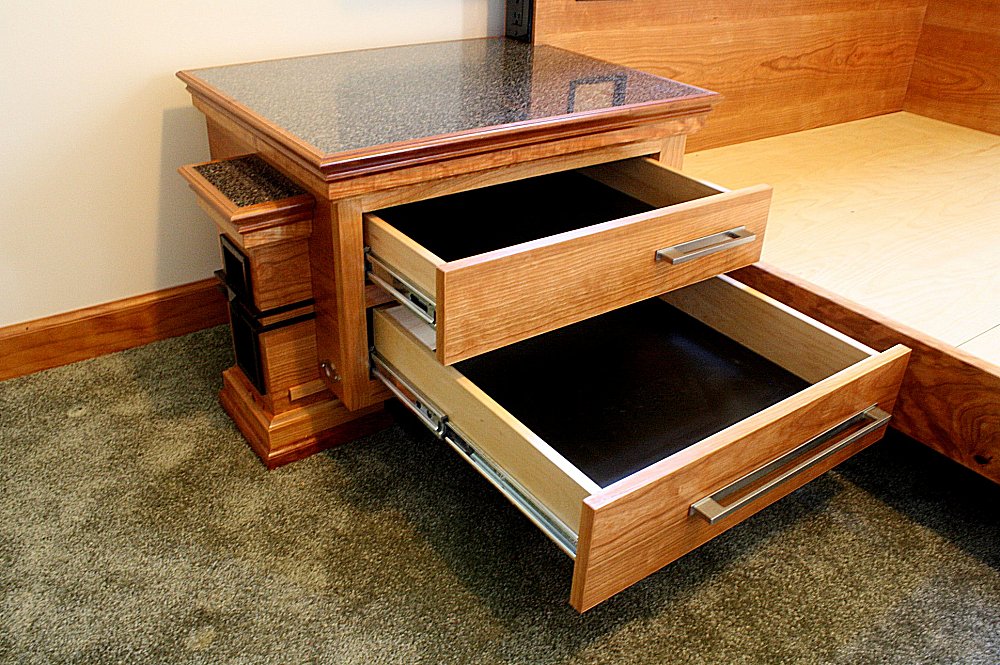
sense. And it's border collie approved!The attached side table features a faux granite (plastic laminate) top, full extension, soft-close drawer slides, and stainless steel hardware. The side table has another one of those fancy legs on one side and it's attached to the bed frame on the other, so it appears as if it's floating. Yes, the drawer pulls are offset. I rarely take the predictable route. The lower pull echoes the banding on the leg and it draws your eye to the upper shorter pull and then to the little "window" on the headboard. The pulls are also easier to reach if you're lying in bed. Please don't make fun of the console TV. It's a perfect match for the Atari 2600 sitting on top of it. A retro video game lover's dream! |
||
| April 11, 2015 | ||
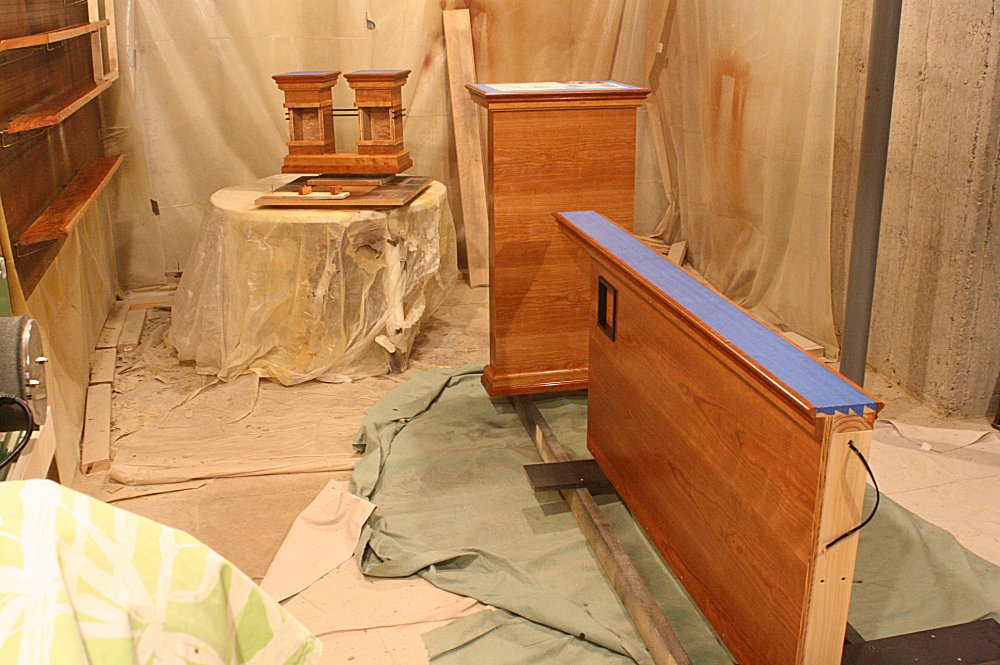 Since
my spray room was not big enough to fit all the pieces in for one
go, I had to apply the polyurethane in two batches. Each batch
gets 3 coats times 2 sides for a total of 6 applications.
That's 1 coat a day and watch it dry. Thus, it takes about 2
weeks to get all the finish on all the sides. Whew, that's
some math! We threw a small vacation in there, too, but hey,
this piece of furniture is for us, so there's no deadline.
We're in the home stretch now. Just a few more coats to go! Since
my spray room was not big enough to fit all the pieces in for one
go, I had to apply the polyurethane in two batches. Each batch
gets 3 coats times 2 sides for a total of 6 applications.
That's 1 coat a day and watch it dry. Thus, it takes about 2
weeks to get all the finish on all the sides. Whew, that's
some math! We threw a small vacation in there, too, but hey,
this piece of furniture is for us, so there's no deadline.
We're in the home stretch now. Just a few more coats to go! |
||
| April 26, 2015 | ||
 Yes,
done! This bed was custom designed to fit this space. A
commercially available bed could not be found that fulfilled all the
program requirements. It had to be a full-size to fit nicely
in the room, which limits available frame selections. It was
going in a corner, so only one flanking side table. The bed
had to fit under an existing window, hence the lower headboard and a
"Tower" in the corner to anchor the composition. There is a
furnace vent below the window, and the bed's base was offset so the
air could still flow freely. Sorry, you can't really see that
here, but check out some of the construction photos above where it's
more obvious. Yes,
done! This bed was custom designed to fit this space. A
commercially available bed could not be found that fulfilled all the
program requirements. It had to be a full-size to fit nicely
in the room, which limits available frame selections. It was
going in a corner, so only one flanking side table. The bed
had to fit under an existing window, hence the lower headboard and a
"Tower" in the corner to anchor the composition. There is a
furnace vent below the window, and the bed's base was offset so the
air could still flow freely. Sorry, you can't really see that
here, but check out some of the construction photos above where it's
more obvious. |
||
 |
 |
 |
|
Integral lighting simply makes anything look that much cooler.
The bed was wired up with a convenience outlet and a light switch in
the side of the headboard. The LED puck lights illuminate the
side table and one of the accent panels, which are made from quilted
maple with wenge trim. The lights provide just enough
illumination to cuddle up with a good book (or a Kindle). One note
on LED's. Have you replaced some bulbs in your home with LED's
and they still glow when you turn them off? This is a very
common problem that some folks just decide to live with. That
happened to me on this project, and I was determined not to live
with it. None of the online articles I read provided a clean
and simple solution. Fortunately, being an architect, I
happened to know an especially astute electrical engineer who was up
to the challenge. |
||
  I
continually bash a lot of commercial furniture throughout my web
site. I understand that they have to make items which are
"good enough" for the price people are willing to spend for
something. That often means providing lesser quality
materials, less sturdy joinery, and inferior finishes. I also
acquire a lot of business fixing the inevitable damage associated
with those shortcomings. We all know at some point a child
will jump on a bed. Why not just make the bed frame robust
enough to withstand it in the first place? I
continually bash a lot of commercial furniture throughout my web
site. I understand that they have to make items which are
"good enough" for the price people are willing to spend for
something. That often means providing lesser quality
materials, less sturdy joinery, and inferior finishes. I also
acquire a lot of business fixing the inevitable damage associated
with those shortcomings. We all know at some point a child
will jump on a bed. Why not just make the bed frame robust
enough to withstand it in the first place?My furniture exudes quality. It starts with the solid wood base constructed as one would your home's floor, with 2x wood at 16" centers. That is capped with a 3/4" thick plywood deck. The kids (or particularly frisky adults) may feel free to jump away! For the exposed surfaces, 3/4" cherry plywood is both sturdy and beautiful, and it will not warp. For other areas, solid cherry wood was hand picked by me for the best color and grain. Yes, I will dig through an entire pile of lumber to find just the right pieces for a project. The tops of everything are covered with plastic laminate (many of you have this on your kitchen counters). It minimizes scratches and water stains and it's available in thousands of colors and patterns (a glossy granite look here). You want real granite, not a problem. With custom furniture, anything is possible. There is also an abundance of detail to draw one's attention. The drawers feature full-extension, soft-close, ball bearing drawer slides that operate very smoothly. The dual legs offer an interesting focal point at the foot of the bed. The bed was finished with linseed oil to pop the wood's grain, and polyurethane to provide the best protection. |
||
 Yes, custom furniture is more expensive. But I can design any piece to fulfill even the most stringent of requirements. I can get it to fit perfectly in a space both dimensionally and visually. I can match the woods and stains of existing decor. I will build it right the first time to last a lifetime. Thus, I have no problem at all offering a LIFETIME WARRANTY (with no fine print). I am confident and proud to sign and stand behind anything that goes out the door. |
||


