|
|
| Beauty is in the details. Click on the photos to see them in a larger size. Use your browser's "Back" button to return. | |
| Introduction | |
 So
you inherited Grandma's old hand-me-down furniture or maybe you
found that ideal piece at the flea market, but it is showing a lot
of signs of wear and tear from years of abuse then sitting in a
storage shed for 20 years. Restoring an old piece of furniture
is not as easy as some of the do-it-yourself television shows may
lead you to believe. Sure, if you want to slap a coat of paint
on it and deem it "shabby sheik" then go for it. However,
bringing back the beauty of the original stained wood and fixing the
broken bits correctly and inconspicuously requires time, patience,
and experience. Many folks might be up for the task on the
first day, then quickly lose interest once they understand the
commitment required. So
you inherited Grandma's old hand-me-down furniture or maybe you
found that ideal piece at the flea market, but it is showing a lot
of signs of wear and tear from years of abuse then sitting in a
storage shed for 20 years. Restoring an old piece of furniture
is not as easy as some of the do-it-yourself television shows may
lead you to believe. Sure, if you want to slap a coat of paint
on it and deem it "shabby sheik" then go for it. However,
bringing back the beauty of the original stained wood and fixing the
broken bits correctly and inconspicuously requires time, patience,
and experience. Many folks might be up for the task on the
first day, then quickly lose interest once they understand the
commitment required.Let me throw this out there right up front: You will NOT save money by having a piece of furniture restored. You will certainly be able to buy a similar piece of quality furniture for less. Restoration is very time consuming, and time is money. Save restoration for those items which have particular sentimental value like that table Uncle Frank made himself that everyone sat around for Thanksgiving dinner. Perhaps that antique piano evokes pleasant childhood memories of sitting there with Grandma eating homemade chocolate chip cookies and singing songs. Another reason to favor restoration is that sometimes certain woods are no longer available so a comparable replacement is not an option. Some people believe that older furniture was made better than it is made today. That is not always the case. Once I get inside something and start disassembling it, I frequently find that those old fabricators could be just as lazy as those you can find presently. Tools and machining processes have evolved to be much more precise and accurate. This can be considered either good or bad. Some label those idiosyncrasies as "character", but when things fit together better, they usually last longer. Following is a brief tour through the restoration process and everything involved. This features Grandma's piano mentioned above. So before you attack that restoration project you have collecting dust in the back of your garage, you can see if you really are up for the challenge. You may also acquire insight into what it takes to properly restore a piece, and perhaps you may gain some appreciation for the artistry, skill, time, patience, and ultimately the cost which goes into such a project. |
|
| Evaluate the Existing Conditions | |
   |
|
|
The first thing you have to do is see what you're working with.
My first inclination is to always do the least amount possible, not
because I'm lazy, but as an economic courtesy to the person who will
be paying the bill. This project received a cursory
examination at the client's storage shed, a more detailed look in my
garage, then an additional report after I took some things apart to
look under the hood. It was pretty obvious that this would not be a quick and dirty job where I could simply refinish a couple pieces of wood and be done with it. Here is a listing of some of the things I found: ● All of the exposed wood was scratched up. ● Some areas (especially at the lower corners) had the wood veneer chipped and broken off. ● The front legs were literally ripped off causing considerable damage. ● One front pull knob was missing, and some other screws were missing. ● The stool was pretty beat up. ● The piano harp and hammer mechanisms still appeared to be in good working order (although I'm not a piano tech). If this were a quick and dirty, minimally invasive approach, I could have given a fixed price to make the minor repairs. Since this would be a complete overhaul, we agreed to do this on a time and materials basis. Some people cringe at that because they were probably screwed over at one time by a dishonest person. Truthfully, I don't do woodworking to pay the bills; I have a day job already. I do woodworking for fun and to see people smile when I'm done, but I still need to make a little something to cover the cost of my tools. I can provide a ballpark estimate, but on a project like this, you simply don't know what you're dealing with until you start dealing with it. I provided weekly email updates with photos and a running cost sheet so the client could see where the money is going and how fast. The client could stop me at any time, and I didn't require progress payments. There was only one payment when the whole job was done. |
|
| Disassemble Everything | |
  You
can not strip and sand all the wood parts while they're all
screwed together. Stripping works better when the item is laid
flat, and you just have too many tight corners to try to get into.
If the piece comes apart, take it apart. With a larger project
like this, photo document everything, make a list of the order
things came apart, and bag/label the screws for each component. You
can not strip and sand all the wood parts while they're all
screwed together. Stripping works better when the item is laid
flat, and you just have too many tight corners to try to get into.
If the piece comes apart, take it apart. With a larger project
like this, photo document everything, make a list of the order
things came apart, and bag/label the screws for each component. |
|
 On
this piano, several things came apart in sub-assemblies. The
keyboard, for instance, slid out easily, but then that removed
"tray" came apart in about a dozen more pieces plus the 88 keys.
Label the individual parts on the hidden side or on a piece of tape
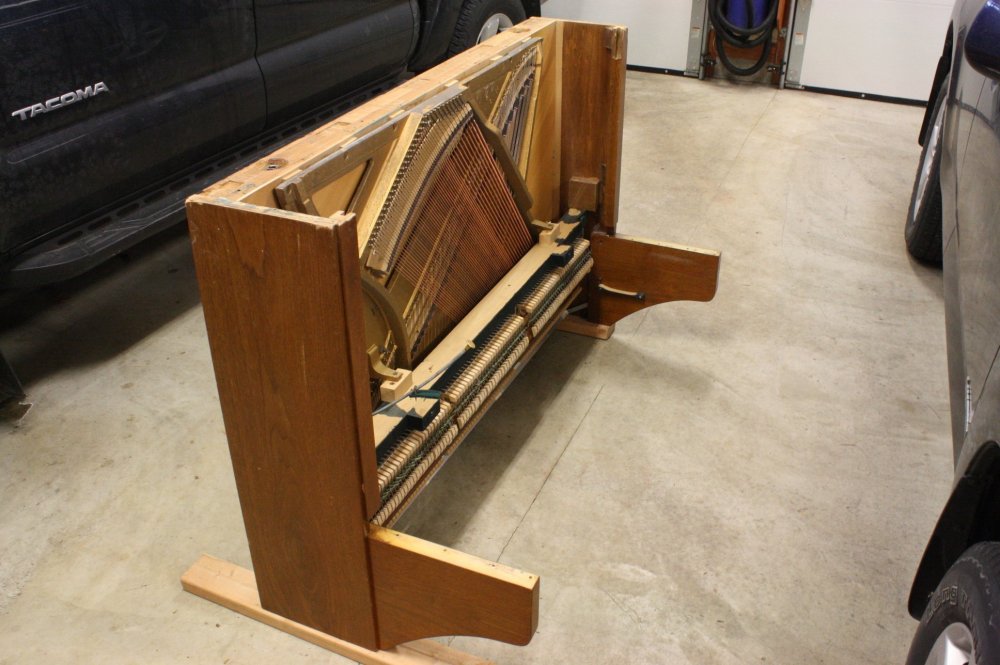
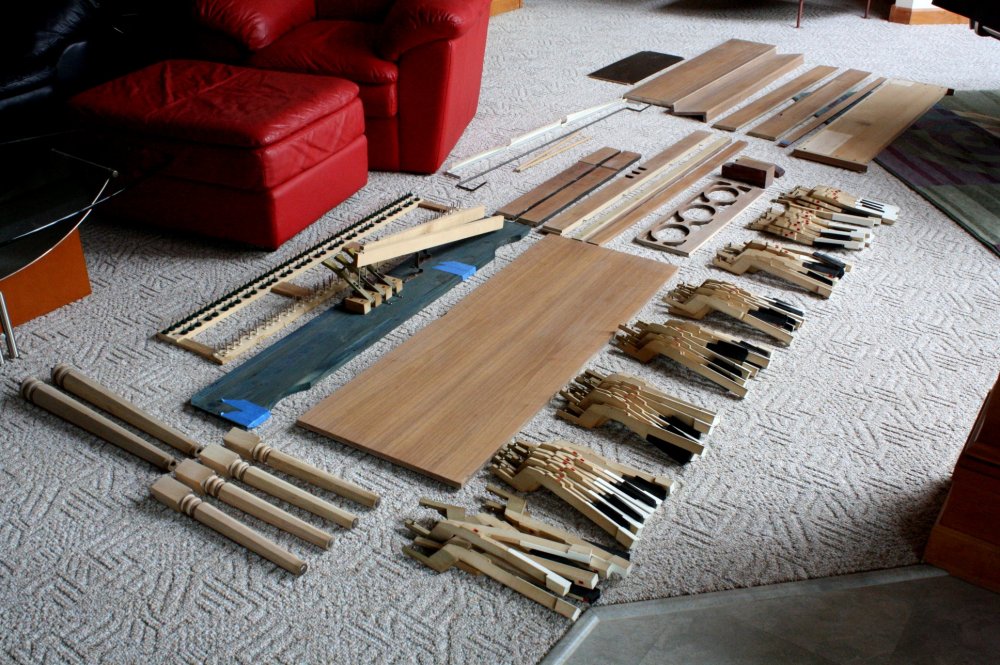
so you know where everything goes back in. On
this piano, several things came apart in sub-assemblies. The
keyboard, for instance, slid out easily, but then that removed
"tray" came apart in about a dozen more pieces plus the 88 keys.
Label the individual parts on the hidden side or on a piece of tape
so you know where everything goes back in.Keep everything organized! This piano came apart in 123 pieces not counting all the screws and hinges. Lay it all out on the floor so you don't loose anything and you can see what you're up against - if not just to annoy the wife. You see, that piano didn't look like such a big project sitting in the shed. It's a little different story when you see it like this. |
|
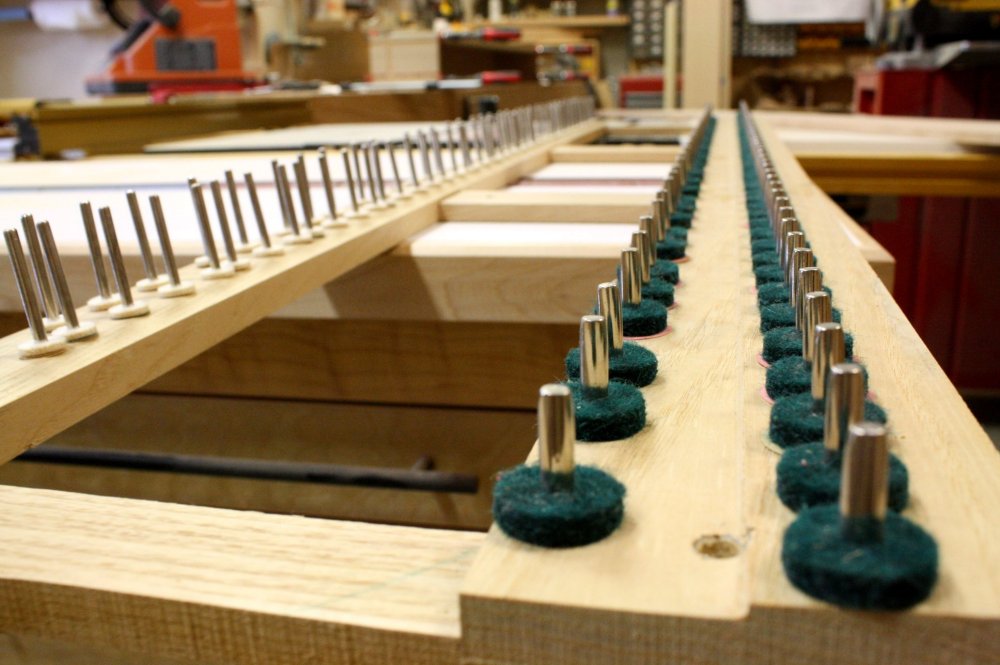
| Strip the Wood | |
   |
|
|
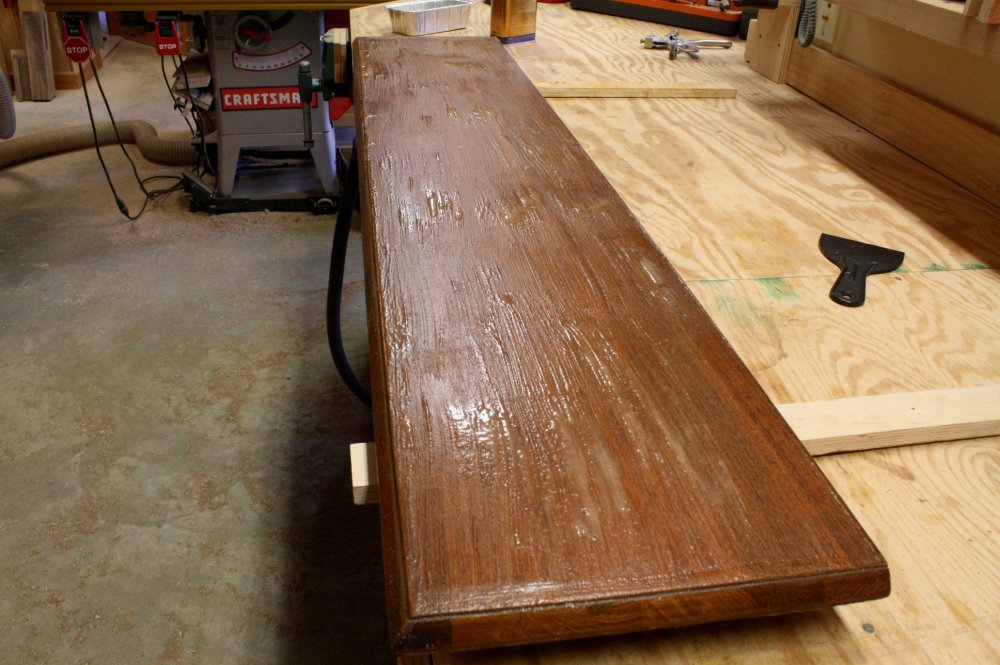
Stripping finish is not particularly difficult; "tedious" is
probably a better word. Fortunately this piano had more flat
pieces than ones with contours or carving. If you do this
yourself and you're standing at Home Depot looking at the cheap can
of paint stripper versus the expensive can, which do you think you
should buy? Fork up the extra $10 for the expensive can.
It will be the consistency of jelly so it will stick, and it will do
its thing in 15 minutes instead of 45. You simply brush it on
with a cheap chip brush, let it sit for 15-20 minutes, scrape it
off, and sand it. |
|
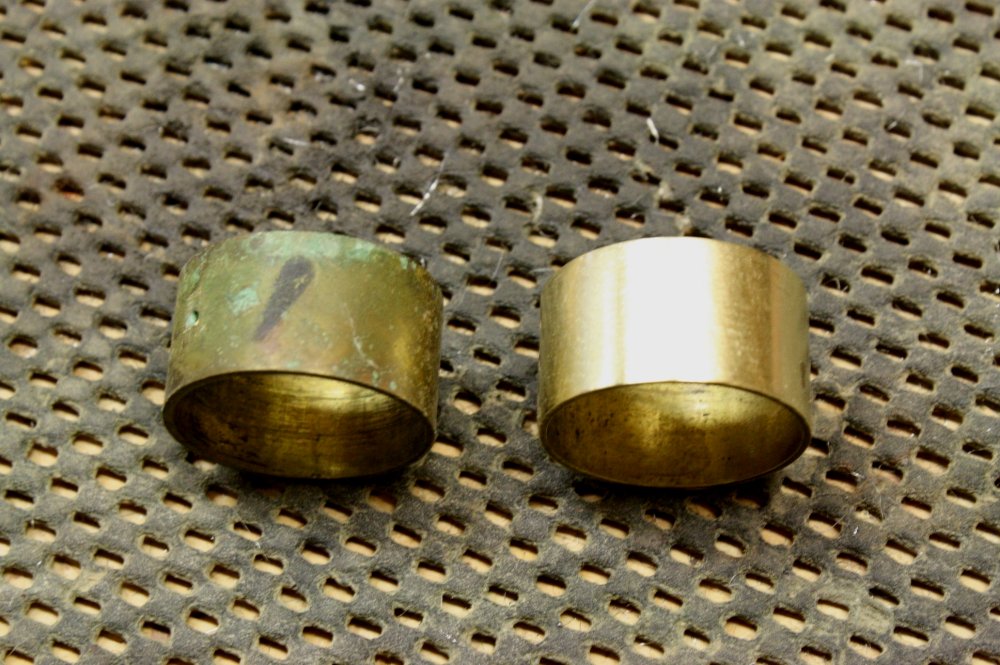
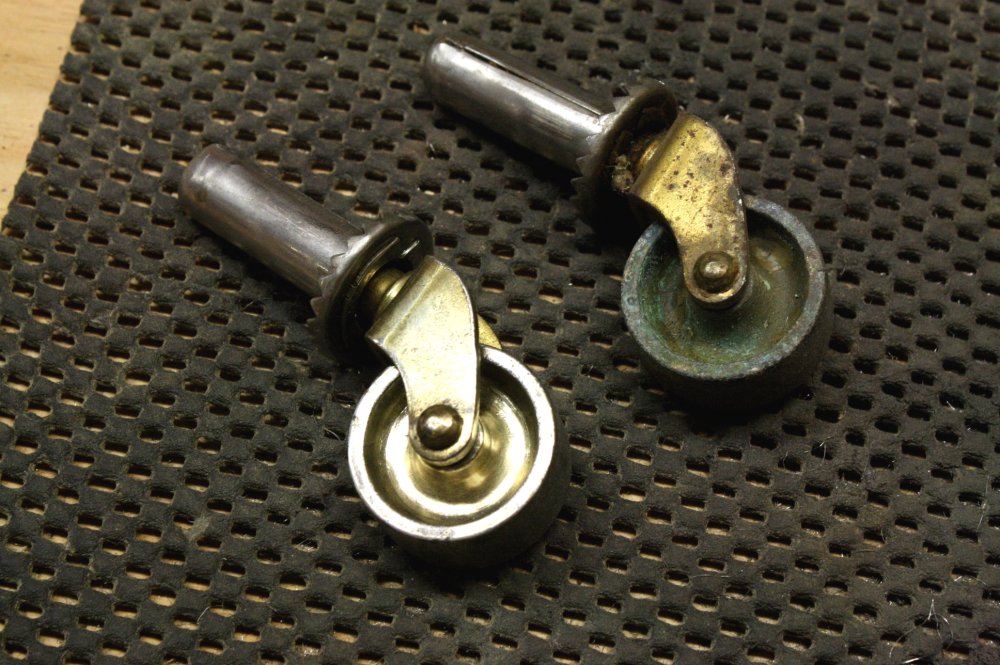
| Clean and Buff Everything Else | |
|
|
|
|
|
|
|
|
|
|
Yes, even take a wire brush to the old screws to knock off any rust. Again, resist the temptation to replace the screws. Old screws have slightly different diameters and their thread pitch is different. If you run in a new screw, you might strip the wood in that old screw hole. Also, there were over a hundred screws on this project. Do you really want to catalog every screw so you can buy suitable replacements? Replace the original screws only when needed or where you messed up those stupid slotted heads taking them out. |
|
| Patch the Wood | |
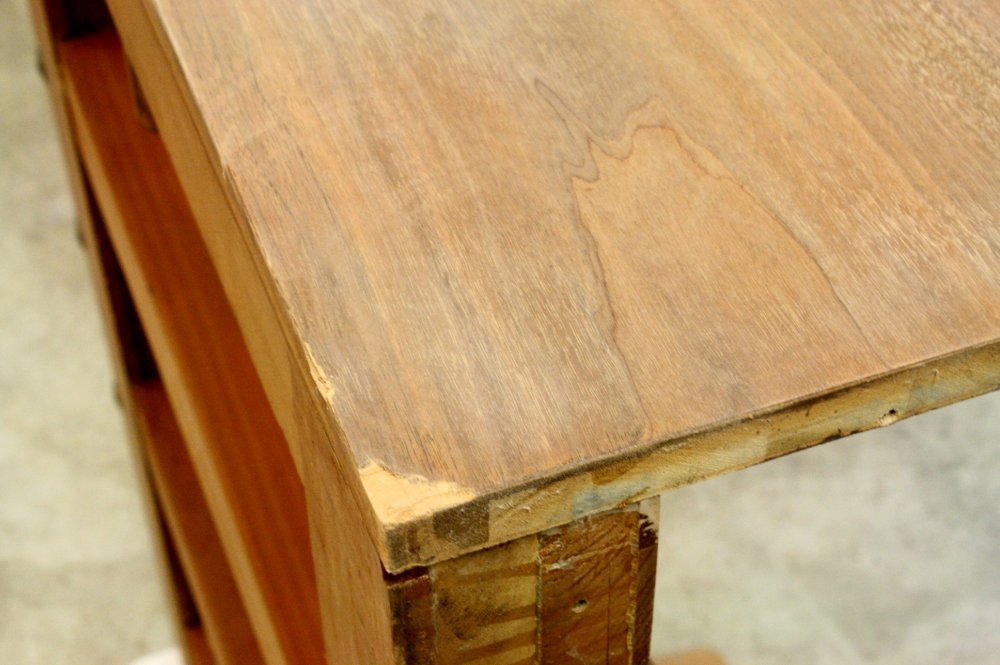
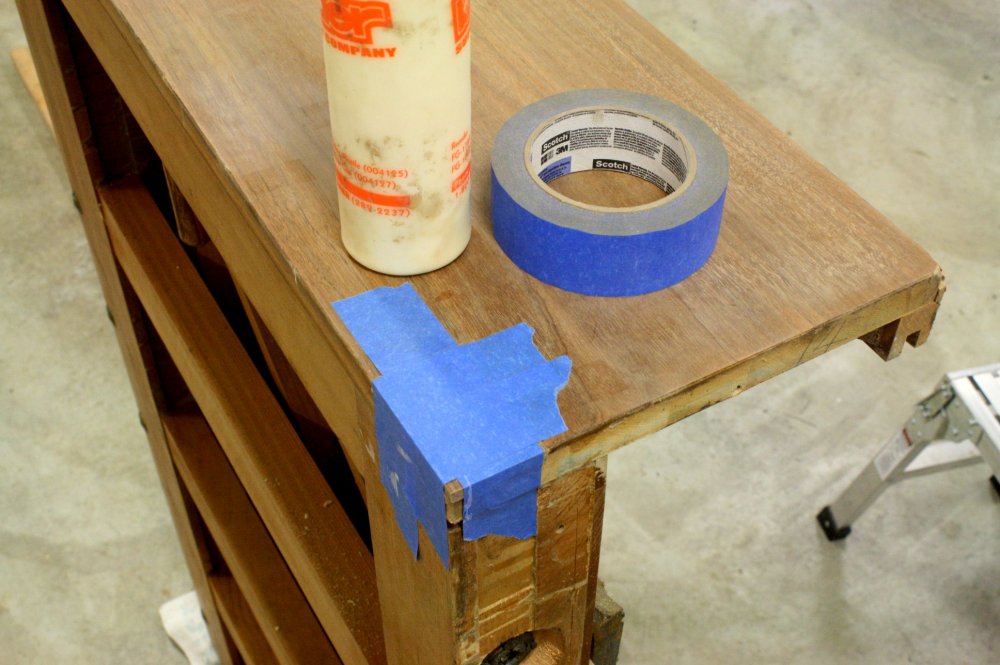
| You'll want to do any patching as sparingly as possible. Even though the patch should be less noticeable than broken or chipped wood, you don't want the thing looking like a quilt either. Keeping the existing wood in place is usually the better way to go. Some woods are simply not available any more like Cuban mahogany, old growth fir, or in this case a vibrant variety of walnut. However, if a piece of wood is badly beaten up, you might have to replace the entire piece with a new one and call it a day. Here's a description for what's involved with patching a broken area. | |
   |
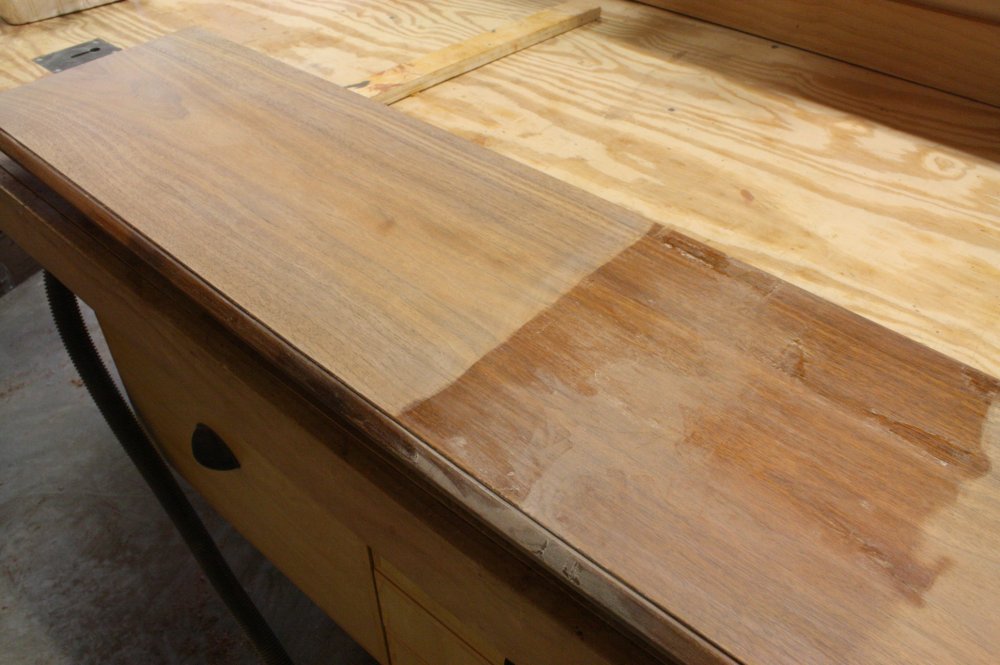
|
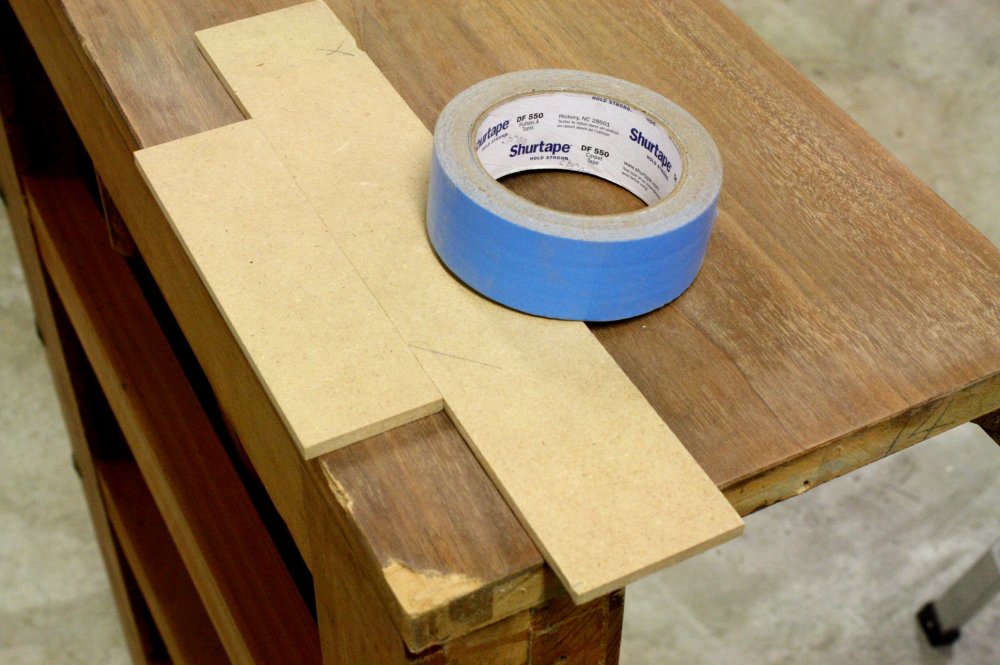
| Chipped veneer is a prime candidate for a patch. You could never color or stain that and make it look acceptable. First you need to cordon off the area with some thin material like MDF stuck down with double-stick (carpet) tape. Then you route out the area about 1/4" deep. Notice that the sides are nice and square so you can easily cut a piece of wood to fit back in there. | |
   |
|
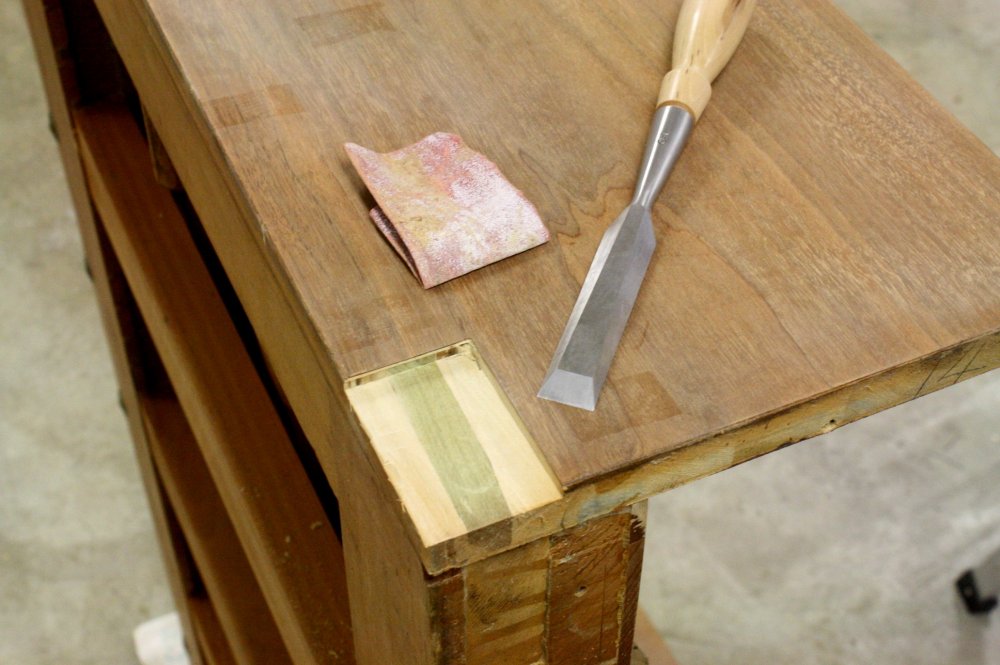
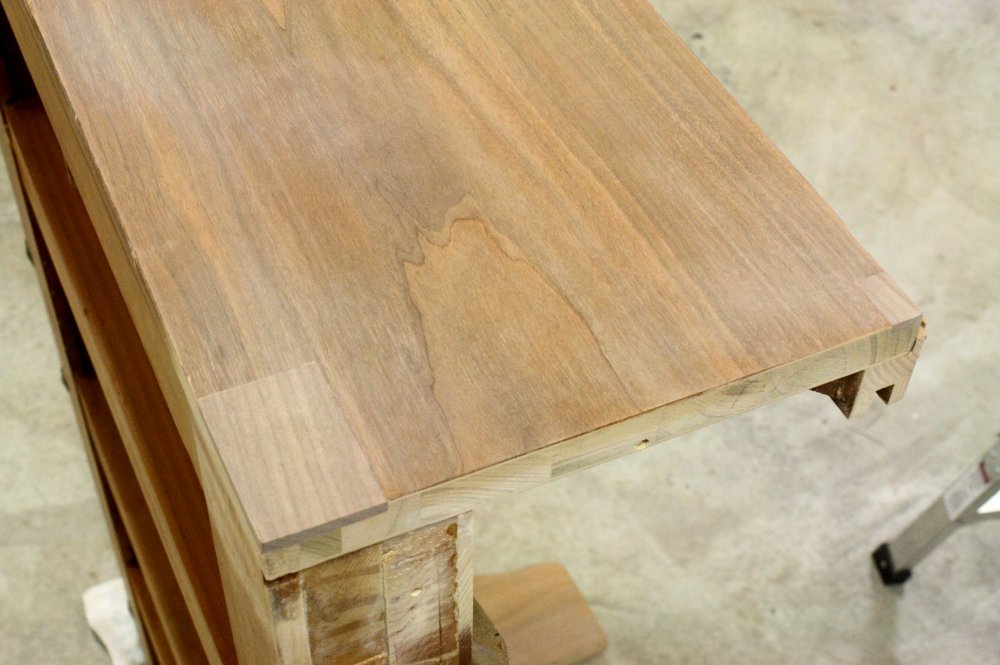
| Clean up the area with a chisel and sandpaper. Find a piece of wood which best matches the color and grain of the area. In this case I used walnut. It was a pretty close match to the variety of walnut originally used. Once the piece receives the finish, it will just about be invisible. Size the piece to match the void, glue it up, and tape it in to dry. In about an hour, remove the tape and sand everything smooth and flush. Then repeat the procedure for all the areas needing some love. | |
| Fix the Major Stuff | |
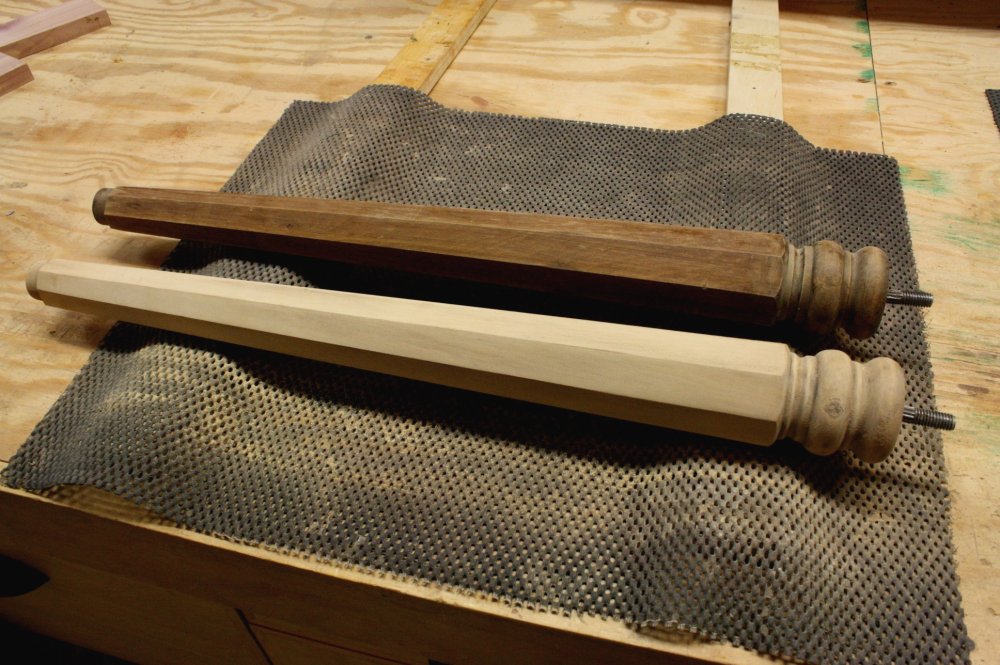
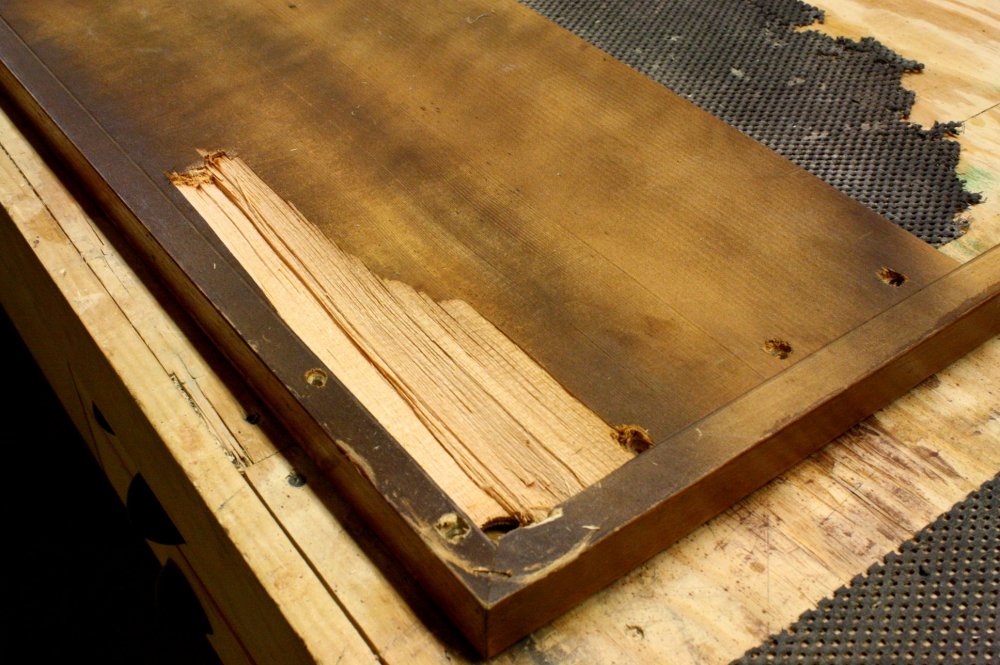 As
I mentioned earlier, the front legs of this piano were completely
ripped out. This would have been extremely difficult to
accomplish unless the person was particularly motivated. The
tray under the keyboard was a 1 1/4" thick piece of lumber.
The top of the leg had a 3/8" diameter threaded stud which screwed
into an insert nut on the other side. The perpetrator would
have had to pull the nut through the piece of wood. As you can
see, he got the leg off and took a good sized chunk of lumber along
with it. Fortunately, the client still had the legs so those
wouldn't have to be recreated. But the damage was done and
needed to be repaired. As
I mentioned earlier, the front legs of this piano were completely
ripped out. This would have been extremely difficult to
accomplish unless the person was particularly motivated. The
tray under the keyboard was a 1 1/4" thick piece of lumber.
The top of the leg had a 3/8" diameter threaded stud which screwed
into an insert nut on the other side. The perpetrator would
have had to pull the nut through the piece of wood. As you can
see, he got the leg off and took a good sized chunk of lumber along
with it. Fortunately, the client still had the legs so those
wouldn't have to be recreated. But the damage was done and
needed to be repaired. |
|
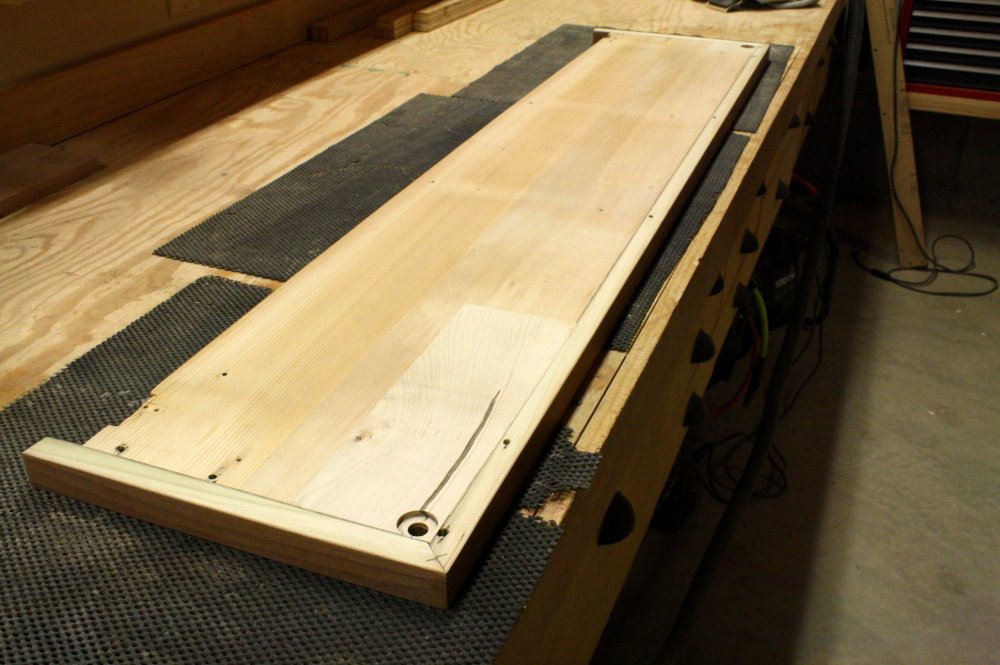
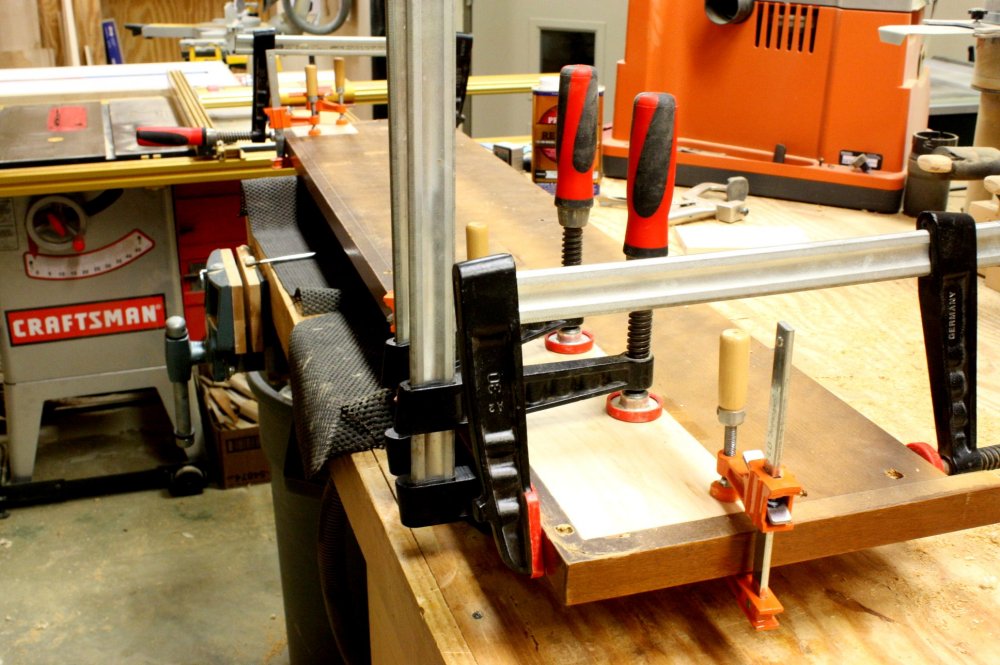 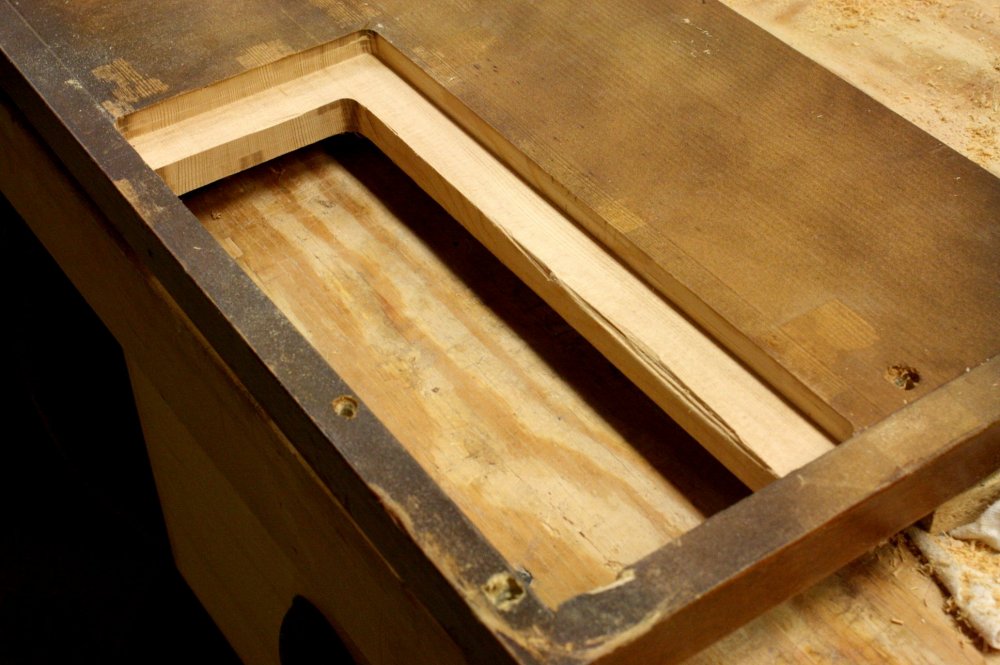 The
offending area was carefully routed away. I left a ledge
around the hole so I could get a little more surface area on which
to apply glue. I cut a piece of birch to fit the hole
perfectly, glued it, and clamped it home. Birch is a very hard
wood; this leg won't be going anywhere. Once the glue dried, I
sanded everything up smooth and flush, then repeated the process for the other
leg. The
offending area was carefully routed away. I left a ledge
around the hole so I could get a little more surface area on which
to apply glue. I cut a piece of birch to fit the hole
perfectly, glued it, and clamped it home. Birch is a very hard
wood; this leg won't be going anywhere. Once the glue dried, I
sanded everything up smooth and flush, then repeated the process for the other
leg. |
|
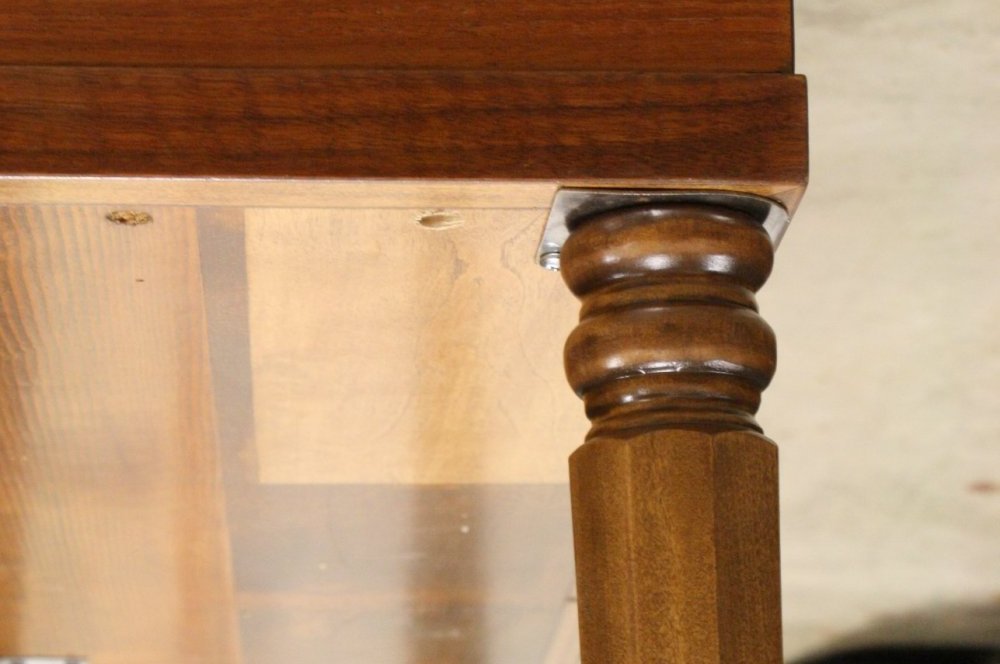  The
holes for the legs' threaded studs were located and drilled through.
A shallow recess on top will house the threaded insert nut.
The patching is only visible from below. No one sill see it
unless someone sticks their head down there ... and I guarantee
there wouldn't be much piano playing going on. The
holes for the legs' threaded studs were located and drilled through.
A shallow recess on top will house the threaded insert nut.
The patching is only visible from below. No one sill see it
unless someone sticks their head down there ... and I guarantee
there wouldn't be much piano playing going on. |
|
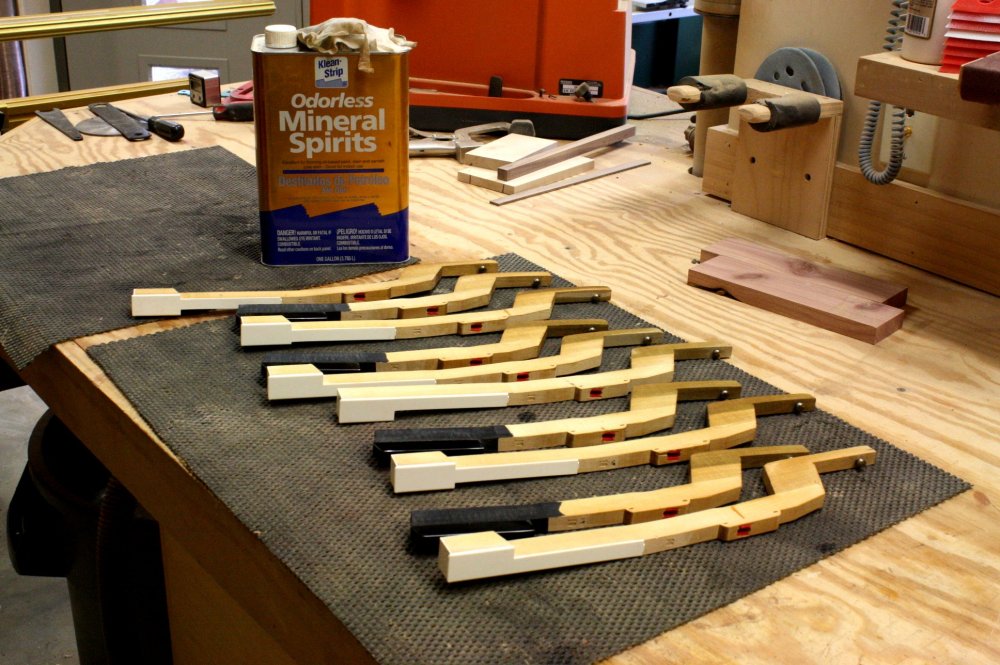
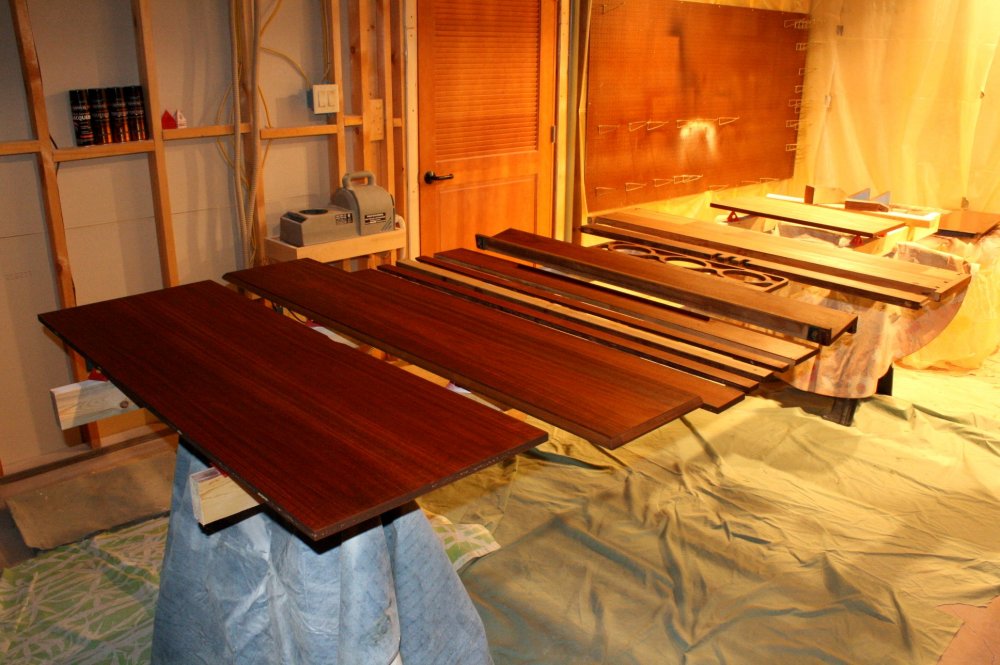
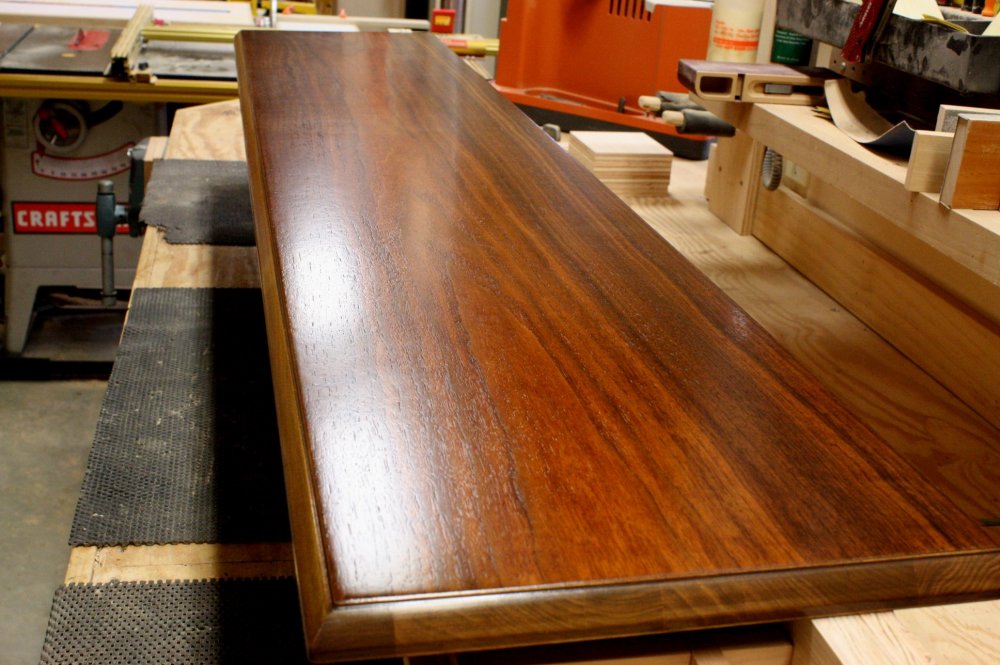
| Apply the Finish | |
   |
|
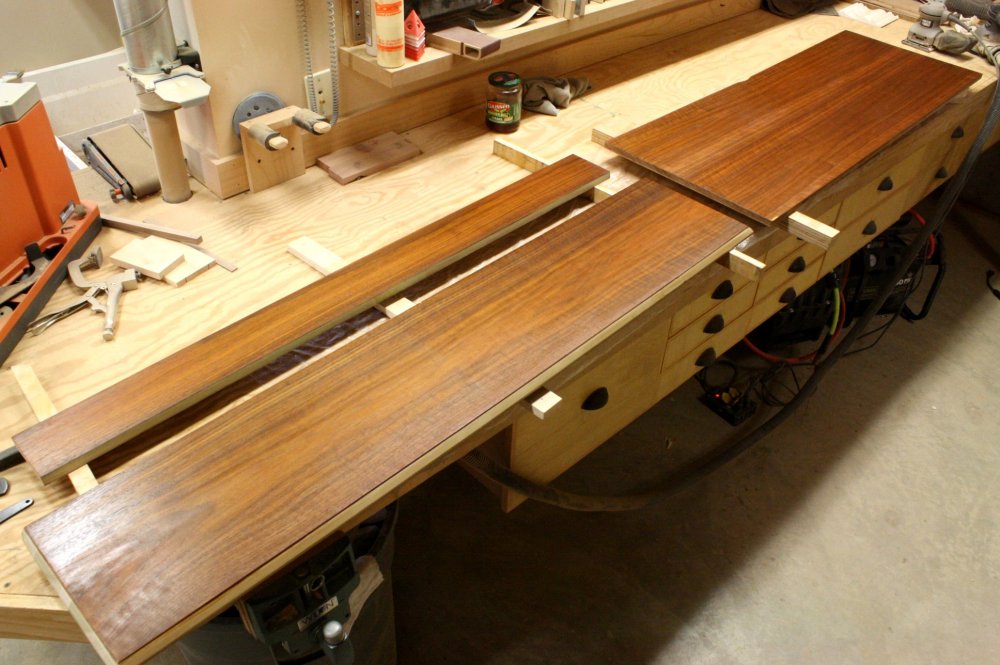
 After
everything was sanded smooth, I
applied one coat of linseed oil which really brought out the beauty
of the wood. It darkens it up and really pops that grain.
I followed that up with three coats of semi-gloss polyurethane
lightly sanding between the second and third coats.
Polyurethane is tougher than lacquer, but it takes a day to dry.
Then I applied some paste wax and buffed it smooth which lends a
little luster and gives it a nice feel to the touch - it's hard to
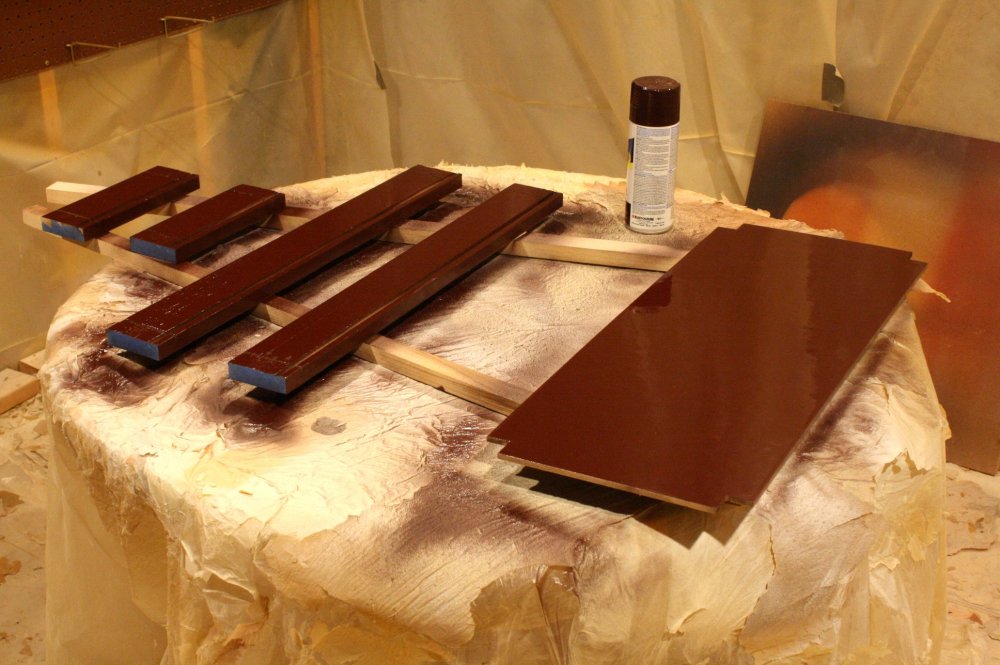
describe - it just feels like new. After
everything was sanded smooth, I
applied one coat of linseed oil which really brought out the beauty
of the wood. It darkens it up and really pops that grain.
I followed that up with three coats of semi-gloss polyurethane
lightly sanding between the second and third coats.
Polyurethane is tougher than lacquer, but it takes a day to dry.
Then I applied some paste wax and buffed it smooth which lends a
little luster and gives it a nice feel to the touch - it's hard to
describe - it just feels like new.The interior of the existing bench was painted so I sanded and sprayed on a few fresh coats of paint. I covered every detail. |
|
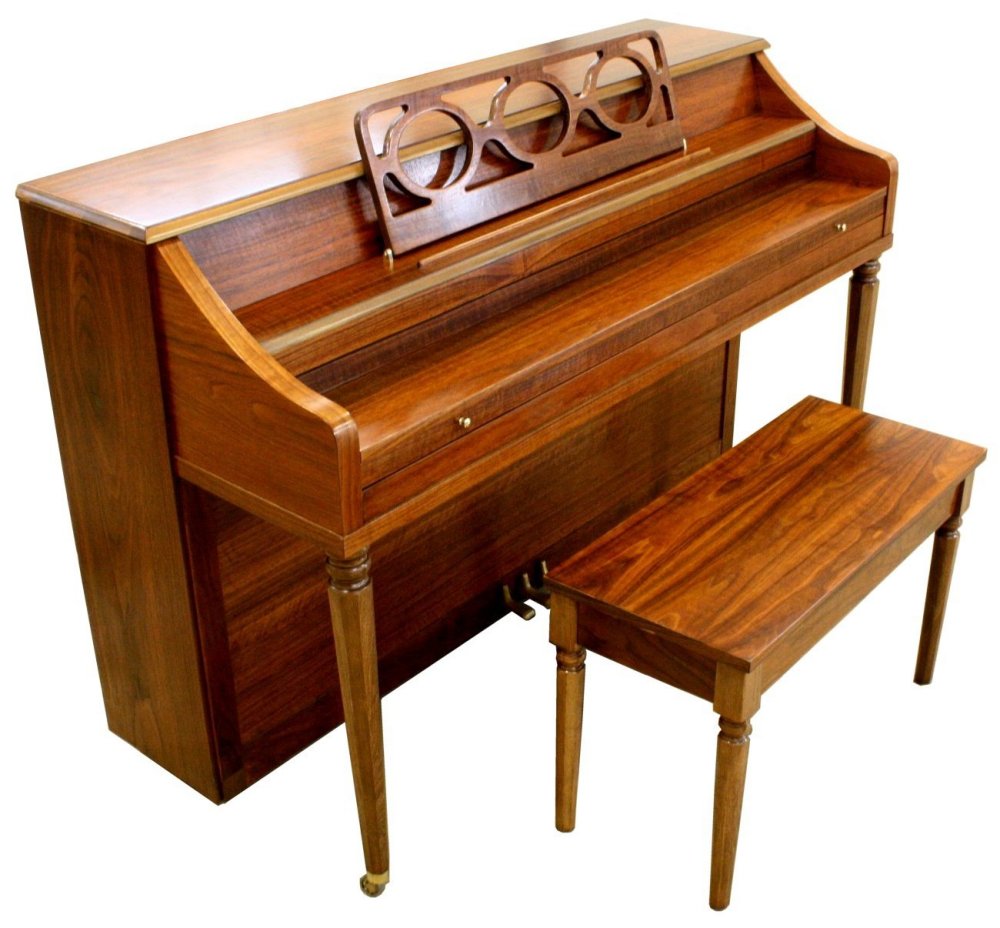
| Put It Back Together | |
 Hopefully
you took good notes and kept all your screws organized. If so,
reassembly is a snap. Take your time so you don't scratch that
freshly finished wood. Now let's take a look at the completed
product. Hopefully
you took good notes and kept all your screws organized. If so,
reassembly is a snap. Take your time so you don't scratch that
freshly finished wood. Now let's take a look at the completed
product.First off you notice that the finish is beautiful, better than the original (even when it was new). Look at the wood grain on that stool. Wow! Go ahead, click on the thumbnails for the larger photos.
|
|
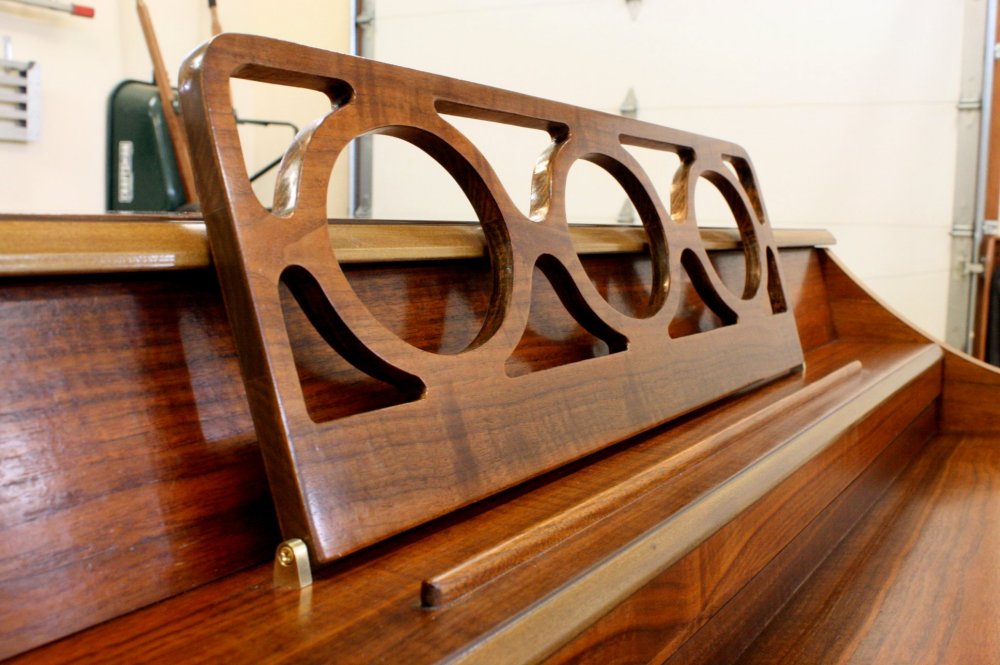  There
are three wood patches in the first photo to the right. Two
blend in pretty good; I'll concede on the third, but these are much
less noticeable than chipped off bare wood. There
are three wood patches in the first photo to the right. Two
blend in pretty good; I'll concede on the third, but these are much
less noticeable than chipped off bare wood.Everything was refinished including the music stand. Everything was cleaned and buffed like those music stand mounting pivots. |
|
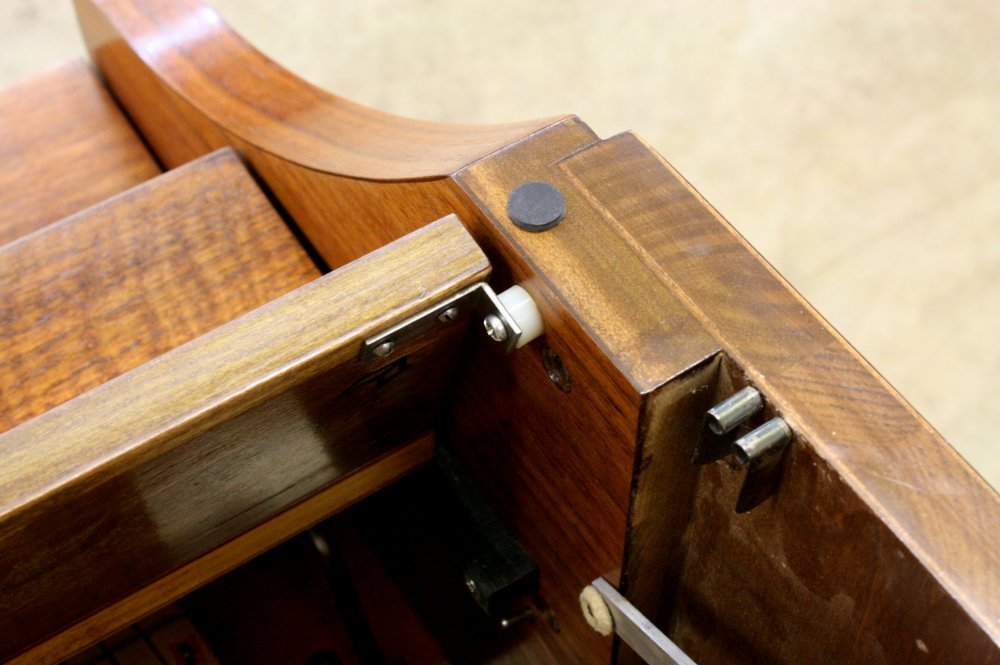 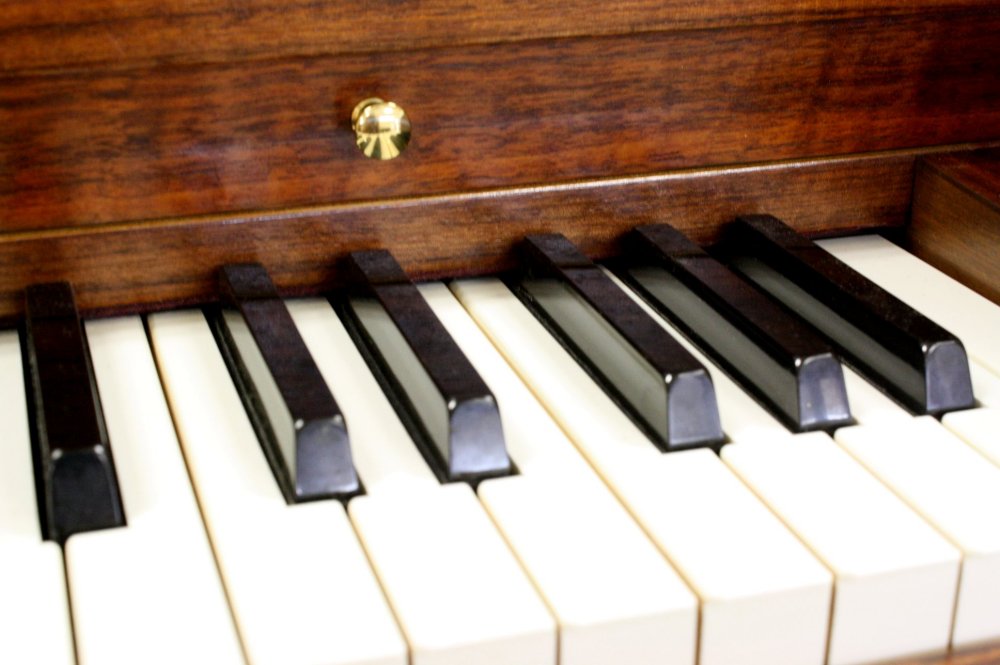 Every
key was hand cleaned. One pull knob on the key cover was
missing. I provided two new ones which were a close match.
Even the issues you can't readily see were addressed. I added a spacer
to the top assembly so the screw wasn't bending that little metal
"L" bracket. I added new rubber bumpers so the top doesn't
slam down. The details! Every
key was hand cleaned. One pull knob on the key cover was
missing. I provided two new ones which were a close match.
Even the issues you can't readily see were addressed. I added a spacer
to the top assembly so the screw wasn't bending that little metal
"L" bracket. I added new rubber bumpers so the top doesn't
slam down. The details! |
|
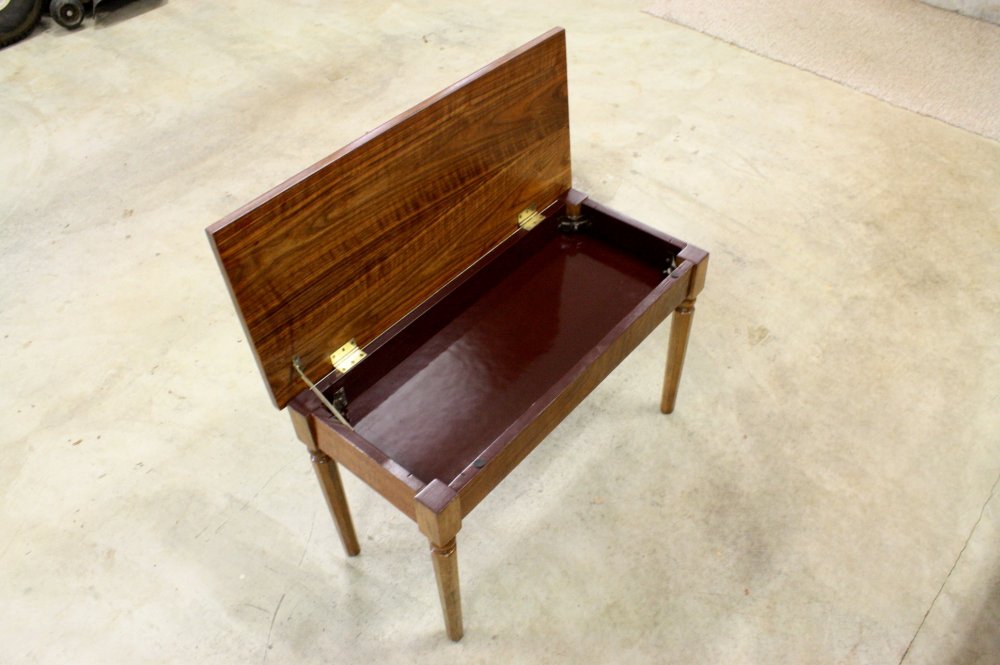 Even
the stool was refinished. Look at the gleam on those buffed
out hinges. This looks like it just came in brand new from the
showroom. Even
the stool was refinished. Look at the gleam on those buffed
out hinges. This looks like it just came in brand new from the
showroom.Many people want to refinish that old antique, but few are willing to put in the time to do it right. Did you think this was going to be a quick weekend job while throwing back a few beers? This restoration took me 48 hours. It was a labor of love and I took the time to respect each individual component. That love shows in the finished product. Now it will be ready to host my client (and any new grand daughters down the line) to create new memories of fresh baked cookies and Christmas carols. |
|