|
Brian's Guitar from Conception to Birth
or How to Build a Guitar in 62 Easy Steps! |
|
28
Set the Frets |
  If
you havenít hammered in frets before, I would strongly recommend a
few practice runs on some scrap wood to get the feel for it. Just
make sure you leave yourself enough fret wire to complete the job.
Our fret wire came coiled in the box. Donít try to straighten it;
the coil will work to your benefit later on. Youíll need a good set
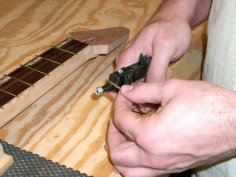
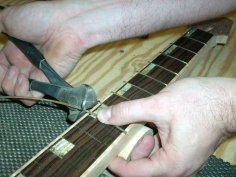
of nippers to get through it. Hold the wire on top of the fretboard
and rough cut it so that about 2mm overhangs each side. Since our
fretboard has banding on it, we need to cut the fretís tang off
leaving the top crown intact. StewMac sells a special tang cutter
tool that does this which was worth the investment. It cut cleanly
and precisely. Without it, you would have to attempt it with a dyke
(the plier type, not the bull variety), and file everything smooth.
That can be very time consuming considering that thereís 44 fret
ends to
de-tang. If
you havenít hammered in frets before, I would strongly recommend a
few practice runs on some scrap wood to get the feel for it. Just
make sure you leave yourself enough fret wire to complete the job.
Our fret wire came coiled in the box. Donít try to straighten it;
the coil will work to your benefit later on. Youíll need a good set
of nippers to get through it. Hold the wire on top of the fretboard
and rough cut it so that about 2mm overhangs each side. Since our
fretboard has banding on it, we need to cut the fretís tang off
leaving the top crown intact. StewMac sells a special tang cutter
tool that does this which was worth the investment. It cut cleanly
and precisely. Without it, you would have to attempt it with a dyke
(the plier type, not the bull variety), and file everything smooth.
That can be very time consuming considering that thereís 44 fret
ends to
de-tang.
|
  Take
the tang off one side of the fret, line it up on top of the
fretboard, then mark the amount to remove off the other side of the
fret. After a while, you wonít have to mark it since you will be
able to judge the amount to remove by looking at the barbs on the
side of the tang. I used some needlenose pliers and put a very
slight downward angle on the ends of the frets. You do not want
these sticking up in the air when you hammer them in which would be
very difficult to correct. Itís easier to hammer down the hump
youíll create than it is the end of the fret. Take
the tang off one side of the fret, line it up on top of the
fretboard, then mark the amount to remove off the other side of the
fret. After a while, you wonít have to mark it since you will be
able to judge the amount to remove by looking at the barbs on the
side of the tang. I used some needlenose pliers and put a very
slight downward angle on the ends of the frets. You do not want
these sticking up in the air when you hammer them in which would be
very difficult to correct. Itís easier to hammer down the hump
youíll create than it is the end of the fret.
|
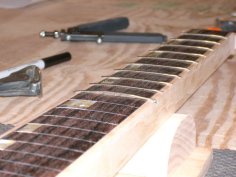
  Support
the neck directly below the fret slot youíll be filling with a wood
block. The back of the neckís not carved yet so you donít have to
worry about marring it. Tap in each end of the fret leaving the
middle bowed up slightly. Thatís the advantage of leaving it coiled
as mentioned above. Again, it much easier to flatten the hump in the
middle. Now tap your way across the fret taking care to strike the
fret and not your pretty fretboard. After a few frets youíll learn
how much force to apply. Check that the fret is fully seated by
trying to jamb your fingernail under the fret. If you can, hammer
some more. Donít whack on the fret ends too hard because thereís no
tang there and you can smash the fret or your edge banding. Support
the neck directly below the fret slot youíll be filling with a wood
block. The back of the neckís not carved yet so you donít have to
worry about marring it. Tap in each end of the fret leaving the
middle bowed up slightly. Thatís the advantage of leaving it coiled
as mentioned above. Again, it much easier to flatten the hump in the
middle. Now tap your way across the fret taking care to strike the
fret and not your pretty fretboard. After a few frets youíll learn
how much force to apply. Check that the fret is fully seated by
trying to jamb your fingernail under the fret. If you can, hammer
some more. Donít whack on the fret ends too hard because thereís no
tang there and you can smash the fret or your edge banding.
|
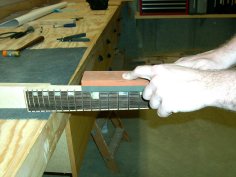
  Hammer
all the frets in then go back and trim off all of the ends flush to
the side of the fretboard. Your nippers should be ground flush on
the end so that your cut is right up against the neck (I bought
these cheap $5 nippers and took an angle grinder to them). If thereís a
bevel on the tip of the nippers, it will leave more to file off and
it will want to pull on the fret when youíre cutting it. Sand the
ends of the frets flush with the side of the neck; a sharpening
stone works great for this. You can work on many frets at a time and
you can feel when you get down to the wood. The side of the neck is
not carved yet so you donít have to worry too much about marring it.
Turn the stone at about a 45 degree angle and bevel the edges of the
frets down to the fretboard. Donít try to level the tops of the
frets yet. Leave the final fret dressing until after the neck is
carved, mounted in the guitar, and strung up. That will give you a
much better reference of where youíll need to level and how much. Hammer
all the frets in then go back and trim off all of the ends flush to
the side of the fretboard. Your nippers should be ground flush on
the end so that your cut is right up against the neck (I bought
these cheap $5 nippers and took an angle grinder to them). If thereís a
bevel on the tip of the nippers, it will leave more to file off and
it will want to pull on the fret when youíre cutting it. Sand the
ends of the frets flush with the side of the neck; a sharpening
stone works great for this. You can work on many frets at a time and
you can feel when you get down to the wood. The side of the neck is
not carved yet so you donít have to worry too much about marring it.
Turn the stone at about a 45 degree angle and bevel the edges of the
frets down to the fretboard. Donít try to level the tops of the
frets yet. Leave the final fret dressing until after the neck is
carved, mounted in the guitar, and strung up. That will give you a
much better reference of where youíll need to level and how much. |