 |
|||||||
| Philosophy | Process | Guitars | Design | Stands | Blog | About Me | |
| ▼ | |||||||
| Design Considerations | ||
 I've never been one to shy away from a lengthy dissertation.
Following is a bit of discussion over all the choices that go into
designing a guitar from scratch. Many of these items need to
be ironed out before cutting that first piece of wood. I ask
that you browse through the categories for your "must-haves" and let
me guide you through the technical stuff. I've never been one to shy away from a lengthy dissertation.
Following is a bit of discussion over all the choices that go into
designing a guitar from scratch. Many of these items need to
be ironed out before cutting that first piece of wood. I ask
that you browse through the categories for your "must-haves" and let
me guide you through the technical stuff.Once I know where you want to go, I will prepare a detailed shopping list. You can turn me loose or you can participate in the shopping as much as you want. Search the stores or internet for individual components or exotic woods. I will coordinate with you before you buy to make sure things will be compatible. |
||
| Body | Discussion | Purchase |
| One piece or faced with veneer | Pretty or exotic wood costs a mint. That’s why you won’t see the whole body made of flamed maple; you just waste too much “pretty” on the backside of the guitar which no one sees. If you prefer the simple grain patterns of mahogany, (plain) maple, or ash you can go with a single chunk of wood from which to carve your body. If you go with a neck-through design, some like to see the neck on the face of the guitar where it can be embellished with multiple bands of different colored woods. |
Body wood Front panel Back panel Side panels |
| Solid body, semi-hollow, or hollow |
● Solid bodies are typical for modern electric guitars. It’s
basically one chunk of wood with space for your electronics scooped
out. ● Semi-hollow bodies add resonance chambers which involve more routing. This adds a different character to the tone. You will often see a penetration on the face of the guitar like an “F” hole. Removing some wood will also make the guitar a little lighter. ● Hollow bodies are akin to acoustic guitars and involve a whole different method of construction. The inside of the guitar is one big resonance chamber and is made from thin pieces of wood bent around to form the shape instead of starting with a single mass of wood and carving out the profiles. |
 |
| Edge-banded or not | This is personal preference. Edge-banding the body of the guitar frames the top. For this look, it simply adds another step to the process. You often see banding made up from several thin layers of plastic, wood, or shell material (mother of pearl or abalone). Faux edge-banding can also be accomplished by simply not applying stain to the top edge. | Edge-banding material |
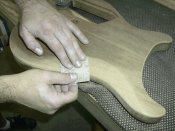
| Body style: sculpted or flat | Sculpted or carved tops look great, but this will add another process to the build. Flat tops can sometimes be embellished with a routed edge or an arm rest relief to give it some flair if you want to keep it simple. | |
| Cavity cover: plastic or wood | Wood gives you a professional look; plastic gives you a thinner guitar leaving more room for electronics. A quarter-inch difference doesn't seem like a lot, but it comes to about 12% of the total thickness, which also factors into the weight. | Plastic or wood |
| Cavity cover: wood screws or threaded inserts | Threaded inserts will never strip out. It’s probably worth the extra 3 dollars to go with the inserts. | Screws, inserts |
| Cavity: copper foil shield or paint | Controlling any outside electrical interference from getting to your electronics is important. Available are adhesive-backed copper shielding or a special impregnated paint. There's no advantage of one over the other. |
Foil or paint Wire insulation |
| Neck | Discussion | Purchase |
| Bolt-on, glue-in, neck-through, or set-in |
Most of this is personal preference. A bolt-on neck is easier to
replace, but how many necks do you break. I find that the other
three glue-in neck options look better and offer better sustain. ● You know what a bolt-on neck is. That was what your first guitar had. I find them very cheap looking. ● A glue-in is like a bolt-on with a neck tenon glued into a mortise on the body instead of bolted on. This option will allow you to gracefully shape the neck to body transition. ● Neck-through is where the neck continues through the body all the way to the end of the guitar. You can see the neck wood intersecting the body on the back and sometimes on the front of the guitar. ● A set-in neck is kind of like a neck sandwich where the body has a top and bottom panel with the neck nested in between. The neck stops short of the end of the guitar and is not visible on the back of the body. The neck is continuous inside the guitar to past the string ferrules creating a very solid connection. |
Neck wood Neck plate (if bolt-on) 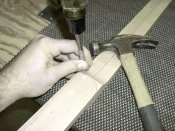 |
| Tilt-back neck or flat | This will somewhat depend on the bridge you buy. If the bridge sticks up pretty high off the body, keeping the neck parallel with the body will result in an awkward looking arrangement. Tilting the entire neck back will make neck construction a little more involved, but will give you a cleaner appearance. Viewing a section of your guitar with your actual components will start to reveal what will look best. You will usually see the neck tilted back from the body from 2 to 4 degrees. | |
| Scale length |
Scale length is the distance from the nut to the bridge. For a
standard guitar, this is usually between 24" and 25 1/2". I’ve heard
of players who use dropped tunings opt for up to 27" scales to keep
a reasonable tension on the strings when they loosen them up. A “compensated” scale length will be employed. This will compensate for the amount the strings are stretched when you press them to the fretboard changing the pitch slightly. You will notice that the saddles will be staggered to compensate for wound versus unwound strings. |
 |
| Truss rod | Including a truss rod will give you an adjustment option if the neck starts to do things. It also helps keep the neck from twisting. There are several types available from a traditional threaded rod with a nut to double-acting units which allow both up and down adjustment. | Truss rod |
| Integral fretboard or applied | Fenders have a one piece neck with the frets laid directly onto the wood with the truss rod cut into the back of the neck (that skunk stripe). Other guitars have a separate fretboard applied onto the neck covering the truss rod cavity. | Fingerboard wood |
| Radius on fretboard | Most electric guitars have a 12" or 14" radius to crown the top of the fretboard to make playing a bit more comfortable. It's just a personal preference as to how dramatic the crown. | |
| Radius on back of neck | How chunky do you like it? Some prefer a very slender feel while others like to hold a log (probably a masculinity compensation). The thicker the neck, the more stable it will be, but don’t try to make it too thin or you risk weakening it. Remember, routing a channel for the truss rod removes a lot of structural wood. |
 |
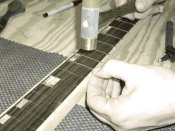
| Frets | There are a few sizes out there. Width and height of the crown are personal preference. | Fret material |
| Edge banded fretboard or not | Edge-banding the fretboard covers the sides of the saw kerfs of the frets. It’s a little more professional to cover these up and will help keep moisture from intruding there, but it is another step to add to the production schedule. The frets will also need to be lapped over the banding. |
Edge banding Wood or plastic |
| Neck width at nut | How far apart do you like your strings? A pre-fabricated nut can usually be found that will work. If you desire something different, they do sell nut blanks which you can create your own string spacings. | Nut or nut material |
| Passive nut or locking | A locking nut helps keep your guitar in tune better. It basically clamps the strings directly behind the nut. You see these on guitars with tremolos. If you’re getting locking tuners, you don’t need a locking nut. | String clamp |
| Fingerboard inlays or dots | Dots are easier to put in, but inlays look cooler and let you personalize things a bit. It depends on what you’re up to. Pre-manufactured shapes can be purchased as well. | Inlay material |
| Neck side dots | Reference dots are the norm on the side of the neck, but other designs can be accommodated. | Inlay material |
| Headstock | Discussion | Purchase |
| Flat headstock or tilted back | Fenders have flat headstocks which are parallel with the fretboard. They usually need those ugly string trees to hold the strings down on the nut. You’ll use a little less wood, but I think the flat headstock style just looks bad. Tilting the headstock back (usually 10 to 15 degrees) will pull the strings over the nut and help with sustain. Another option is to add a veneer of pretty wood over the headstock, usually something to match the body of the guitar. | Face veneer wood |
| 6, 7, or 8 string | Stick with the standard 6 or go for the exotic. When it's a custom, you can do as you choose. But straying from the standard 6 will reduce your options on tuners, nuts, and bridges. | |
|
Tuners: 3 a side 2+4 1+5 6 in a row |
3+3 or 6 in a row are the combinations in which you’ll find tuners packaged. Going to a 2+4 or a 1+5 will require you to buy two sets of tuners and have leftovers (presumably for the next guitar). 3+3 sets have larger blades and the straight 6 tuners are smaller so they fit. | Tuners (left/right) |
| Locking tuners or non-locking | I prefer locking tuners since you do not have to wind the string around the post numerous times. You just pull the string though tight and clamp it. Locking tuners also hold your tuning better. You’ll narrow your options some with the locking tuners, so just browse the internet and see what you like. | |
| Truss rod adjustment cover | A very minute choice to make, but it will still require the purchase of something so I’ll list it. You can find many pre-made covers, but for a one-off guitar, you might as well just have me make one from some scrap wood. | Plastic or wood |
| Headstock inlay | A great spot for some personalization. I can also print out your logo on clear film and lacquer over it. | Inlay material |
| Finish | Discussion | Purchase |
| Stained or natural | Your choice; the possibilities are endless. Stain your wood or paint it. Add glossy top coats or keep it a natural satin finish. Some prefer the natural feel of a neck that’s only been oiled. |
Stain, paint, lacquer |
| Hardware | Discussion | Purchase |
| Single or electric/ acoustic output jack | You can go crazy with electronics. It is possible to have six outputs to control each string individually. You can also find guitars with computer circuit boards and MIDI outputs. You can keep the guitar simple and use pedal effects to embellish your tone, or you can go the BC Rich route with 48 or so on-board switches and effects. If you like a piezo acoustic pickup, you can opt send it out through a stereo jack for separate amping. |
Output jack(s) Output jack cover plate |
| Fixed or tremolo bridge | Fixed bridges obviously keep your tuning better, but tremolos can be fun too. Tremolos do require a lot of extra routing right down the middle of the guitar compromising a little tone and sustain. | Bridge |
| String ferrules or tailpiece | Some bridges hold the string balls; some require a separate tailpiece. You can also run the strings all the way through the body which will require something to trim out the holes on the front and back of the body (string ferrules). | String ferrules or tailpiece |
| Strap locks | There’s no choice here; I will require these. You won’t want to be dropping your beautiful new guitar. | Pair strap locks |
| Electronics | Discussion | Purchase |
| Controls through the front or from back | Fenders have the wiring from the front; Gibson’s from the back. Either route is viable; however, when going through the front, you will need a large pick guard to cover up your wiring channels and you won't be able to do much contouring on the front. | Pick guard |
| Active or passive electronics | Active electronics offer a few more tone choices and a little extra punch to the volume. Active electronics require room for a 9 volt battery. Check with the pickups you like to see what they require. Also, piezo acoustic bridges usually require a battery. | Battery compartment |
| Potentiometers | You can build a guitar without knobs. The pots are subtractive and simply take out volume or remove the highs. However, most folks prefer a little on-board control. Volumes and tone use the same kind of potentiometer. Some capacitors will also be needed. |
Volume pot(s) Tone pot(s) Capacitors |
| Knobs | Pick what you like or have me make some for you out of wood. | Knobs |
| Switches | A 3-way pickup selector is the norm, but it doesn't have to be wired up that way. You can go with a simple on-off switch for each pickup, or a blend pot so you can pan between pickups. Pick what you like. The only thing to consider here is not to pick a bulky switch that won’t fit in your control cavity. Whenever they offer a lower profile model, buy that one. |
Switches |
| Single-coil pickups or humbuckers | This is the age-old debate that’s been going on since electric guitars first came out. Fenders use single-coil pickups and lend a thinner, twangier tone. You’ll find humbuckers on Gibson’s which give a fuller tone and less noise. Humbuckers can be wired with a coil-splitter option which will try to emulate a Fender sound. This can be switched with a pull-up knob or a toggle. Again, this is personal preferences. |
Neck pickup Bridge pickup |
| Acoustic pickup | There are some nice peizo pickups out that give great acoustic tone from tiny pickups mounted in the bridge saddles. It's a bit more wiring, but the tone possibilities are endless. | Acoustic pickup and associated switches and knobs |