| Brian's Guitar from Conception to Birth or How to Build a Guitar in 62 Easy Steps! |
| The Body |
| Once you feel you’ve
prepared enough, it’s time to dive in. Here is where some of the
“real man” tools come in handy. As I mentioned, I took woodworking
classes at a technical college. One of the benefits of being an
alumni is that I can go back and use their big and expensive tools.
So I just planned and prepared a few trips to take care of the
things I couldn’t accomplish at home. 1 Rough-out the Body Panels |
 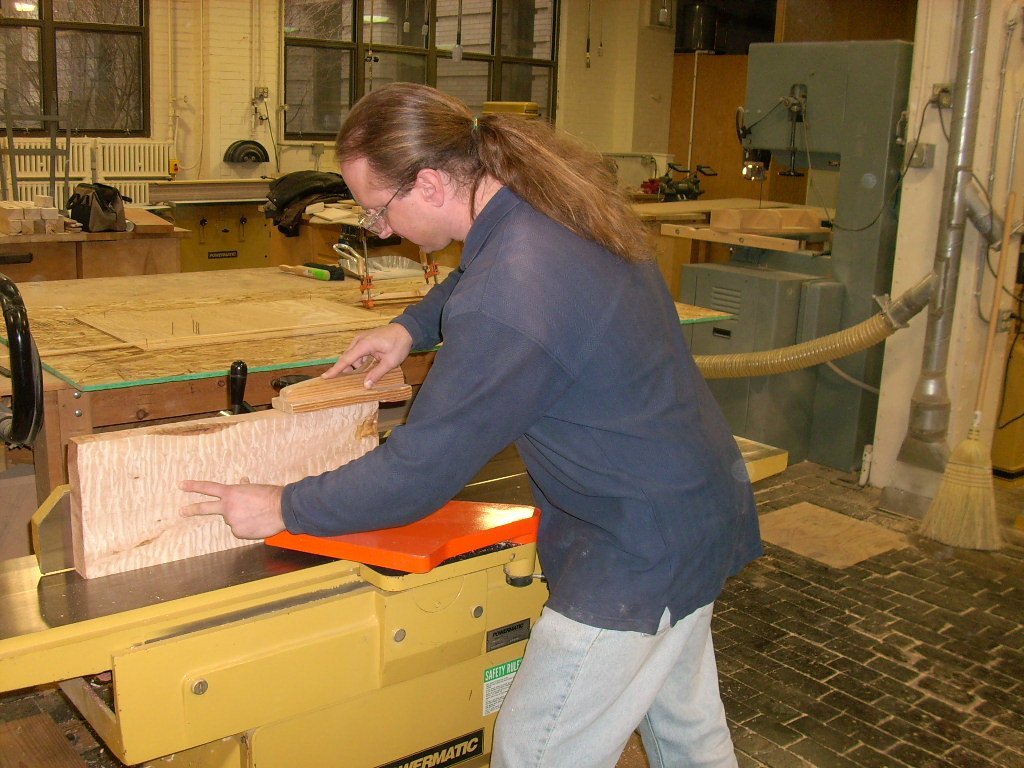 The
guitar’s body design has a pretty front face of quilted maple on top
of the less expensive mahogany (although that’s not that cheap
either). I used the jointer to clean up and flatten one edge of the
maple. A few light passes through the machine is all you’ll need.
Then take the board over to the table saw and cut just a little off
the opposite edge. This will make both edges perfectly parallel.
Keep the board oversized at this point. Remember, you can always
trim a little more off, but you can’t add more back on (just make a
sign of that statement and tape it to your forehead). Take the board
back to the jointer for a single, light pass on this freshly cut
edge to clean up any saw marks and get it glass smooth. The
guitar’s body design has a pretty front face of quilted maple on top
of the less expensive mahogany (although that’s not that cheap
either). I used the jointer to clean up and flatten one edge of the
maple. A few light passes through the machine is all you’ll need.
Then take the board over to the table saw and cut just a little off
the opposite edge. This will make both edges perfectly parallel.
Keep the board oversized at this point. Remember, you can always
trim a little more off, but you can’t add more back on (just make a
sign of that statement and tape it to your forehead). Take the board
back to the jointer for a single, light pass on this freshly cut
edge to clean up any saw marks and get it glass smooth.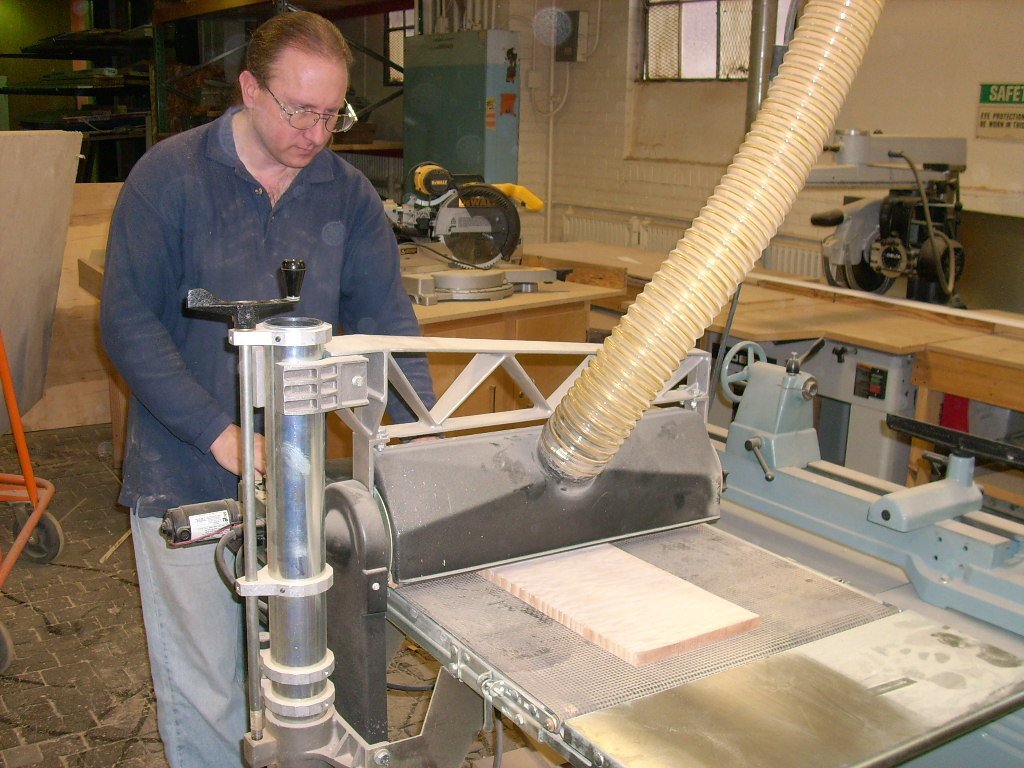 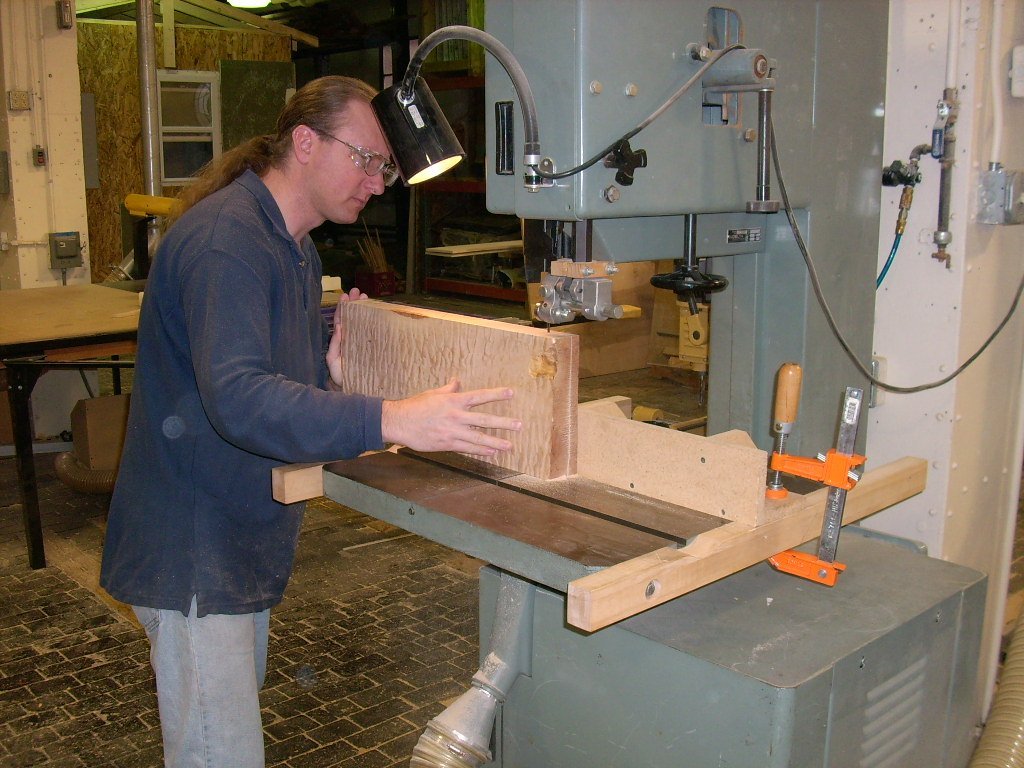 Since
the top will be a book-matched set (kind of like a mirror image),
you have to cut the board and open it up like a book. This is
accomplished on the bandsaw. Mark your board on the edge before
cutting so you can match the pieces up again later in sequence. Set
the fence up to cut the board a little thicker than you need. Run
both sides of both leaves through the drum sander to clean off the
saw marks. The jointer is a little too aggressive for this type of
wood and it will chip out on you. Get them to the same thickness,
but at least 4mm over your final thickness. You’ll plane them down
to final thickness after they’re glued up. Set the front panels
aside for now and get the back panels going. Since
the top will be a book-matched set (kind of like a mirror image),
you have to cut the board and open it up like a book. This is
accomplished on the bandsaw. Mark your board on the edge before
cutting so you can match the pieces up again later in sequence. Set
the fence up to cut the board a little thicker than you need. Run
both sides of both leaves through the drum sander to clean off the
saw marks. The jointer is a little too aggressive for this type of
wood and it will chip out on you. Get them to the same thickness,
but at least 4mm over your final thickness. You’ll plane them down
to final thickness after they’re glued up. Set the front panels
aside for now and get the back panels going.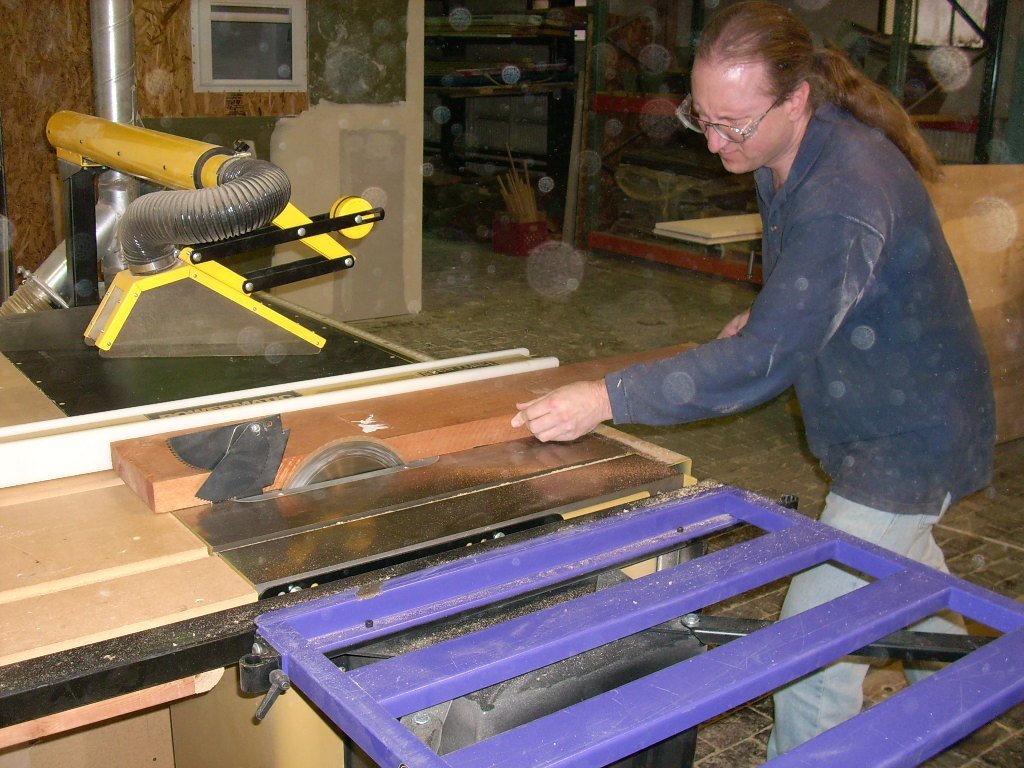 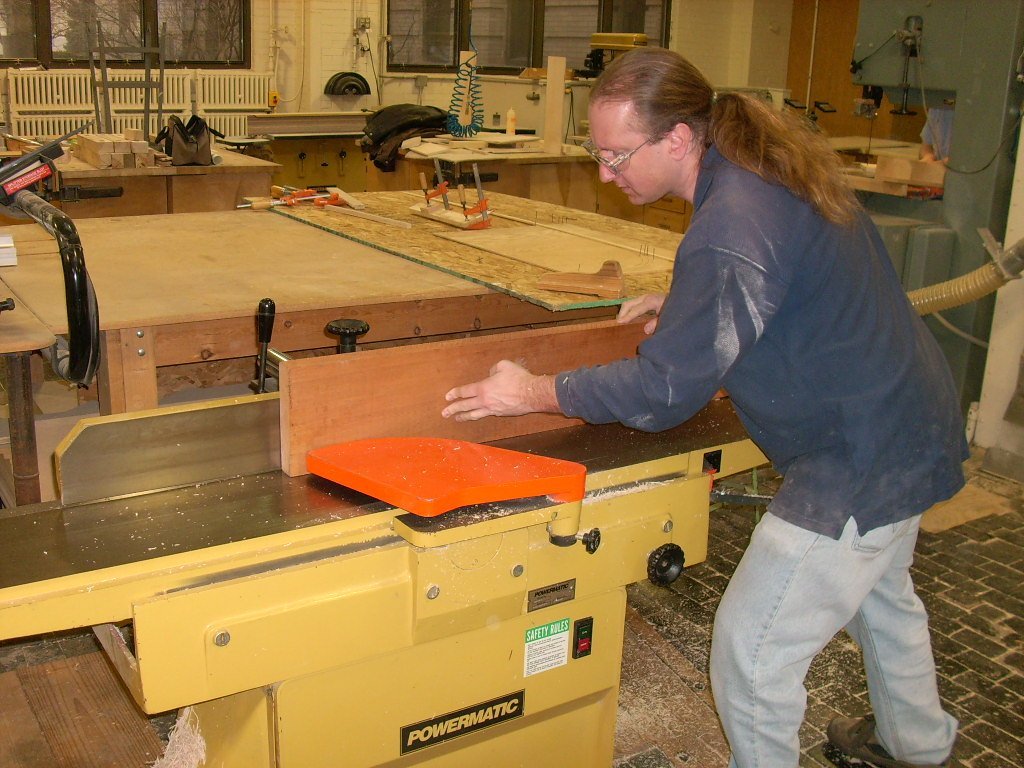 The
back side of the body for this guitar is mahogany, but the board we
found was not quite wide enough to book-match. It’s on the back of
the guitar so it really wasn’t that critical to us. Mahogany doesn’t
have that distinctive of a grain pattern so it will not be that
noticeable anyway. Just like the front panels, run one edge through
the jointer and then trim the opposite edge parallel on the table
saw. Make one more light pass back through the jointer on the
freshly cut edge. Since I’m not book-matching this board, I can skip
the bandsaw. Instead, use the miter saw to chop two panels about
50mm over the final length. Run them through the drum sander to
remove any imperfections and to insure consistent depth keeping them
at least 4mm over the final thickness. The
back side of the body for this guitar is mahogany, but the board we
found was not quite wide enough to book-match. It’s on the back of
the guitar so it really wasn’t that critical to us. Mahogany doesn’t
have that distinctive of a grain pattern so it will not be that
noticeable anyway. Just like the front panels, run one edge through
the jointer and then trim the opposite edge parallel on the table
saw. Make one more light pass back through the jointer on the
freshly cut edge. Since I’m not book-matching this board, I can skip
the bandsaw. Instead, use the miter saw to chop two panels about
50mm over the final length. Run them through the drum sander to
remove any imperfections and to insure consistent depth keeping them
at least 4mm over the final thickness. |


