|
Brian's Guitar from Conception to Birth
or How to Build a Guitar in 62 Easy Steps! |
|
2
Glue-up the Body Panels |
Now it’s
time to glue up the halves. The front of the guitar is book-matched
so you’ll want to choose which book-match looks the best; it can go
either of two ways. Use the edge marks you made earlier to put the
boards back into the original alignment. Imagine that the binding of
this “book” can be hinged on the top or the bottom. Open them up
each way and pick the side you like best. Once you’ve selected your
best face, place a mark across the faces at the abutment of the two
boards so they can easily be aligned when gluing.
  Once
you spread the glue you only have a few minutes to work. So prepare
the clamps and do a dry run to make sure everything is set up right.
I cover the tops of the clamps and my workbench with wax paper to
keep the glue from sticking where it shouldn’t. Once you’re ready,
smear a little wood glue on one edge of one board. Just like picking
your nose or checking your prostate, nothing works
better than your finger. I also put a very small amount of glue on
the opposite edge just enough to saturate the grain. If you get too
much glue in there you’ll have a big slippery, sliding mess (which
might be good for sex, but not for this glue-up). Place the boards
in your clamps and apply slight side pressure keeping your
book-matched halves in alignment. Add a clamp on each end of the
joint to keep the two surfaces flush with each other. Use a clamping
block with wax paper wrapped around the edges of the boards. Tighten
all the clamps a little at a time working your way around. Moderate
pressure is all that’s needed. You’ll get some glue squeeze out, but
that’s a good thing; it shows that you’ve used enough glue. Avoid
the temptation to wipe up the glue ooze. All you’ll do is force glue
into the grain of the wood and stain will not be able to penetrate
those areas (meaning that would be ugly). Repeat the glue up
procedure for the back panels of the guitar, and let everything dry
over night. Once
you spread the glue you only have a few minutes to work. So prepare
the clamps and do a dry run to make sure everything is set up right.
I cover the tops of the clamps and my workbench with wax paper to
keep the glue from sticking where it shouldn’t. Once you’re ready,
smear a little wood glue on one edge of one board. Just like picking
your nose or checking your prostate, nothing works
better than your finger. I also put a very small amount of glue on
the opposite edge just enough to saturate the grain. If you get too
much glue in there you’ll have a big slippery, sliding mess (which
might be good for sex, but not for this glue-up). Place the boards
in your clamps and apply slight side pressure keeping your
book-matched halves in alignment. Add a clamp on each end of the
joint to keep the two surfaces flush with each other. Use a clamping
block with wax paper wrapped around the edges of the boards. Tighten
all the clamps a little at a time working your way around. Moderate
pressure is all that’s needed. You’ll get some glue squeeze out, but
that’s a good thing; it shows that you’ve used enough glue. Avoid
the temptation to wipe up the glue ooze. All you’ll do is force glue
into the grain of the wood and stain will not be able to penetrate
those areas (meaning that would be ugly). Repeat the glue up
procedure for the back panels of the guitar, and let everything dry
over night.
|
 |
 |
 |
The next
day, take off all of the clamps. Use a scraper to remove the (now
dry) glue ooze. As you probably noticed, when you glue something up,
it tends to want to slide all over the place. My boards traveled
some over the length and they crept out of flush a tad. That’s why
you always leave everything bigger until the last possible moment. I
trimmed a fraction off each end to square things up. Then I ripped
some off of each side of the panel to get it a little closer to
actual size. This will help in making it easier to handle on some of
the upcoming steps (as well as getting it to fit through my planer).
Remember to keep the centerline of your glued-up panels in the
center; trim a little off of both sides.
  Clean
up both sides of the panel on the planer with light passes until you
reach final thickness checking after each pass with a caliper. If
your planer isn’t wide enough to handle the panel or you simply
don’t own a power planer, try kicking it old school with a trusty
No. 5 bench plane and a straightedge (notice that pile of shavings).
It’s not quite as fast, but you’d be surprised at how well the old
tools work. Clean
up both sides of the panel on the planer with light passes until you
reach final thickness checking after each pass with a caliper. If
your planer isn’t wide enough to handle the panel or you simply
don’t own a power planer, try kicking it old school with a trusty
No. 5 bench plane and a straightedge (notice that pile of shavings).
It’s not quite as fast, but you’d be surprised at how well the old
tools work.
|
 |
 |
 |
 Now
repeat all those steps with the top panel: square up the ends, rip
to width, plane to exact thickness. Remember to keep the centerline
of your glued-up panels in the center; trim a little off of both
sides. Always take your time and triple-check all of your
measurements. You don’t want to make a wrong cut on expensive wood
and have to start all over again. Your patience will reward you.
Let’s take some time now for a preview and to get excited about the
build. Notice the mirror effect the book-matching gives you. The
wood in this photo was wetted down with mineral spirits so you can
see what the grain will look like after finishing. This effect will
be even more spectacular once the color and top coats go on and it’s
rubbed out. Now
repeat all those steps with the top panel: square up the ends, rip
to width, plane to exact thickness. Remember to keep the centerline
of your glued-up panels in the center; trim a little off of both
sides. Always take your time and triple-check all of your
measurements. You don’t want to make a wrong cut on expensive wood
and have to start all over again. Your patience will reward you.
Let’s take some time now for a preview and to get excited about the
build. Notice the mirror effect the book-matching gives you. The
wood in this photo was wetted down with mineral spirits so you can
see what the grain will look like after finishing. This effect will
be even more spectacular once the color and top coats go on and it’s
rubbed out. |

 Once
you spread the glue you only have a few minutes to work. So prepare
the clamps and do a dry run to make sure everything is set up right.
I cover the tops of the clamps and my workbench with wax paper to
keep the glue from sticking where it shouldn’t. Once you’re ready,
smear a little wood glue on one edge of one board. Just like picking
your nose or checking your prostate, nothing works
better than your finger. I also put a very small amount of glue on
the opposite edge just enough to saturate the grain. If you get too
much glue in there you’ll have a big slippery, sliding mess (which
might be good for sex, but not for this glue-up). Place the boards
in your clamps and apply slight side pressure keeping your
book-matched halves in alignment. Add a clamp on each end of the
joint to keep the two surfaces flush with each other. Use a clamping
block with wax paper wrapped around the edges of the boards. Tighten
all the clamps a little at a time working your way around. Moderate
pressure is all that’s needed. You’ll get some glue squeeze out, but
that’s a good thing; it shows that you’ve used enough glue. Avoid
the temptation to wipe up the glue ooze. All you’ll do is force glue
into the grain of the wood and stain will not be able to penetrate
those areas (meaning that would be ugly). Repeat the glue up
procedure for the back panels of the guitar, and let everything dry
over night.
Once
you spread the glue you only have a few minutes to work. So prepare
the clamps and do a dry run to make sure everything is set up right.
I cover the tops of the clamps and my workbench with wax paper to
keep the glue from sticking where it shouldn’t. Once you’re ready,
smear a little wood glue on one edge of one board. Just like picking
your nose or checking your prostate, nothing works
better than your finger. I also put a very small amount of glue on
the opposite edge just enough to saturate the grain. If you get too
much glue in there you’ll have a big slippery, sliding mess (which
might be good for sex, but not for this glue-up). Place the boards
in your clamps and apply slight side pressure keeping your
book-matched halves in alignment. Add a clamp on each end of the
joint to keep the two surfaces flush with each other. Use a clamping
block with wax paper wrapped around the edges of the boards. Tighten
all the clamps a little at a time working your way around. Moderate
pressure is all that’s needed. You’ll get some glue squeeze out, but
that’s a good thing; it shows that you’ve used enough glue. Avoid
the temptation to wipe up the glue ooze. All you’ll do is force glue
into the grain of the wood and stain will not be able to penetrate
those areas (meaning that would be ugly). Repeat the glue up
procedure for the back panels of the guitar, and let everything dry
over night.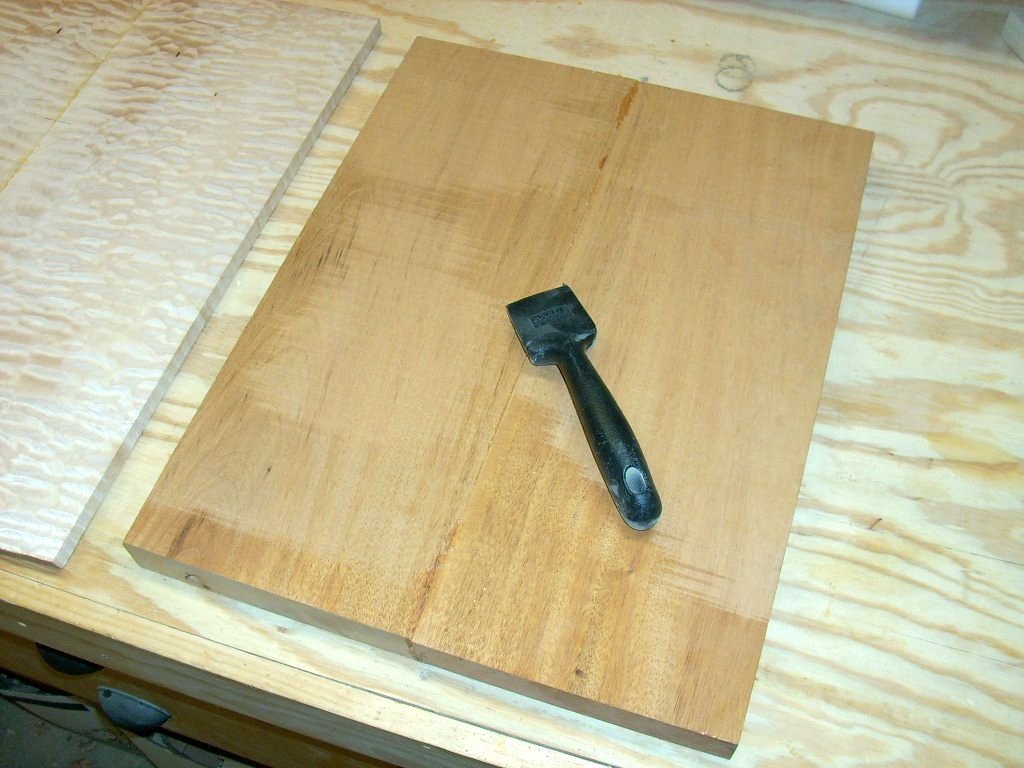


 Clean
up both sides of the panel on the planer with light passes until you
reach final thickness checking after each pass with a caliper. If
your planer isn’t wide enough to handle the panel or you simply
don’t own a power planer, try kicking it old school with a trusty
No. 5 bench plane and a straightedge (notice that pile of shavings).
It’s not quite as fast, but you’d be surprised at how well the old
tools work.
Clean
up both sides of the panel on the planer with light passes until you
reach final thickness checking after each pass with a caliper. If
your planer isn’t wide enough to handle the panel or you simply
don’t own a power planer, try kicking it old school with a trusty
No. 5 bench plane and a straightedge (notice that pile of shavings).
It’s not quite as fast, but you’d be surprised at how well the old
tools work.


 Now
repeat all those steps with the top panel: square up the ends, rip
to width, plane to exact thickness. Remember to keep the centerline
of your glued-up panels in the center; trim a little off of both
sides. Always take your time and triple-check all of your
measurements. You don’t want to make a wrong cut on expensive wood
and have to start all over again. Your patience will reward you.
Let’s take some time now for a preview and to get excited about the
build. Notice the mirror effect the book-matching gives you. The
wood in this photo was wetted down with mineral spirits so you can
see what the grain will look like after finishing. This effect will
be even more spectacular once the color and top coats go on and it’s
rubbed out.
Now
repeat all those steps with the top panel: square up the ends, rip
to width, plane to exact thickness. Remember to keep the centerline
of your glued-up panels in the center; trim a little off of both
sides. Always take your time and triple-check all of your
measurements. You don’t want to make a wrong cut on expensive wood
and have to start all over again. Your patience will reward you.
Let’s take some time now for a preview and to get excited about the
build. Notice the mirror effect the book-matching gives you. The
wood in this photo was wetted down with mineral spirits so you can
see what the grain will look like after finishing. This effect will
be even more spectacular once the color and top coats go on and it’s
rubbed out.


