| Brian's Guitar from Conception to Birth or How to Build a Guitar in 62 Easy Steps! | ||
| 3 Install Alignment Dowels | ||
| The first
thing most people want to do is get directly into cutting out the
shape of the guitar. Resist that urge. Keeping your work surface
square will allow you to transfer measurements from one side of a
panel to the other, it will allow you to use edge routing guides,
and it will provide a broader surface to support your router. Save
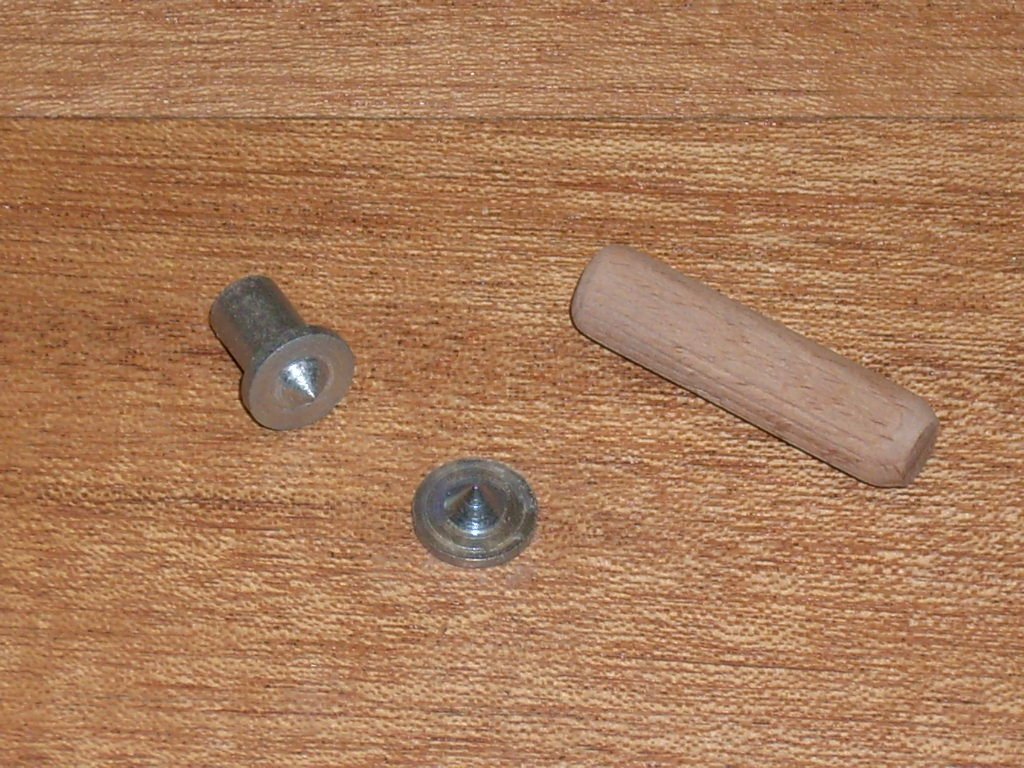
the body magic for later. There are many cavities inside an electric guitar. They all have different depths and some of them overlap. I thought there should be an easy way to organize the various routing setups and precisely control the placement of all the cuts. I came up with a system which uses dowels to which you can accurately register a multitude of templates. It allows easy placement of your templates repeatedly in exactly the same position. You’ll never have an alignment problem nor a faulty measurement issue when you start carving up your expensive wood.   First,
print up a few copies of your guitar body complete with all of your
cavity layouts. Tape it to the body back panel and carefully line up
your center lines. Using an awl, mark the locations of the alignment
dowels. I used four dowels. Remove your pattern and drill holes to
match your dowel diameter. Drill into the body about 12mm. Be
careful not to drill all the way through or you’ll mess up the back
of your guitar. First,
print up a few copies of your guitar body complete with all of your
cavity layouts. Tape it to the body back panel and carefully line up
your center lines. Using an awl, mark the locations of the alignment
dowels. I used four dowels. Remove your pattern and drill holes to
match your dowel diameter. Drill into the body about 12mm. Be
careful not to drill all the way through or you’ll mess up the back
of your guitar.  The
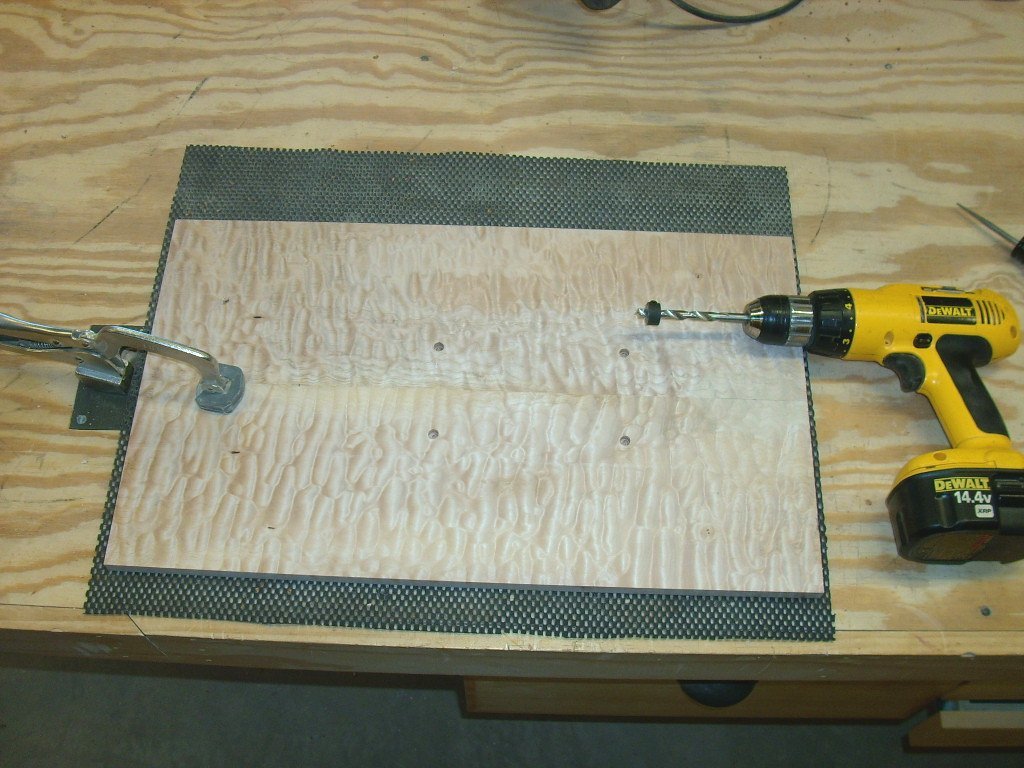
best way to avoid drilling too deep is to set your depth stop on
your drill press. If you don’t own a drill press, you can use
masking tape to mark your drill bit. Just be very careful as masking
tape is not the sturdiest thing and it won’t stop you if you get
heavy-handed. They also make stop collars which attach directly to
drill bits. These will be more forgiving if you push too hard, but
they, too, can still slip. Be very conscious if you’re hand drilling
to keep your drill perfectly level and plumb so you drill straight
down. If you angle your drill, it may make for some alignment
problems later on down the line. The
best way to avoid drilling too deep is to set your depth stop on
your drill press. If you don’t own a drill press, you can use
masking tape to mark your drill bit. Just be very careful as masking
tape is not the sturdiest thing and it won’t stop you if you get
heavy-handed. They also make stop collars which attach directly to
drill bits. These will be more forgiving if you push too hard, but
they, too, can still slip. Be very conscious if you’re hand drilling
to keep your drill perfectly level and plumb so you drill straight
down. If you angle your drill, it may make for some alignment
problems later on down the line. |
||
 |
 |
 |
| Now you’ll need to transfer your dowel locations to the top panel and some 1/4" thick MDF for some template blanks. Dowel centers are commonly available and do the trick well. Insert the dowel center into the holes you just drilled, place your body top panel over them keeping your center lines aligned (keep your “show-side” out), then gently push down or rap the top with your fist to leave a slight indentation. Drill the backside of your top panel about 8mm deep. Repeat the procedure for the template blanks and transfer your center lines to these blanks. Now all of these panels can be repeatedly installed and removed in exactly the same position every time without measuring, marking, or taping down. | ||


