| Brian's Guitar from Conception to Birth or How to Build a Guitar in 62 Easy Steps! | ||
| 4 Make Up the Templates | ||
|
Now that you have some template blanks, you can start
to organize your plan of attack. Each cavity will have it’s own
router setup. This will include bit diameter, bushing outside
diameter, bearing guided bits, depth of cut, which router bits you
actually have available, etc. In some cases, you will make a
template to make a template. I won’t get into the entire puzzle, but
I will show you a few examples. The first example is for some simple wiring channels. Since my guitar will have a pretty top panel over a mahogany back panel, I can easily rout a channel for the wires rather than trying to drill a carefully placed and angled hole between the pickups and the control cavity. My ultimate goal is to rout the channel with a 1/2" diameter router bit with a 3/4" OD (outside diameter) guide bushing. The guide bushing will allow you to align the router first before plunging it into the surface of the wood. The template blank (with the dowel alignment holes) needs to have a 3/4" wide groove in it. |
||
 |
 |
 |
To make this groove, first tape a copy of your guitar
body pattern onto one of the templates. I cut half of each dowel
hole out of the pattern and used the center lines to carefully place
the pattern. Draw some offsets onto your pattern 1/8" of an inch
outside each of the limits of your final routed channel. Remember,
using this bit/ bushing setup will leave a 1/8" offset from your
guide to your router bit. Since we’ll essentially be making a
template to make our template, you will have two 1/8" offsets; a
1/4" (metric is so much easier, but I don’t have metric router
bits). Place some scrap 1/4" thick MDF at these offset lines using
double-sided (carpet) tape. Since you will be routing all the way
through, place your work over some scrap plywood. Set your plunge
depth to just go through the MDF template blank. Place your router
bushing inside your limits, flip it on, plunge it in, and rout away.
I like to make two light passes blowing the dust out frequently to
leave a crisp line. Remove your temporary scrap guides. Repeat the
procedure for the channels.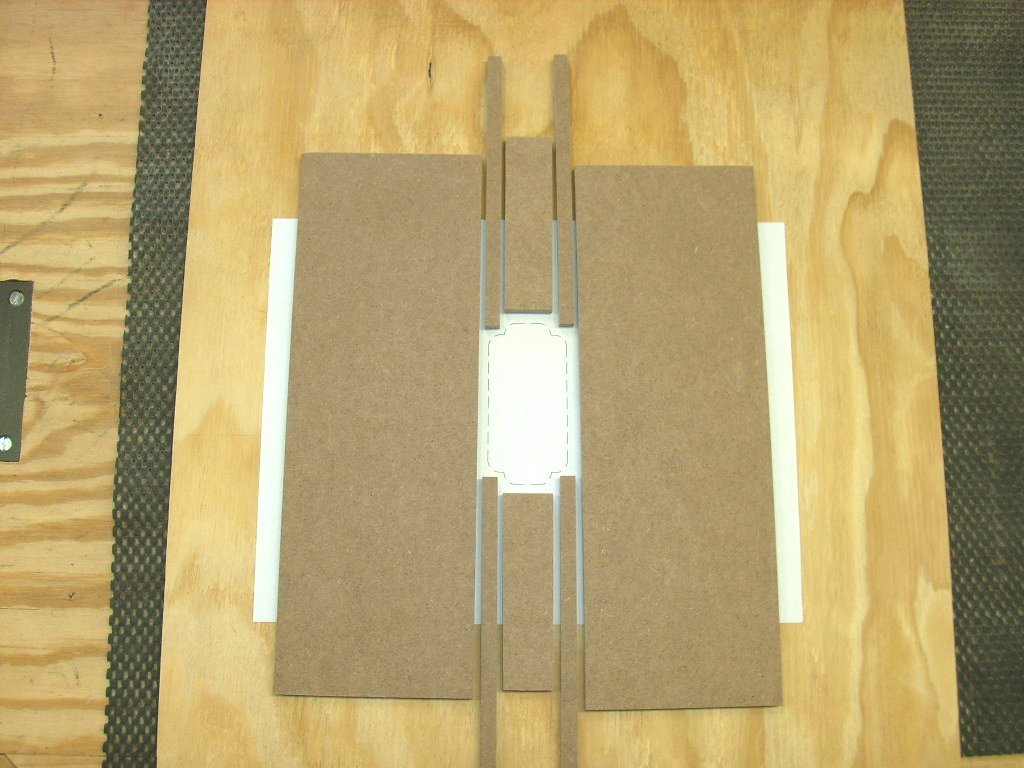 Other
cavities will have different setups. For instance, the pickup
cavities on my guitar will completely pierce the top panel, but will
not have to go into the back panel. Again, I will make a template to
make a template. This way I can use the pickup template on the next
guitar whose configuration might vary. This template scheme will
work out differently. My pickup template will have only a 1/16"
offset (1/2" bit with a 5/8" bushing). I will use this template to
transfer the pattern to the large template blank leaving a pattern
exactly the same size as that which will be used on the guitar. Then
I will use a 1/2" bearing guided bit to clean up the edges. After
you see some of this in action, you’ll start to be able to
understand how each cavity setup will vary and how to plan your
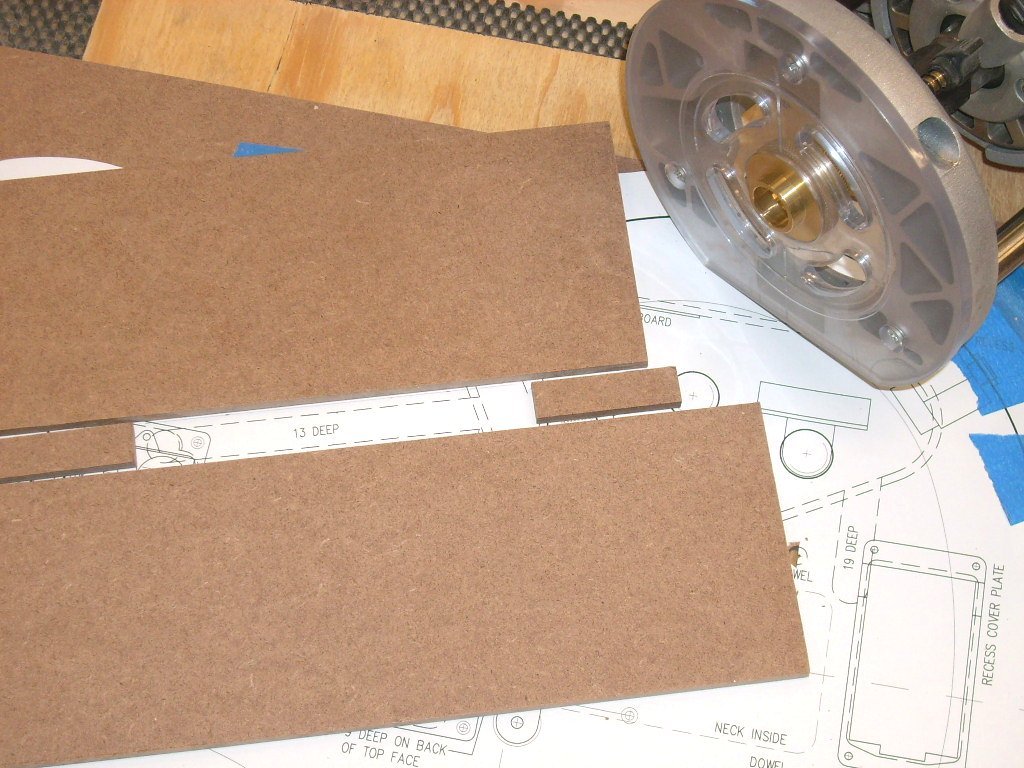
methodology. For the pickup cavity template, cut up thin strips of
1/4" thick MDF to the appropriate widths and glue them all up
securing them with masking tape to hold them while they dry. Other
cavities will have different setups. For instance, the pickup
cavities on my guitar will completely pierce the top panel, but will
not have to go into the back panel. Again, I will make a template to
make a template. This way I can use the pickup template on the next
guitar whose configuration might vary. This template scheme will
work out differently. My pickup template will have only a 1/16"
offset (1/2" bit with a 5/8" bushing). I will use this template to
transfer the pattern to the large template blank leaving a pattern
exactly the same size as that which will be used on the guitar. Then
I will use a 1/2" bearing guided bit to clean up the edges. After
you see some of this in action, you’ll start to be able to
understand how each cavity setup will vary and how to plan your
methodology. For the pickup cavity template, cut up thin strips of
1/4" thick MDF to the appropriate widths and glue them all up
securing them with masking tape to hold them while they dry.  Label
your templates with your setup notes so you’ll remember each bit and
bushing arrangement. This template locates the two humbuckers, the
control cavity, and the center points for the bridge mounting
location and string ferrules. It took a few nights of (unrewarding)
template construction, but this effort is time well spent. If you
screw up a template, you’re only out a couple dollars. Pretty guitar
wood can be quite expensive. Remember that old “ounce of prevention”
proverb. Label
your templates with your setup notes so you’ll remember each bit and
bushing arrangement. This template locates the two humbuckers, the
control cavity, and the center points for the bridge mounting
location and string ferrules. It took a few nights of (unrewarding)
template construction, but this effort is time well spent. If you
screw up a template, you’re only out a couple dollars. Pretty guitar
wood can be quite expensive. Remember that old “ounce of prevention”
proverb. |
||


