|
Brian's Guitar from Conception to Birth
or How to Build a Guitar in 62 Easy Steps! |
|
45
Make the Truss Rod Cover |
As long as we’re going crazy with recessing all of the hardware, why
stop now; my time is cheap? For a clean look, we’re going to make
our truss rod cover out of the same material as the headstock, we’ll
inlay it flush, and we’ll even hide the mounting screw for an
almost invisible installation.
|
 |
 |
 |
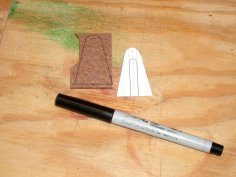
Trace the outline of the cover plate onto some scrap wood of the
same species as the headstock. Try to select a piece with similar
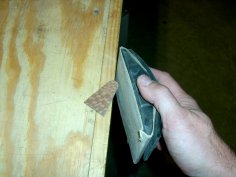
color and grain pattern. Using a sanding disk in the table saw (my
newest favorite tool), sand the piece right up to your line. Finish
the sanding by hand with some 100 grit in a sanding block.
|
 |
 |
 |
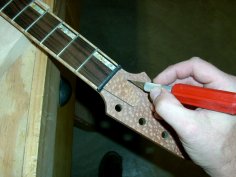
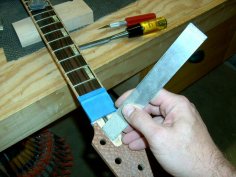
Dry fit the nut, locate your truss rod cover, and scribe around it
with a sharp Exacto knife. Just like inlaying the jack plate, use a
Dremel tool in a router base to remove material. Set the depth to
just less than the depth of the cover and work very close to your
scribed line. Then finish it off with a small chisel registering it
into your scribed line. Clean up the bottom and sides with a chisel.
Get into the tight corners with some sandpaper stuck to a stick.
Since we’ll be screwing our cover on from the back of the neck,
we’ll need to add some meat in which to seat the screw. Make a small
wedge from some scrap maple. Take your time to get a tight fit.
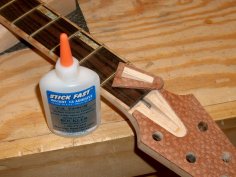
Place the wedge into the slot, add a couple drops of super glue, and
press the cover plate into place. Don’t go overboard on the glue or
your cover will be permanently stuck in place. Clamp it up for an
hour, preferably two. Then remove your cover plate with wedge
affixed to the back of it.
|
 |
 |
 |
|
Choose a drill bit which will allow a small, #2 screw to slide
through without the threads catching. Put some masking tape on the
back of the neck to avoid any blowout. Drill through the bottom of
the truss rod channel and out the back of the neck paying attention
to keep the drill perpendicular and straight. Fit the cover into
place. Chuck up a drill bit sized to catch the threads of the screw.
From the back of the guitar, predrill through your hole and into the
back of the wedge for the mounting screw being careful not to drill
through the front of the cover plate. Gently drive in the mounting
screw; don’t over-tighten it. Flip the guitar over and sand the
cover plate perfectly flush with some 60 grit, then hit it with some
100 grit to smooth things out. With the busy pattern of our lacewood
headstock, the cover blends in and is almost completely invisible. |