|
Brian's Guitar from Conception to Birth
or How to Build a Guitar in 62 Easy Steps! |
|
59
Dress the Frets |
 |
 |
 |
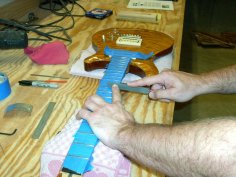
Weíve already worked on the neck, but we never really finished
leveling out the frets. You canít really do much until this point
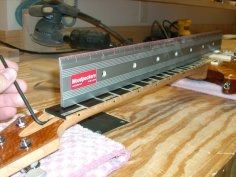
since it isnít until now that you can string it up. Place a straight
edge on top of the neck down the center of the fretboard. Adjust the
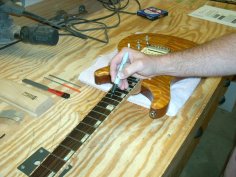
truss rod so that it is as level as you can get it. Using a fat,
black, permanent marker, draw a line on top of each fret being
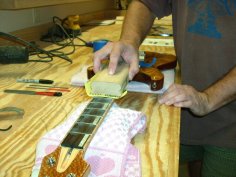
carefully not to mark on the wood. Grab your radiused sanding block
you used to crown your neck, put on a fresh piece of 400 grit
sandpaper, and lightly sand the frets in long, smooth strokes until
you just sand off the marker lines. Donít concentrate sanding in one
spot; work the whole fretboard evenly. This will level the frets so
theyíre all in the same plane.
|
 |
 |
 |
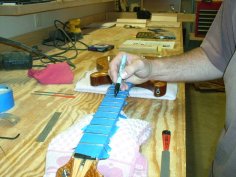
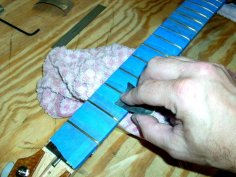
Once level, itís time to re-crown the tops of the frets. Wipe off
the sanding dust from the neck and tape off the wood leaving only
the frets exposed. Understand that this will only provide a minor
degree of protection; you will still need to be careful. Darken the
frets with the permanent marker again. A fret crowning file
specifically designed for this task makes the work quick and is only
a small investment. File perfectly in line with the frets; I use my
left finger to keep things on track. Work in long, smooth strokes
and let the file do the work. Donít go crazy filing on one fret or
you will make that one lower than the rest; not good. File just
until the marker line disappears. A few passes on each side with the
file tilted at about a 45 degree angle will help make a smooth
radius on top.
|
 |
 |
 |
Once all the frets are crowned, itís time to make them pretty with a
few finishing touches. With a small piece of 600 grit sandpaper,
remove any remaining file marks and finish rounding off the tops.
This will provide a beautiful satin sheen to the frets. Using a flat
needle file, remove any portion of the fret which hangs off the edge
which might cause you to sever a finger. I used a thin piece of
metal (cut from a soda can) to protect the side of the fretboard in
case I filed too much. Switch to a fret dressing file which only has
burrs on the sides and none on the bottom which could mar the wood.
Gently file away any remaining sharp edges. We beveled the fret ends
earlier, but recheck them to see if they need any additional touch
up using a sanding block loaded up with 600 grit sandpaper.
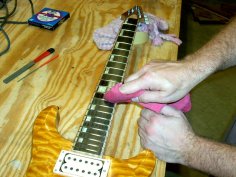 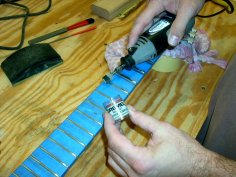 If
your frets are happy with a satin sheen, stop here. But if you like
the shiny gloss, install a buffing wheel on your Dremel tool and
give it some polish. Just a few strokes will give you an amazing
shine. Remove the tape and clean the fretboard with mineral spirits.
Donít worry, it wonít eat through the tung oil you put on earlier. If
your frets are happy with a satin sheen, stop here. But if you like
the shiny gloss, install a buffing wheel on your Dremel tool and
give it some polish. Just a few strokes will give you an amazing
shine. Remove the tape and clean the fretboard with mineral spirits.
Donít worry, it wonít eat through the tung oil you put on earlier. |