With the strings tuned up, check for a 0.76mm (or 0.03") clearance
between the top of the first fret and the bottom of the string. You
can buy some fancy feeler gauges, but a credit card happens to be
the precise dimension. Youíll likely be a little high, so move the
strings out of the way and remove the nut. Load a sanding block with
60 grit sandpaper and secure it in your vise. Sand off the bottom of
the nut evenly. Use some 150 grit to clean it up. Reinstall the nut
back onto the neck. and tighten up the strings again. Remove only a
little at a time and check the clearance at the first and sixth
strings to make sure youíre not sanding too much off one side.
Remember, you can always remove a little more material, but you
canít add any back on.
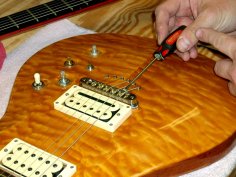
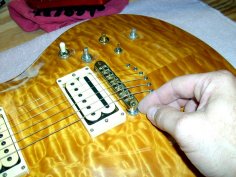
  When
you start to get close, adjust the bridge height down a little at a
time. The object is to get the lowest action possible without
getting buzz or without choking the note when you bend the strings.
You will have to loosen the strings a lot and make frequent
adjustments, just be patient. The last thing to do is to check the
intonation (the string length from nut to bridge). Hopefully, your
careful layout and woodworking skills will not require a lot of
adjustments here. Hook up an accurate, electronic tuner. Tune the
string to the proper pitch using the tuner, then play a 12th fret
harmonic. The needle should split the uprights on both notes. If
they donít, adjust the individual bridge saddles until the two notes
match. When
you start to get close, adjust the bridge height down a little at a
time. The object is to get the lowest action possible without
getting buzz or without choking the note when you bend the strings.
You will have to loosen the strings a lot and make frequent
adjustments, just be patient. The last thing to do is to check the
intonation (the string length from nut to bridge). Hopefully, your
careful layout and woodworking skills will not require a lot of
adjustments here. Hook up an accurate, electronic tuner. Tune the
string to the proper pitch using the tuner, then play a 12th fret
harmonic. The needle should split the uprights on both notes. If
they donít, adjust the individual bridge saddles until the two notes
match. |