|
Brian's Guitar from Conception to Birth
or How to Build a Guitar in 62 Easy Steps! |
|
31
Add the Side Dots |
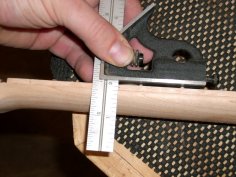 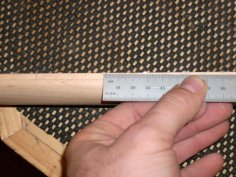 We
bought pre-manufactured acrylic dots, but you could certainly make
your own and in any variety of shapes. Take very careful
measurements between the insides of the frets and mark the halfway
point. Any errant measurement will be immediately noticed due to the
tight scale and proximity to the top of the fretboard. Take your
time. Transfer the mark down the desired distance with a combination
square. Make all your marks up the whole neck before moving on. We
bought pre-manufactured acrylic dots, but you could certainly make
your own and in any variety of shapes. Take very careful
measurements between the insides of the frets and mark the halfway
point. Any errant measurement will be immediately noticed due to the
tight scale and proximity to the top of the fretboard. Take your
time. Transfer the mark down the desired distance with a combination
square. Make all your marks up the whole neck before moving on.
|
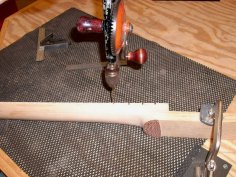  Using
an awl, indent your mark so that your drill will register exactly
where you want it. I preferred to use the old school, hand-powered
drill for this task since you can feel the progress and judge the
depth better. Drill slowly and with light pressure to avoid tear
out. Do not drill too deep or you’ll have to fill the bottom of the
hole before installing the dots. You want to drill so that the dot,
once installed, protrudes only about 1/2mm above the surface of the
wood. Drill a little then check frequently by dry fitting a dot.
Drill all your holes all the way up the neck before moving on. Using
an awl, indent your mark so that your drill will register exactly
where you want it. I preferred to use the old school, hand-powered
drill for this task since you can feel the progress and judge the
depth better. Drill slowly and with light pressure to avoid tear
out. Do not drill too deep or you’ll have to fill the bottom of the
hole before installing the dots. You want to drill so that the dot,
once installed, protrudes only about 1/2mm above the surface of the
wood. Drill a little then check frequently by dry fitting a dot.
Drill all your holes all the way up the neck before moving on. |
 |
 |
 |
|
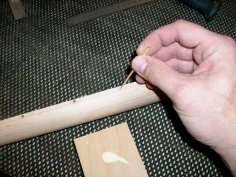
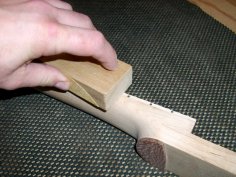
Splash a glob of glue on a piece of scrap wood and use a toothpick
to transfer a small drop into the hole. Grab a dot with a needle-nose pliers and insert the dot into the hole. Use the side of
the pliers to push on and seat the dot all the way in. Let it dry
for at least an hour, preferably two. Sand the dots flush with a
block equipped with some 60 grit. Infill any tear out with some
appropriately colored wood filler. Sand some more with 100 and 150
grits without the block. You can hold off on the higher grits of
sandpaper until later. |