|
Brian's Guitar from Conception to Birth
or How to Build a Guitar in 62 Easy Steps! |
|
32
Drill for the Tuners |
 Earlier
you drilled some small, shallow pilot holes to establish the tuner
locations. If you didnít do it then, overlay your headstock template
and do it now. Chuck up your drill press with a bit sized for the
turners. I prefer the cleaner cut of a forstner bit. Test the setup
on some scrap first to make sure everything will fit correctly. Tape
off the back of the headstock and clamp it down over a piece of
scrap to avoid tear out when the big bit breaks through the back.
Tuners which are out of line are very noticeable, so take your time
to line up the locations dead on. Earlier
you drilled some small, shallow pilot holes to establish the tuner
locations. If you didnít do it then, overlay your headstock template
and do it now. Chuck up your drill press with a bit sized for the
turners. I prefer the cleaner cut of a forstner bit. Test the setup
on some scrap first to make sure everything will fit correctly. Tape
off the back of the headstock and clamp it down over a piece of
scrap to avoid tear out when the big bit breaks through the back.
Tuners which are out of line are very noticeable, so take your time
to line up the locations dead on.
|
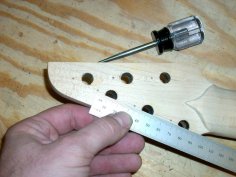
  Our
tuners had little alignment pegs you had to drill for as well. These
keep the tuner housing from spinning around when you install the
tuners. Make some layout lines through the centers of the holes you
just made. Carefully measure the distance from the edge of the hole
(not the center) to the center of the peg. Carefully (I used that
word again) transfer your measurements to the back of the headstock
and indent the location with an awl. Chuck up the drill press with a
bit sized for the alignment pegs. Set your depth stop for the
appropriate depth. Test the setup on some scrap first to make sure
your measurements and layout were precise. Drill for the alignment
pegs. Our
tuners had little alignment pegs you had to drill for as well. These
keep the tuner housing from spinning around when you install the
tuners. Make some layout lines through the centers of the holes you
just made. Carefully measure the distance from the edge of the hole
(not the center) to the center of the peg. Carefully (I used that
word again) transfer your measurements to the back of the headstock
and indent the location with an awl. Chuck up the drill press with a
bit sized for the alignment pegs. Set your depth stop for the
appropriate depth. Test the setup on some scrap first to make sure
your measurements and layout were precise. Drill for the alignment
pegs.
|
 |
 |
 |
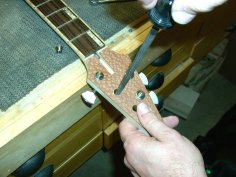
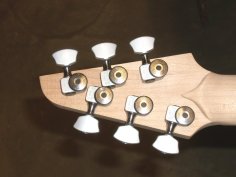
Now install all of the tuners. If the hole is a little snug, ream it
out a little with a round file. Tighten them by hand; itís not
necessary to torque them down too hard. On a tight headstock like
ours, careful preparation and design work ensured that the tuners
wouldnít interfere with each other. Now stand back and admire your
work, then take all the tuners back out. You need to install and
check all of the hardware before you apply your finish since it
would be impossible to tweak something successfully afterwards.
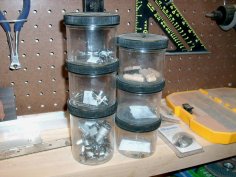
 Store
the tuners back in their original packaging (or in small plastic
containers, or in baby food jars, or in whatever) to protect them
and to keep all the nuts and washers together in one spot while not
mixing them in with all the other hardware. If you think youíll get
confused you can also add some labels in the containers to identify
what screws go to what. Store
the tuners back in their original packaging (or in small plastic
containers, or in baby food jars, or in whatever) to protect them
and to keep all the nuts and washers together in one spot while not
mixing them in with all the other hardware. If you think youíll get
confused you can also add some labels in the containers to identify
what screws go to what. |